Remove and install exhaust system
Some parts of the exhaust system can be replaced individually.
Caution: When installing exhaust system parts, make sure the parts are joined without gaps.
Otherwise, incorrect readings may occur during the emissions test (AU).
Nuts and gaskets must always be replaced after removal. Check rubber hangers and rubber buffers for porosity and damage, and replace them if necessary. Caution: The catalytic converter is sensitive to impact; do not strike it or drop it.
RemovalRaise the vehicle.
Spray all bolts and nuts of the exhaust system with rust penetrant. Allow the penetrant to act for some time.
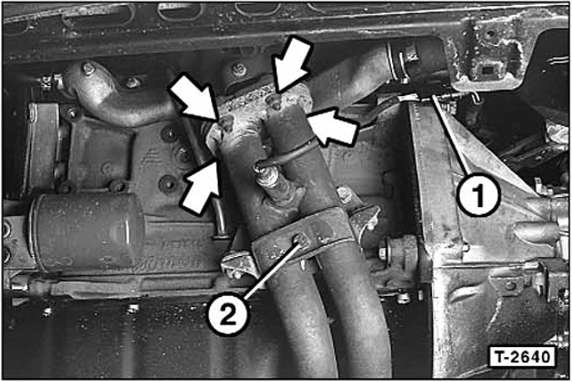
Petrol engines: disconnect multi-plug for lambda sensor - 1 -. If necessary, remove the lambda sensor, see page 123.
Unbolt the front exhaust pipe from the manifold (arrows), or from the turbocharger on diesel engines. The illustration shows the 1.4 l engine.
Unbolt the bracket for the front exhaust pipe - 2 -
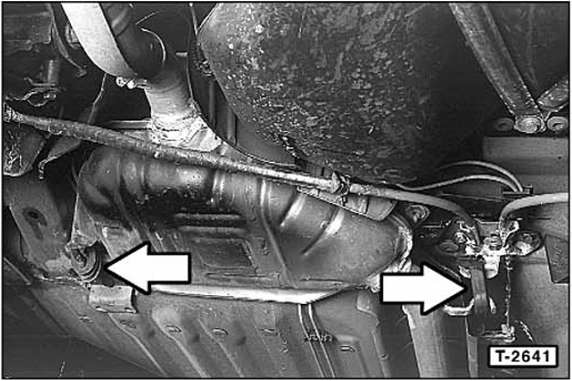
Check rubber mounts (arrows) for cracks. To do this, press the exhaust system down slightly, illuminate the rubber mount webs with a torch, inspect them and replace if necessary.
Unhook the exhaust pipes from all rubber mounts and remove them.
Remove old gaskets. If necessary, disassemble the exhaust system, see the following section.
Before installation, clean the manifold, the front exhaust pipe flange and the connecting flange with a wire brush.
Always use new gaskets, bolts and nuts. To make the exhaust bolts and nuts easier to loosen later, it is recommended to coat them with high-temperature copper paste, for example Liqui Moly LM-508-ASC.
Fit the front exhaust pipe with a new gasket and loosely bolt it to the manifold.
Hook the exhaust system into the rubber mounts, and shift the components against each other to align them with the underbody. Make sure the rubber mounts are loaded evenly and not deformed.
Caution: The clearance between the exhaust system and all vehicle components must be at least 25 mm.
Bolt the front exhaust pipe to the manifold and catalytic converter flanges using new self-locking nuts and 25 N·m.
Tighten the clamp bolt of the rear exhaust pipe clamp to 25 N·m.
Bolt on the bracket for the front exhaust pipe.
Coat the thread of the lambda sensor with high-temperature paste, for example Bosch lambda sensor grease or Fiat anti-seize, and tighten to 55 N·m.
Route the electrical lead for the lambda sensor and connect the plug. Screw on the plug cover.
Lower the vehicle.
Start the engine and check the exhaust system for leaks, see page 119.
Test yourself
A quick Fiat Bravo quiz: every answer comes with an explanation and a link to the manual page.