Checking glow plugs
If difficulties occur when starting the engine, check all glow plugs for proper function.
Test requirements: engine cold (ambient temperature).
Battery fully charged, battery voltage at least 11.5 volts.
Check power supplyThis check can be carried out with the glow plugs installed.
Connect test lamp in parallel between the glow plug busbar and ground.
Switch on ignition, preheat engine. Leave ignition key in preheat position and observe test lamp.
The test lamp must light up and go out after 4 to 5 seconds.
Return ignition switch to preheat position again.
When the preheat indicator light goes out, start the engine.
Note: with the preheating system functioning correctly at an ambient temperature of +20 °C, the preheat indicator light only remains lit for 4 to 7 seconds. The glow plugs nevertheless remain energized for longer (afterglow time) so the engine warms up faster. Observe test lamp: at +20 °C the test lamp must remain lit for approx. 30 seconds.
If the power supply is faulty, have the preheat control unit checked by a qualified workshop.
Remove connecting cable and glow plug busbar.
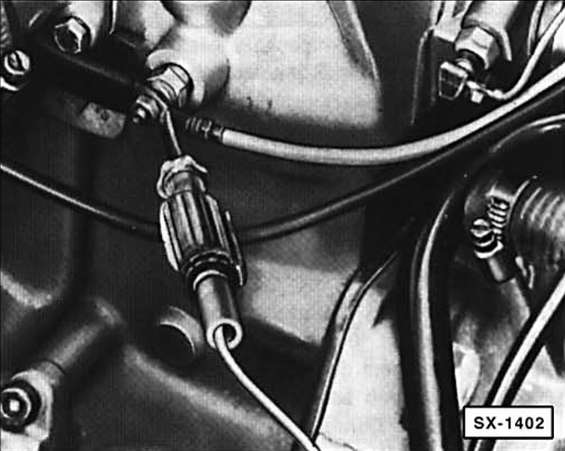
Connect ohmmeter to each glow plug in turn and measure resistance. Nominal value: approx. 0.6 Ω.
If the nominal value is not reached: glow plug defective, replace. Tightening torque: 15 N·m. Note: the tightening torque must not be exceeded, otherwise the annular gap between glow pin and threaded part will be compressed and the glow plug will fail prematurely. For burnt glow pins, observe the notes.
Connect connecting cable to busbar.
Note: if no fault is found although the engine starts poorly, visually inspect the glow plugs during preheating.
To do this, remove the injectors and observe the glow plugs through the openings. Glow plugs with burnt glow pinsBurnt glow pins on glow plugs are often consequential damage from injector faults. Such damage is not due to defects in or on the glow plug.
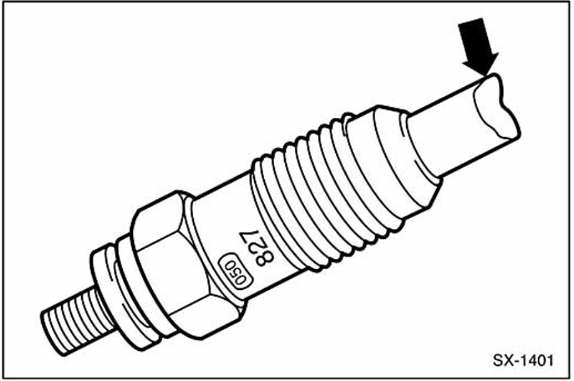
If such glow plugs are found in a complaint case (arrow), it is not sufficient to simply replace them. The injectors must also be checked for spray pressure and leak-tightness (workshop work).
Test yourself
A quick Fiat Bravo quiz: every answer comes with an explanation and a link to the manual page.