Removing and installing injection nozzles
Faulty injection nozzles can cause heavy engine knocking and suggest bearing damage. For such complaints, run the engine at idle and loosen the injection line union nuts one after another.
If the knocking disappears after loosening a union nut, this indicates a faulty nozzle.
Faulty nozzles can also be located by loosening the injection line union nuts one after another while the engine runs at fast idle. If the engine speed remains constant after loosening a union nut, this indicates a faulty nozzle. The nozzle can be checked with a pressure gauge (workshop work).
The first signs of nozzle faults appear as follows.
Misfiring
Knocking in one or more cylinders
Engine overheats
Loss of engine power
Excessive black exhaust smoke
High fuel consumption
Carefully clean the injection lines from the outside with cold cleaner or diesel fuel.
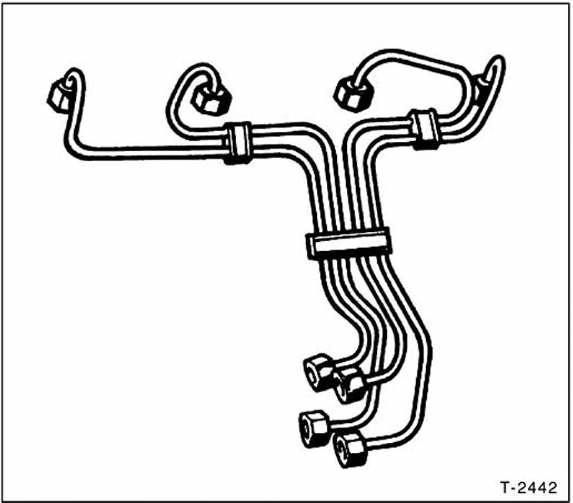
Remove the injection lines completely: loosen the union nuts at the pump and injection nozzles with an open-end wrench, for example Hazet 4550. Caution: do not change the bend shape of the lines.
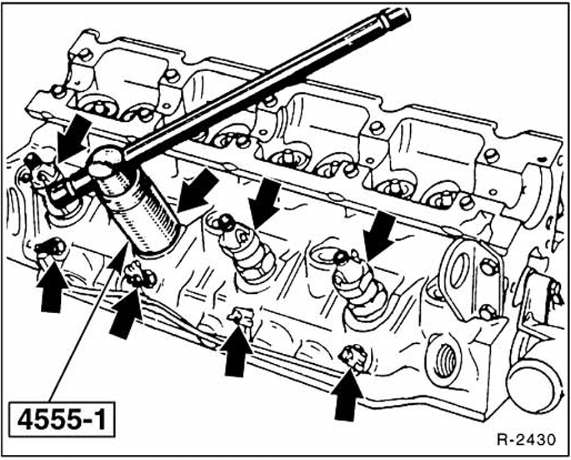
Remove the injection nozzles with a socket insert, 27 mm A/F.
An extended socket, for example Hazet 4555-1, is required for this. (Lower 4 arrows = glow plugs.)
Warning: the injection nozzle of cylinder 1 (timing belt side) has an electrical connection (needle movement sensor).
Disconnect the supply line and unscrew the injection nozzle with a socket. If necessary, first prepare the socket with a slot for the cable. Route the cable through the socket.Each injection nozzle has a heat shield to protect it from heat damage. Remove the heat shields from the bores in the cylinder head.
Clamp the nozzle holder between soft-metal jaws in a vise. Disassemble the injection nozzle.
Check the nozzle needle seat for dents or roughness, and check the nozzle needles for wear or damage.
Clean carbon from the spray nozzle with a wooden spatula. The needle must slide into the nozzle under its own weight alone.
Screw the upper and lower nozzle parts together to 70 N·m.
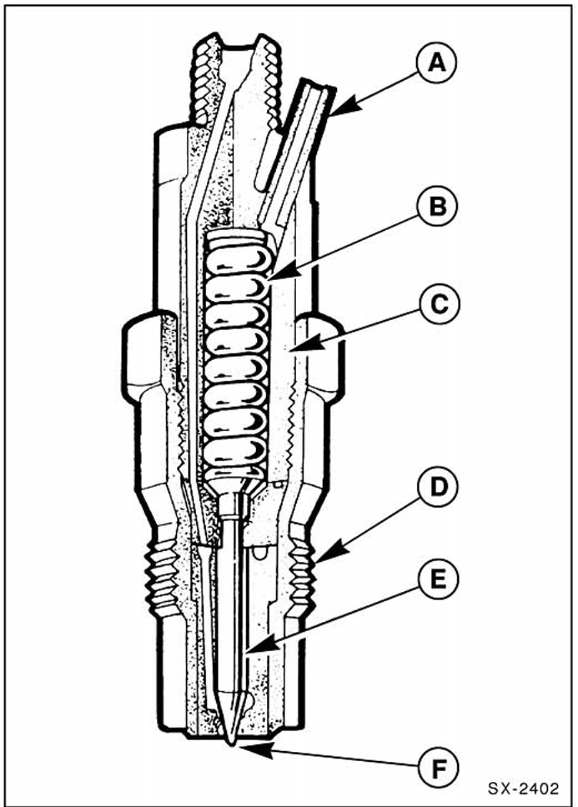
Fuel return
Compression spring
Nozzle body
Base
Nozzle needle
Needle tip

Always use new heat shields between the cylinder head and the injection nozzle. The recess must point upwards, the arrow points towards the cylinder head.
Tighten the injection nozzles to 55 N·m.
Fit the injection lines and tighten the union nuts to 25 N·m.
Test yourself
A quick Fiat Bravo quiz: every answer comes with an explanation and a link to the manual page.