Removing, Installing and Checking Clutch
Remove the transmission. See page 131.
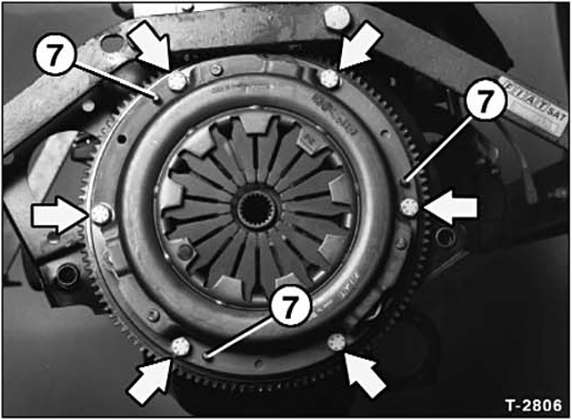
Loosen the pressure plate mounting bolts one at a time, each by 1 to 1 1/2 turns, until the pressure plate is relaxed. To keep the flywheel from turning while loosening the bolts, lock the flywheel with a screwdriver and drift punch.
Then unscrew the bolts completely.
Remove the pressure plate and clutch disc. Caution: Do not drop the pressure plate or clutch disc when removing them, otherwise judder and disengagement problems may occur after installation.
Wipe the flywheel with a cloth soaked in gasoline.
Check the clutch pressure plate for heat cracks and grooves, and replace it if necessary.

Check the diaphragm spring for breaks - arrows -.
Check the spring connections between the pressure plate and cover for cracks, and check that the rivet connections are secure. Replace clutches with damaged or loose rivet connections.
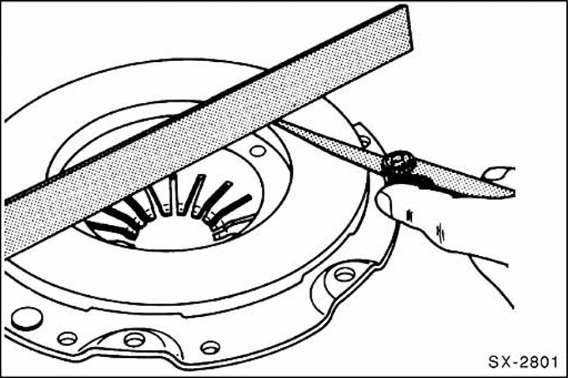
Check the contact surface of the pressure plate for cracks, burn marks, and wear. Pressure plates that are warped inward by up to 0.3 mm may still be installed. Check using a straightedge and feeler gauge.
Check the flywheel for heat cracks and grooves.
Smooth the clutch pressure plate and flywheel with very fine emery cloth.
Replace clutch discs that are oil-soaked, greasy, or mechanically damaged.

Measure the lining thickness of the clutch disc with a vernier caliper.
The distance to the rivet heads must be at least 0.3 mm, otherwise the clutch disc must be replaced. The same applies to cracked linings.
The clutch disc can be checked for runout in the workshop. Maximum lateral runout of the clutch disc is 0.25 mm. Note: this check is only necessary if the old clutch disc is to be reinstalled and the clutch did not disengage properly beforehand.
Check the release bearing in the transmission housing. The bearing must not show any visible wear marks. Turn the bearing by hand. The bearing must not bind. If the bearing made noise when disengaging the clutch, it must also be replaced, see page 129.
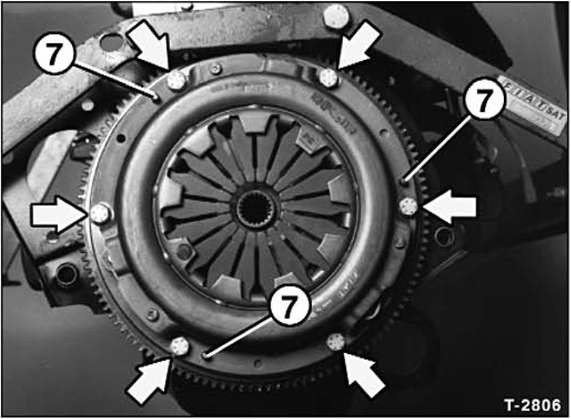
Check that the locating dowels - 7 - on the flywheel are seated firmly.
Insert the clutch disc and fit the clutch pressure plate onto the corresponding locating dowels on the flywheel.
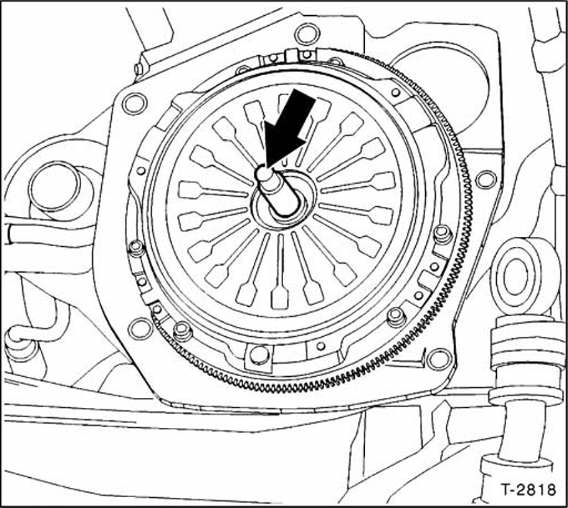
The clutch disc must be centered with a suitable alignment arbor - arrow - (universal arbor available as special tool from Hazet, no. 2174). The clutch disc can also be centered in the pressure plate by eye. However, it is better to center the disc with the arbor. If the clutch disc is not centered, the transmission input shaft cannot be inserted. The Fiat part numbers for the centering arbors are: for 1.4/1.8/2.0 i engines: no. 1875086000, 1.6 L engine: no. 1870447, diesel: Fiat no. 1870081000.
Measure the thread diameter of the clutch pressure plate mounting bolts, then install them and tighten them alternately in 1 to 1/2 turn steps until the pressure plate is secured. Then remove the centering arbor. Note: make sure the pressure plate is drawn evenly into the flywheel without binding when tightening the bolts. Tightening torque for bolts with M6 thread (outside thread diameter 6 mm): 17 N·m; for bolts with M8 thread (outside thread diameter 8 mm): 35 N·m.
If fitted, remove the locking tool from the flywheel.
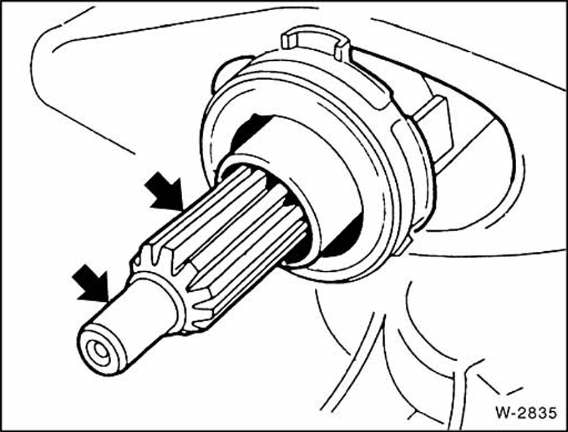
Clean the splines of the transmission input shaft and apply a thin coat of MoS2 grease, for example Molykote BR 2.
Do not use too much grease, otherwise it can be thrown onto the clutch friction surfaces, where it causes clutch malfunctions. The required amount of grease is about the size of a corn kernel.
Install the transmission, see page 131.
Test yourself
A quick Fiat Bravo quiz: every answer comes with an explanation and a link to the manual page.