Thermostat Operation Check and Replacement
Do not open the radiator cap or remove the thermostat until the engine has cooled completely. Also refer to the warning at the beginning of the section Antifreeze - General Information.
INSPECTION
PROCEDURE
1. Before concluding that the thermostat has failed, check the coolant level in the system, the condition and tension of the drive belt (refer to the chapter Tune-up and Routine Maintenance), and the operation of the temperature gauge.
2. One possible cause of the engine warming up too slowly (according to the gauge reading) is a thermostat stuck in the open position. Replace the thermostat with a new one.
3. If the engine overheats, feel the upper radiator hose by hand. If the hose is not hot, the thermostat may be stuck closed, blocking coolant circulation through the radiator. Replace the thermostat.
Never operate the vehicle with the thermostat removed. The on-board computer feedback loop may be interrupted, which will increase exhaust emissions and cause excessive fuel consumption.
4. If the upper hose is hot, coolant is circulating through the radiator, that is, the thermostat is open. Refer to the section on cooling system diagnosis.
REPLACEMENT
PROCEDURE
1. Disconnect the negative battery cable.
If the vehicle is equipped with an audio system with a security code, make sure you have the correct code to reactivate the audio system before disconnecting the battery.
2. Drain the coolant from the radiator (refer to the chapter Tune-up and Routine Maintenance). If the coolant was replaced recently, save it for reuse.
3. Follow the upper radiator hose to the engine and locate the thermostat housing cover.
4. Loosen the clamp and remove the hose from its connection. If the hose is stuck, grasp it with pliers (as close to the end as possible) and twist it on the fitting to break the bond of deposits. An old hose that is to be replaced can simply be cut off (be careful not to scratch the fitting).
5. If the fitting surface that contacts the hose is corroded or mechanically damaged, replace the thermostat housing cover.
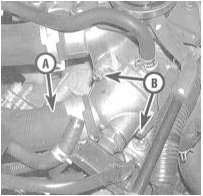
6. Remove the retaining bolts and remove the thermostat housing cover.
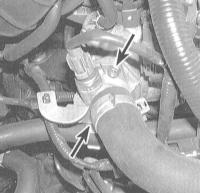
If the cover is stuck, tap it with a soft-faced hammer. Be prepared to catch any spilled coolant.
7. Note the installed position of the thermostat (with the jiggle pin up), then remove it from the housing.
8. Remove all traces of sealant and old gasket material from the housing and cover surfaces.
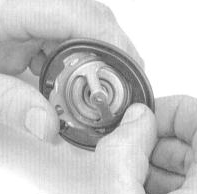
9. Replace the thermostat rubber seal.
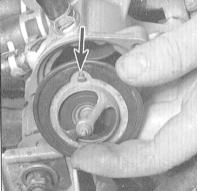
10. Install the thermostat in the housing (do not use any sealant). Make sure it is positioned with the jiggle pin up and the spring side toward the engine.
11. Install the cover and secure it with the bolts. Tighten the bolts to the specified torque.
12. Connect the hose to the cover fitting and secure it firmly with the clamp. Install all components removed for access.
13. Fill the system with the required amount of coolant (refer to the chapter Tune-up and Routine Maintenance).
14. Start the engine and check for leaks and for proper thermostat operation (refer to steps 2 through 4).
Test yourself
A quick Honda Accord quiz: every answer comes with an explanation and a link to the manual page.