Water Pump Replacement
PROCEDURE
Begin the procedure only after the engine has completely cooled down!
1. Disconnect the negative battery cable.
If the vehicle’s audio system is equipped with an anti-theft code, make sure you have the correct code to activate the audio system before disconnecting the battery!
2. Drain the cooling system (see Maintenance and Adjustments chapter). If the coolant was replaced recently, save it for reuse (see warning at the beginning of the Antifreeze - General Information section).
3. Remove the accessory drive belts (see Maintenance and Adjustments chapter).
4. Remove the timing belt.
5. On 4-cylinder models, remove the camshaft sprocket and the rear timing belt cover (see Engine chapter).
6. Remove the mounting bolts and separate the pump from the engine. Note the location of the long bolt(s). Check the back side of the impellers for signs of corrosion and missing vanes.
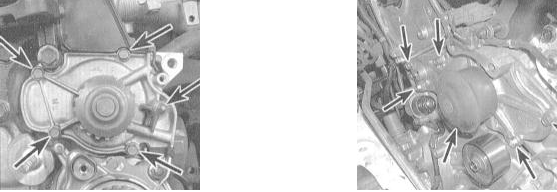
7. Clean the threads of the mounting bolts and the bolt holes in the block, completely removing all corrosion. If necessary, repair stripped threads.
8. Make sure the new pump matches the old one in size.
9. Remove all traces of sealant and old O-ring material from the mating surface of the engine block.
10. Wipe the mating surfaces of the engine and the new pump with a rag dampened with acetone.

11. Apply RTV sealant to the bottom and walls of the O-ring groove on the new pump housing, then carefully install a new O-ring into the groove.
12. Carefully press the pump against the engine block, install a pair of mounting bolts, and tighten them by hand only. Lightly apply RTV sealant to the threads of the mounting bolts and make sure the locating pins engage the mating holes.
13. Install the remaining bolts. Tighten the bolts to the specified torque in several stages (1/4 turn per pass).
Overtightening the bolts is strictly prohibited due to the risk of distorting the mating surfaces!
14. Install all components removed to gain access to the pump.
15. Fill the cooling system and bleed air from it. Check the drive belt tension (see Chapter Maintenance and Adjustments). Start the engine and check for signs of coolant leaks.
Test yourself
A quick Honda Accord quiz: every answer comes with an explanation and a link to the manual page.