Headlamp Leveling Unit
Components and Component Location
Wiring Diagram

Description and Operation
Description
Depending on driving conditions and vehicle load status, the headlamp beam direction changes to maintain the driver's visibility range and protect the driver's vision from glare, for safe driving.
The ECU with built-in sensor, installed on the rear center arm, drives the headlamp actuator after detecting an input signal for static vehicle inclination change.
The headlamp beam is automatically adjusted when the chassis tilts.
Operation
Operating Procedure
Change in suspension angle due to change in vehicle load.
Change in sensor angle.
The microprocessor calculates the required headlamp angle change amount.
Sends the appropriate signal to the headlamp leveling device and the drive actuator.
Operating Condition
Ignition ON
Low Beam On
When stopped: if the sensor arm changes by 0.3° or more, the headlamps are adjusted after max. 1.5 seconds.
While driving: if the vehicle speed exceeds 4 km/h, the speed change is not more than 0.8 - 1.6 km/h per second, and the load condition changes, the headlamps operate.
Components
Automatic Headlight Aim Control
Leveling Unit and Sensor
Sensor Mounting Bracket
Sensor Communication
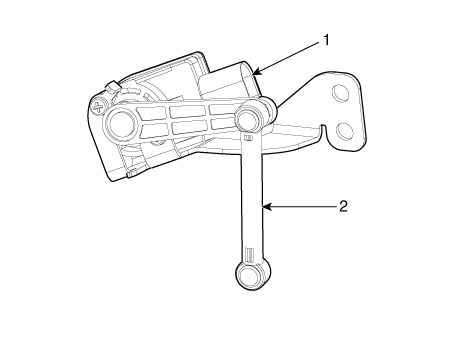
Using the microprocessor, determine the operating level of the mechanical angle change and speed signal.
The device installed on the rear center arm controls the actuator through an internal control program.
Repair Procedures
Inspection
Ignition switch ON.
Turn on the headlamp switch.
Check operation. The headlamp direction should change smoothly when the headlamp leveling switch is turned on.
If the operation does not work, check the connector and terminals to make sure they all maintain good contact.
If terminals are bent, loose, or corroded, repair them as necessary and recheck the system.
If the terminals look normal, go to step 5.
Replace with a known-good headlamp assembly and check for proper operation.
Removal
Disconnect the negative (-) battery terminal.
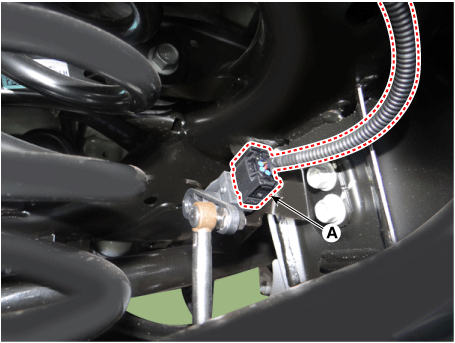
Disconnect the headlamp leveling corrector connector (A).
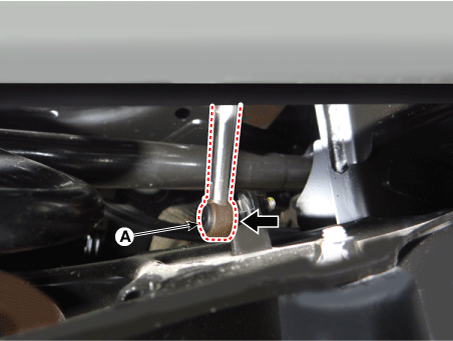
Remove the connecting rod (A) from the headlamp leveling unit.
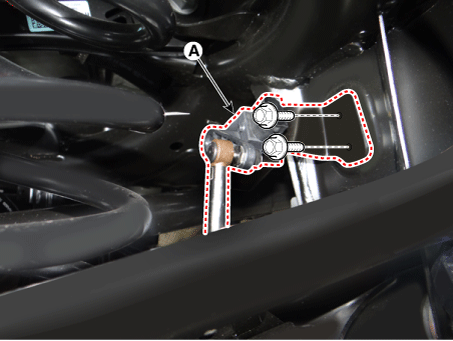
Remove the headlamp leveling unit (A) after loosening the mounting bolts.
Installation
Install the headlamp leveling device.
Tightening torque: 7–11 N·m
Install the headlamp leveling unit bracket.
Connect the connector of the headlamp leveling unit.
Connect the negative (-) battery terminal.
Test yourself
A quick Kia Stinger CK quiz: every answer comes with an explanation and a link to the manual page.