Seat Heater Switch
Components and Component Location
Components
Front Seat Switch
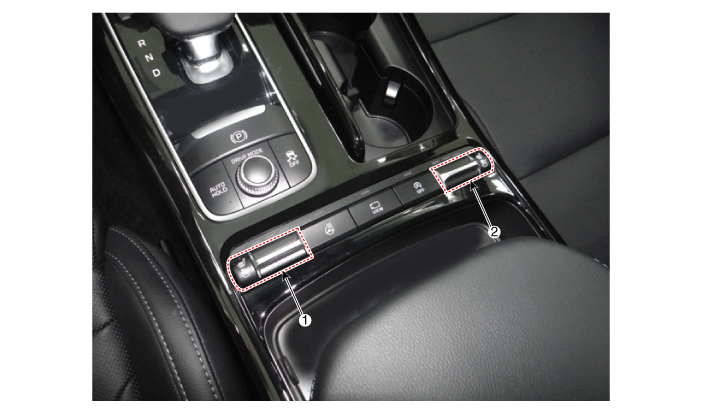
| 1. Driver Seat Heater Switch | 2. Passenger Seat Heater Switch |
Rear Seat Switch
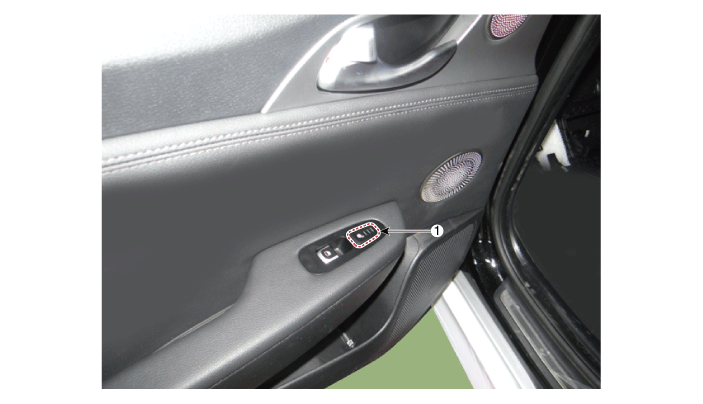
| 1. Rear Seat Heater Switch (Left / Right) |
Description and Operation
Description
Intelligent Seat Heater Control Technology
To prevent low-temperature burns, the seat heater temperature is automatically lowered after a certain period of time.
(Low-temperature burn condition: more than 30 minutes at 50 °C)
Intelligent Seat Heater Control Operation
[1st Row Seat]
After 30 minutes, change from "HIGH" to "MID", then after 60 minutes, change to "LOW".
Changes to "LOW" after 60 minutes in "MID".
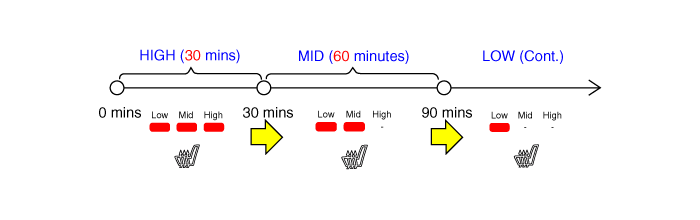
[2nd Row Seat]
After 30 minutes, change from "HIGH" to "MID", then after 60 minutes, change to "LOW".
Changes to "LOW" after 60 minutes in "MID".
Circuit Diagrams
Wiring Diagram
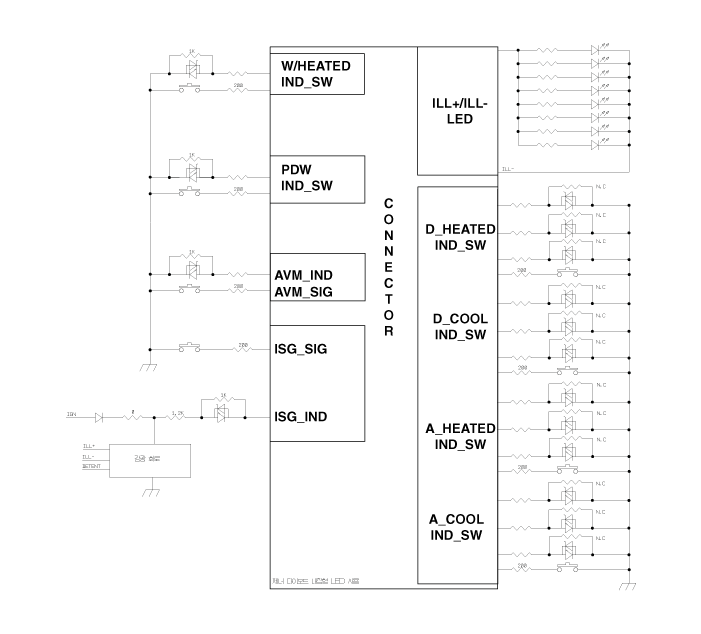
Front Seat Heater Switch
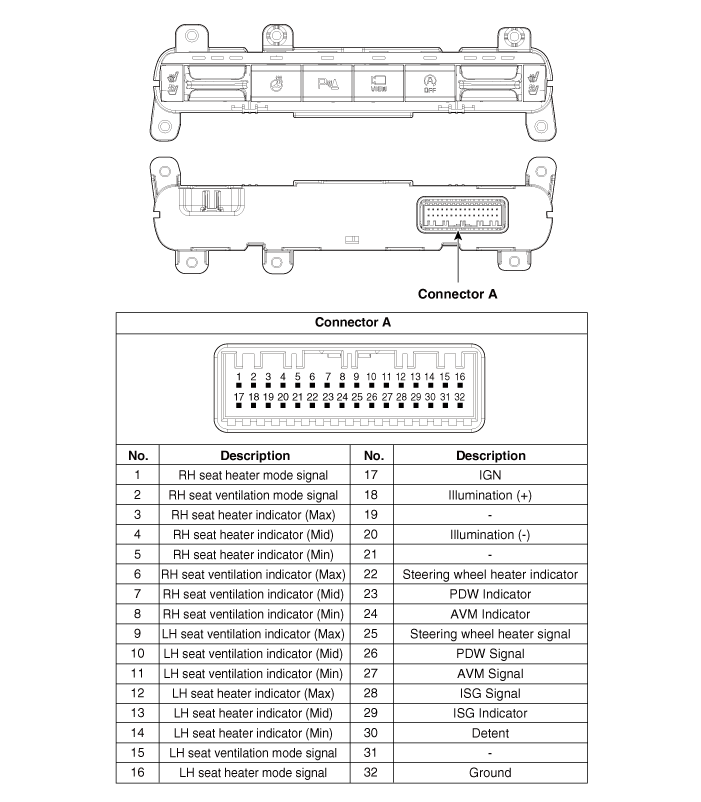
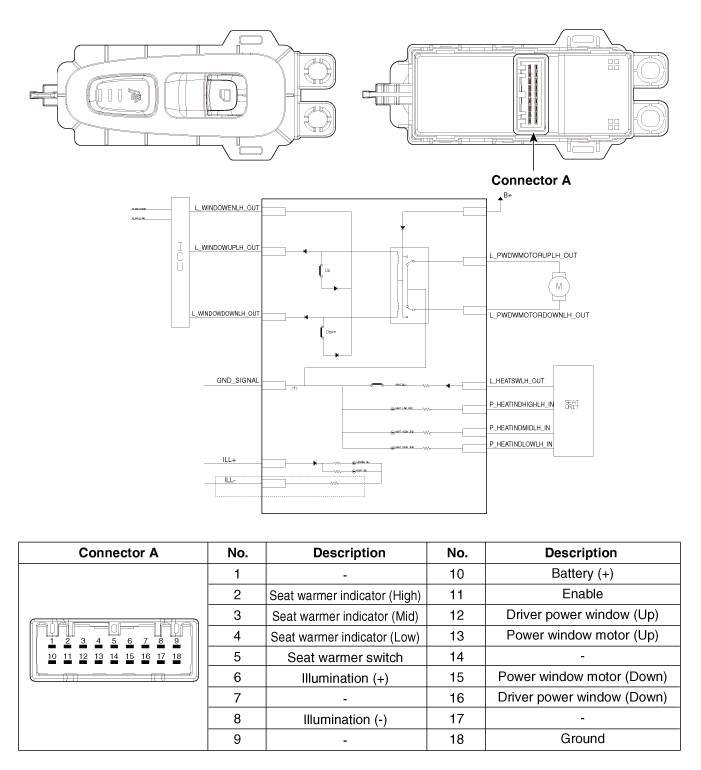
Rear Seat Heater Switch
Repair Procedures
Removal
Front Seat Heater Switch
Disconnect the negative (-) battery terminal.
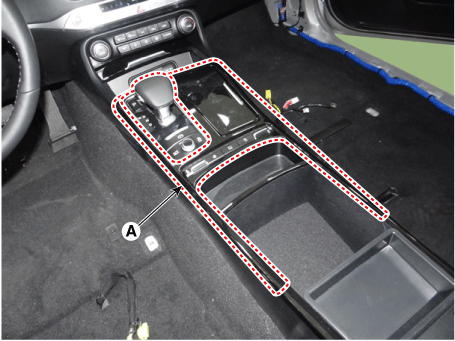
Remove the console upper assembly (A) using a remover.
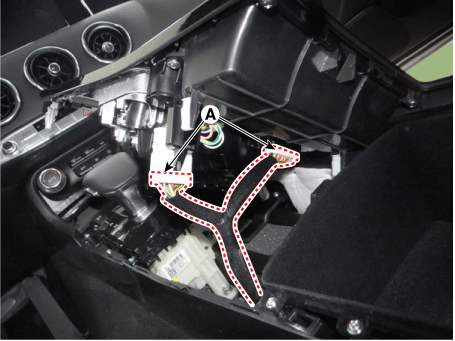
Disconnect the connectors (A) from the console upper assembly.
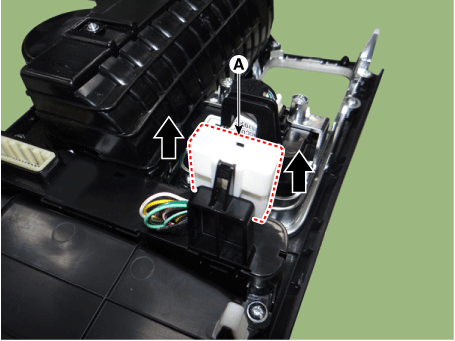
Fully disconnect the connector (A) from the console floor switch.
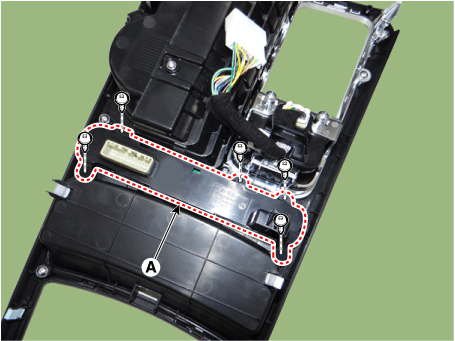
Fully remove the console floor switch (A) after loosening the mounting screws.
Rear Seat Heater Switch
Disconnect the negative (-) battery terminal.
Remove the rear door trim.
(Refer to Body - "Rear Door Trim Panel")
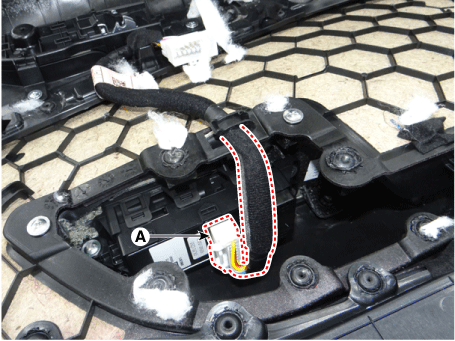
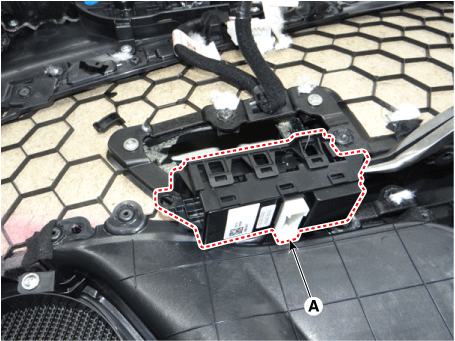
Disconnect the power window switch connector (A).
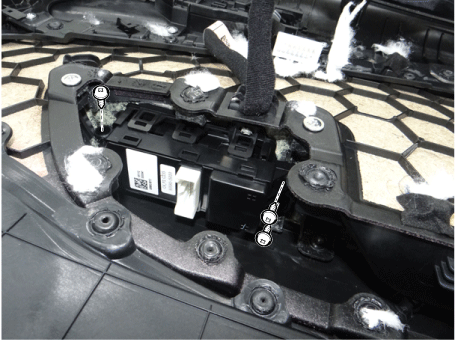
Remove the power window switch (A) after loosening the mounting screws.
Installation
Front Seat Heater Switch
Installation of the console floor switch is complete.
Connect the connector to the console floor switch assembly.
Connect the connectors to the console upper assembly.
Install the console upper.
Connect the negative (-) battery terminal.
Rear Seat Heater Switch
Install the power window switch.
Connect the power window switch connector.
Install the rear door trim after connecting the connector.
Connect the negative (-) battery terminal.
Test yourself
A quick Kia Stinger CK quiz: every answer comes with an explanation and a link to the manual page.