Audio System
NOTICE
If you install aftermarket HID (High Intensity Discharge) headlights, the audio system and electronic devices of your vehicle may malfunction.
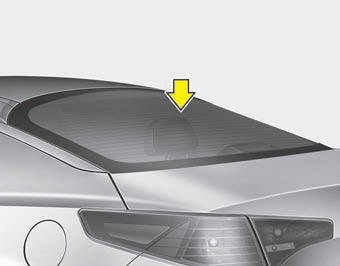
Rear Window Antenna (if equipped)
When you turn on the radio after turning the ignition switch to ON or ACC, the system receives AM and FM signals through the antenna embedded in the rear window.
CAUTION- Do not clean the inside of the rear window with window cleaner or a scraper to remove dirt, as you may damage the antenna elements.
- Avoid applying metallic coatings such as Ni, Cd, etc. They may interfere with AM or FM reception.
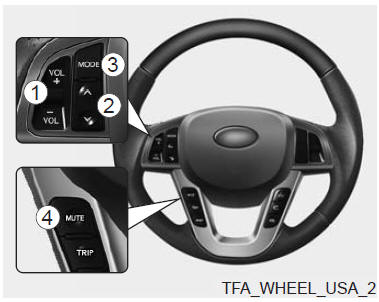
Steering Wheel Audio Controls (if equipped)
The steering wheel may be equipped with audio control buttons.
CAUTIONDo not press multiple buttons on the remote control at the same time.
VOLUME (+/-) (1)
- Raise the lever (+) to increase the volume.
- Lower the lever (-) to decrease the volume.
PRESET/SEEK ( /
 ) (2)
The SEEK/PRESET button operates differently depending on the mode.
For the following functions, press and hold the button for 0.8 seconds or more.
RADIO Mode
Performs automatic seek (AUTO SEEK).
CD/USB/iPod Mode
Performs fast forward and fast reverse (FF/REW).
If you press SEEK/PRESET for less than 0.8 seconds, it operates as follows: RADIO Mode: It acts as a preset button (PRESET STATION).
CD/USB/iPod Mode
It acts as a previous/next track button (TRACK UP/DOWN).
MODE (3)
Press the button to change the audio source.
- FM(1~2)-AM-SAT(1~3)-CD-USB AUX(iPod) FM...
In addition to changing the mode, this button turns the audio system on or off while the ignition switch is in ACC or ON.
- To turn on: Press the button while the radio is off.
- To turn off: Press and hold the button for more than 0.8 seconds while the radio is on.
MUTE (4, if equipped)
- Press the button to mute the audio.
- Press the button to mute the microphone during a phone call.
The control buttons are explained in more detail on the following pages.
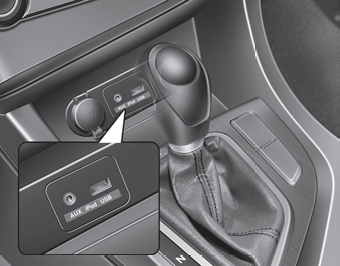
AUX, USB and iPod* Ports
If your vehicle is equipped with an AUX, USB (Universal Serial Bus) or iPod port, you can use the AUX port to connect an audio device, the USB port to connect a USB device, and the iPod port to connect an iPod.
NOTICE
If you use the power outlet to power an audio device, you may hear background noise during playback. If this occurs, use only the audio device's power supply.
* iPod is a trademark of Apple Inc.
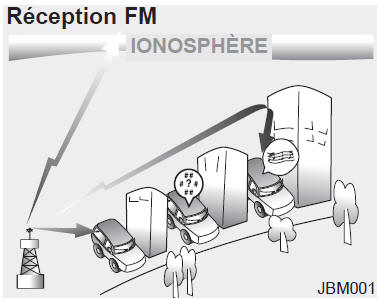
How Car Radio Works
AM and FM signals are broadcast from transmission towers located around the city. These signals are picked up by your vehicle's radio antenna. The signal then reaches the radio receiver, which sends it to the speakers.
When your vehicle receives a strong radio signal, the radio's precise engineering ensures the best possible sound reproduction. Sometimes the received signal may be of poor quality or weak. This may be caused by factors such as distance from the radio station or the presence of buildings, bridges or other large obstacles in the area.
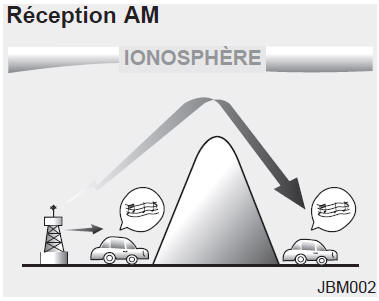
AM broadcasts can be received over greater distances than FM broadcasts. This is because AM radio waves are transmitted at low frequencies. These long, low-frequency radio waves can follow the curvature of the Earth rather than travel in a straight line through the atmosphere. In addition, they follow the shape of obstructions, providing better coverage.
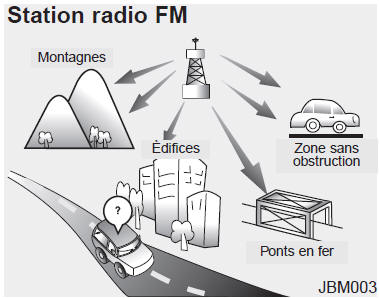
FM broadcasts are transmitted at high frequencies and do not follow the surface of the Earth. As a result, FM broadcasts generally begin to weaken at a short distance from the station. In addition, FM signals are easily affected by buildings, mountains and other obstructions.
This may cause listening conditions that could lead you to believe there is a problem with your radio. The following conditions are normal and do not indicate a problem:
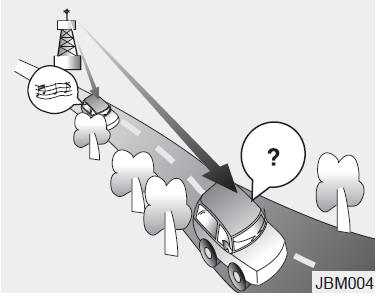
- Fading - as the vehicle moves away from the radio station, the signal weakens and the sound begins to fade out. In this case, we suggest tuning to a new station.
- Static/Electrostatic Noise - Weak FM signals or large obstructions between the broadcast tower and your radio may interfere with the signal and cause static or crackling noise. Reducing the treble level may reduce the effect until the interference disappears.
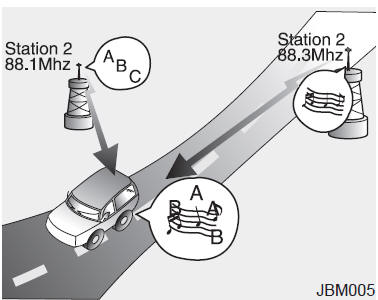
- Station Switching - When the FM signal weakens, a stronger signal on the same frequency may be picked up. This happens because the radio is designed to lock onto the clearest signal. If this occurs, tune to another station with a stronger signal.
- Multipath Cancellation - Radio signals received from several directions may cause distortion or flutter. This is caused by a direct and reflected signal from the same station, or by signals from two stations on adjacent frequencies. If this occurs, tune to another station until the condition clears.
Satellite Radio Reception
You may experience satellite radio reception problems in the following situations.
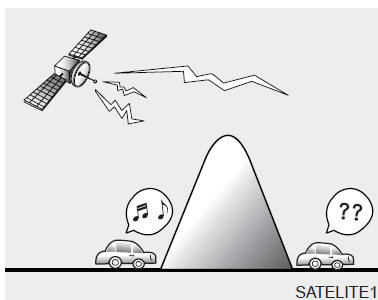
- Driving through a tunnel or an enclosed parking garage.
- Driving under the upper deck of a double-deck highway.
- Driving under a bridge.
- Driving near a tall vehicle (such as a truck or bus) that could block the signal.
- Driving in a valley where surrounding mountains or hills could block the signal.
- Driving on a mountain road where mountains could block the signal.
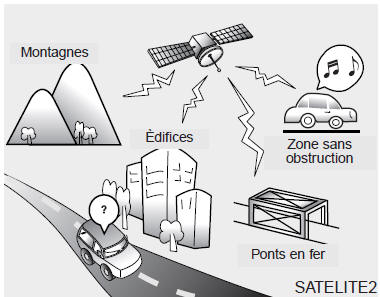
- Driving in an area where tall trees (over 10 m high) could block the signal, such as a dense forest.
- The signal may become weak in areas not covered by a network of terrestrial repeater stations.
NOTICE: Also note that other unforeseen circumstances may affect reception of the SIRIUS satellite radio signal.
Use of a Cellular Phone or Two-Way Radio
Using a cellular phone in the vehicle may interfere with the radio equipment. This does not mean that the equipment is faulty.
In such cases, use the cellular phone as far away from the radio equipment as possible.
CAUTIONWhen using a communication device such as a cellular phone or two-way radio in the vehicle, a separate antenna must be used. If the phone or radio is used with only a built-in antenna, it may interfere with the vehicle's electrical system, which could affect proper vehicle operation.
WARNINGDo not use a cellular phone while driving. Pull over to a safe location before using your phone.
Disc Care
- If the vehicle interior is too hot, lower the windows to ventilate the vehicle before using the radio.
- It is illegal to copy and use MP3/WMA files without permission.
NOTICE - Playing a Copy-Protected or Non-Compliant CD
Some copy-protected CDs that do not comply with the international audio CD standard (Red Book) may not play on the audio system.
Note that if you try to play a copy-protected CD and the CD player does not operate properly, the CD may be defective rather than the player.
CD Player : PA710TFU
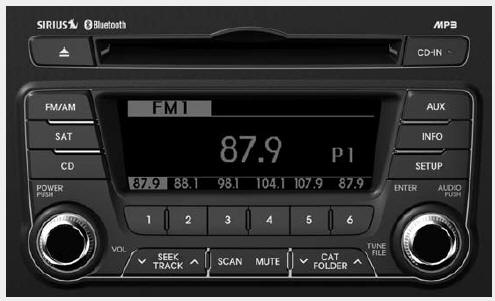
If the unit does not support Bluetooth technology, the Bluetooth logo will not be displayed.
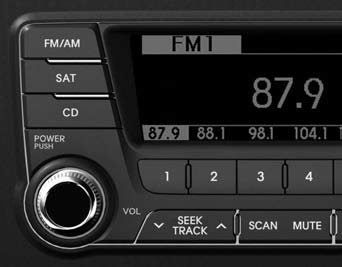
Using the Radio Controls: Tuning, Volume and Sound
1. Select Button
The FM/AM button switches between the FM and AM bands. It follows the switching sequence.
- FM/AM: FM1-FM2-AM-FM1...
2. Power and Volume Knob
- Turns the audio system on or off when the ignition switch is in ACC or ON.
- Turn the knob clockwise/counterclockwise to increase/decrease the volume.
3. Auto Seek Buttons
- Press
 to
automatically skip to the lower frequency station. - Press
 to
automatically skip to the higher frequency station.
4. Scan Button
- Press the button to start automatic scanning of stations.
- The button skips to the next station and stays on it for 5 seconds.
- Press again

to stop scanning and listen to the tuned station.
5. Mute Button
Press the button to mute the sound. "Audio Mute" appears on the LCD.
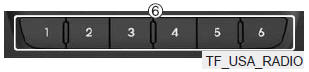
6. Preset Buttons
- Press
 ~
 Press
for less than 0.8 s to recall the station stored on this button.
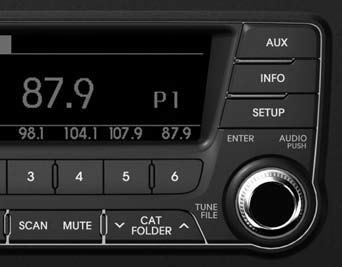
- Press~ Press and hold
for more than 0.8 s to store the tuned station at this position. The action is confirmed by a beep.
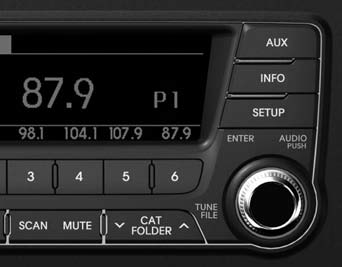
7. Knob
Press this button to enter setup mode. If no action is taken within 8 seconds, the system returns to the previous mode.
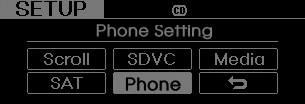
In SETUP mode, turn the TUNE knob to scroll the cursor through the items, and press TUNE to make a selection.
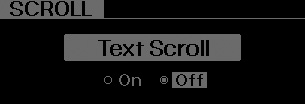
- SCROLL
Select whether long file names scroll continuously (ON) or only once (OFF).
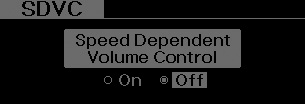
- SDVC (speed-dependent volume control)
Select this item to turn the function on or off. When on, the volume automatically adjusts according to vehicle speed.
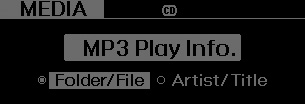
- MEDIA
Select the default display of the MP3 player information: "Folder/File" or "Artist/Title".
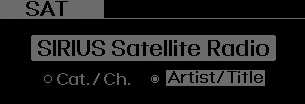
- SAT
Select the default display for SIRIUS mode: "Cat./Ch." (category/channel) or "Artist/Title".
- PHONE
Select this item to go to the BLUETOOTH mode settings. For more information, see "USING A BLUETOOTH PHONE".
8. Tuning and sound control knob
Turning the knob clockwise or counterclockwise increases or decreases the reception frequency.
(AM 10 kHz, FM 200 kHz) Press the knob to cycle through bass, middle, treble, front/rear balance and left/right balance. The selected mode is shown on the display. Once the mode is selected, turn the knob clockwise or counterclockwise to adjust it.
- BASS control: To increase the BASS, turn the knob clockwise; to decrease it, turn the knob counterclockwise.
- MIDDLE control: To increase the MIDDLE, turn the knob clockwise; to decrease it, turn the knob counterclockwise.
- TREBLE control: To increase the TREBLE, turn the knob clockwise; to decrease it, turn the knob counterclockwise.
- FADER (front/rear balance): Turn the knob clockwise to increase the sound from the rear speakers (the front speakers are reduced). Turn the knob counterclockwise to increase the sound from the front speakers (the rear speakers are reduced).
- BALANCE (left/right balance): Turn the knob clockwise to increase the sound from the right speakers (the left speakers are reduced). Turn the knob counterclockwise to increase the sound from the left speakers (the right speakers are reduced).
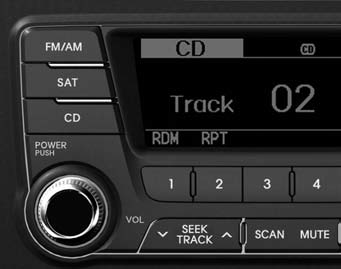
Using the CD player
1. Button
If a CD is loaded, switches to CD mode.
If there is no CD, "No Disc" is displayed for 3 seconds and the unit returns to the previous mode.
2. Random play button
Press the button for less than 0.8 s to activate "RDM" mode, and for more than 0.8 s to activate "A. RDM" mode. The next track is played once.
- RDM: Only the files/tracks in the folder/disc are played in random order.
- A. RDM (MP3/WMA only): All files are played in random order.
3. Repeat button
Press the button for less than 0.8 s to activate "RPT" mode, and for more than 0.8 s to activate "FLD RPT" mode.
- RPT: Only one file is played repeatedly.
- FLD RPT: Only the files in one folder are played repeatedly.
4. Track selection button
- Press

Press for less than 0.8 s to play the current track from the beginning. - Press
 Press
for less than 0.8 s, then again within the next second, to go to the previous track. - Press
 Press and hold
for 0.8 s or more for high-speed reverse search. - Press
 Press
for less than 0.8 s to go to the next track. - Press
 Press and hold
for 0.8 s or more for high-speed forward search.
5. Scan button
Plays 10 seconds of each track on the CD. To cancel scan, press the button again.

6. CD eject button
- The
 button works
whether the unit is on or off.
7. CD slot
Insert the CD, label side up, and push it in gently while the ignition switch is in the ACC or ON position.
The unit automatically switches to CD mode and plays the CD. If the unit is off, it turns on automatically when a CD is inserted.
- This unit only recognizes 12 cm CDs: CD-DA (audio CD) or ISO (MP3).
- If you insert a UDA CD or another type of disc (DVD, for example), "Reading Error" will be displayed and the disc will be ejected.
CAUTION: Do not insert a CD while the CD indicator is lit.
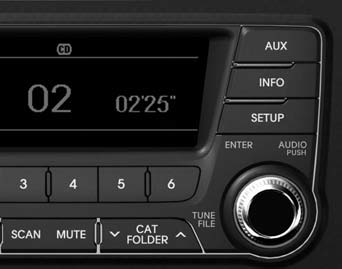
8. Button - Folder
(folder)
- Press the button
 Press
to go to the subfolder of the open folder and display the first track of the folder.
Press the TUNE/ENTER button to open the displayed folder. The unit plays the first track.
 Press
to go to the parent folder of the open folder and display the first track of the folder.
9. Button
Displays information about the current track.
- Audio CD: disc title/artist, track title/artist, number of tracks.
- MP3 CD: file name, title, artist, album, folder, number of files (not displayed if the information is not available on the CD or file).
10. Tuning and enter button (ENTER)
- Turn the knob clockwise to view tracks after the current track, or counterclockwise to view tracks before the current track. Press the knob to play the displayed track.
- Press the knob without turning it to switch to sound control mode.
NOTE: File (folder) playback order: 1. Track playback order: 1 to 14 in sequence.
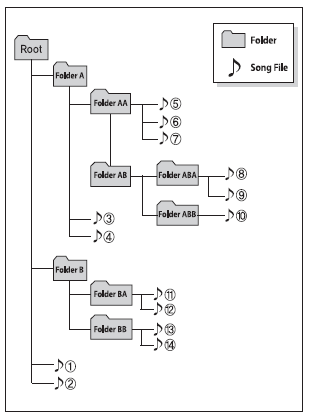
2. Folder playback order: If there are no track files in a folder, the folder is not displayed.
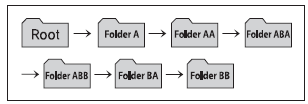
CAUTION - Regarding USB devices
- To use an external USB device, make sure the device is not connected when starting the vehicle, then connect the device.
- If you start the vehicle while the USB device is connected, you may damage the USB device (the USB is not protected against ESD).
- If you start or switch off the engine while the USB device is connected, the external USB device may not work.
- The device may not play non-genuine MP3 or WMA files.
- It can only play MP3 files compressed at a bit rate from 8 Kbps to 320 Kbps.
- It can only play WMA files compressed at a bit rate of 8 Kbps to 320 Kbps.
- Be careful of electrostatic discharge when connecting and disconnecting the USB device.
- An encoded MP3 player will not be recognized.
- Depending on the condition of the external USB device, the connected external USB device may not be recognized.
- If the byte/sector format of the external USB device is other than 512 bytes or 2048 bytes, the device will not be recognized.
- Only use a USB device formatted in FAT 12/16/32.
- A USB device without a USB IF logo may not be recognized.
- Make sure the USB plug does not touch the human body or any object.
- If you connect and disconnect a USB device in a short interval, the device may be damaged.
- You may hear a strange noise when connecting and disconnecting the USB device.
- If you disconnect the external USB device during playback in USB mode, the external USB device may be damaged or malfunction. Also, connect the external USB device only when the engine is off or the audio system is in another mode.
- Depending on the type and capacity of the external USB device or the type of files stored on the device, the recognition time of the device may vary. This is not a malfunction; please be patient.
- Only use a USB device for playing music files.
- Using USB accessories such as a charger or heater with the USB I/F may reduce performance or cause a malfunction.
- If you use devices such as a separately purchased USB hub, the audio system may not recognize the USB device. Connect the USB device directly to the vehicle's multimedia port.
- If the USB device is divided into logical units, the audio system will only recognize music files on the unit with the highest priority.
- Devices such as MP3 players, mobile phones or digital cameras that are not supported by the USB I/F standard will not be recognized by the audio system.
- Non-standard USB devices (metal cover type) may not be recognized.
- A USB flash memory card reader (CF, SD, microSD, etc.) or an external hard drive will not be recognized.
- Music files protected by DRM (Digital Rights Management) will not be recognized.
- Data on a USB memory may be lost when used in the audio system. We recommend that you make a copy of all important and personal data.
- Avoid using USB memory products that can also be used as a key ring or mobile phone accessory, as they may damage the USB port.

Using a USB
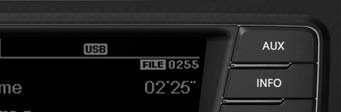
1. AUX/USB selection button
If an auxiliary device is connected, the audio system switches to AUX or USB mode to play the auxiliary device.
If no auxiliary device is connected, "No Media" is displayed for 3 seconds and the audio system returns to the previous mode.
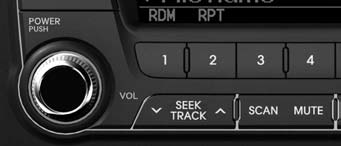
2. Random play button
- Press the button for less than 0.8 s to play the songs in the folder in random order.
- Press the button for 0.8 s or longer to play the songs on the USB device in random order.
- Press the button again to cancel random play.
3. Repeat button
- Press the button for less than 0.8 s to repeat the current song.
- Press the button for 0.8 s or longer to repeat all songs in the current folder.
- Press the button again to cancel repeat play.
4. Track selection button
- Press
 Press the button for
less than 0.8 s to play the current song from the beginning.
Press the button for less than 0.8 s, and again within one second, to go to the previous song.
Press and hold the button for 0.8 seconds or more to play the song in reverse at high speed. Press the button for
less than 0.8 s to go to the next song. Press the button for 0.8 s or longer to play the song at high speed.
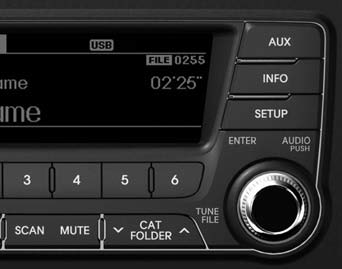
5. Scan button
Plays the first 10 seconds of each song on the USB device.
Press the button again to cancel scan.
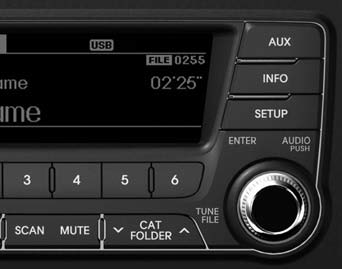
6. Button
Displays information about the current file in the following order: FILE NAME - TITLE - ARTIST - ALBUM - FOLDER - TOTAL FILE - NORMAL DISPLAY - FILE NAME -… (nothing is displayed if the file does not contain song information).
7. Folder button
- Press
 Press the button for
to go to the subfolder of the current folder and display the first song in the folder. Press TUNE/ENTER to open the displayed folder. The first song in the folder will play. - Press
 Press the button for
to go to the parent folder and display the first song in the folder.
8. Tune and enter button (ENTER)
- Turn the knob clockwise to view tracks after the current track, or counterclockwise to view tracks before the current track. Press the knob to play the displayed track.
- Press the knob without turning it to switch to sound control mode.
NOTICE - Regarding iPods
- Some iPods may not support the communication protocol, and files will not be played in that case (supported iPod models:
- iPod Mini
- iPod 4th (Photo) to 6th (Classic) generation
- iPod Nano 1st to 4th generation
- iPod Touch 1st and 2nd generation
- The order in which songs are searched and played on the iPod may differ from the search order of the audio system.
- If the iPod freezes, reset it (refer to the iPod owner's manual).
- The iPod may not operate properly if the battery is too weak.
- Some iPod devices such as the iPhone can be connected via Bluetooth. The device must have Bluetooth audio capability (such as Bluetooth stereo headphones). The device can be heard but cannot be controlled from the audio system.
- The Kia iPod cable is required to use an iPod with the audio system buttons.
The USB cable supplied by Apple may cause a malfunction and should not be used in Kia vehicles.
The Kia iPod cable can be purchased from a Kia dealer.
Disconnect the iPod cable when you are not using the iPod.
Using an iPod
iPod is a trademark of Apple Inc.
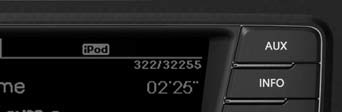
1. iPod Select Button
If an iPod is connected, the system switches from the current mode to iPod mode and plays the files on the iPod.
If no iPod is connected, " No Media " is displayed for 3 seconds, and then the system returns to the previous mode.
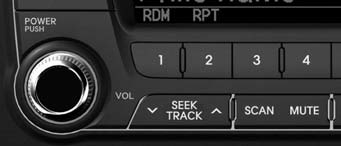
2. Random play button
- Press the button for less than 0.8 s to shuffle the order of songs in the current category (random song play).
- Press and hold the button for 0.8 s or longer to shuffle the order of albums in the current category (random album play).
- Press the button again to cancel random play.
3. Repeat button
Repeats playback of the current song.
4. Track Change Button
- Press
 Press the button for
less than 0.8 s to play the current song from the beginning.
Press the button for less than 0.8 s, then press it again within one second, to go to the previous track.
Press and hold the button for 0.8 seconds or more to start fast reverse playback of the song. Press the button for
less than 0.8 s to go to the next track. Press and hold the button for 0.8 s or longer to start fast forward playback of the song.
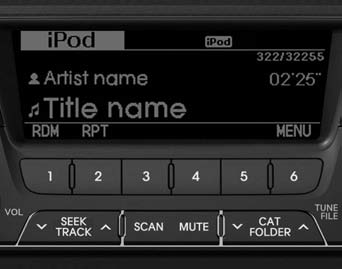
5. Scan Button
Plays the first 10 seconds of each song on the iPod.
Press the button again to stop scanning.
6. (MENU) Button
Moves up to the higher category from the category shown on the iPod.
To select the displayed category (song), press TUNE. You can then search within the category below the one selected.
The normal category order on the iPod is SONGS - ALBUMS - ARTISTS - GENRES - iPod
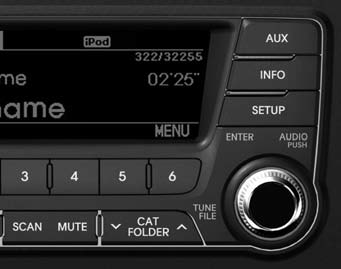
7. Button
Displays information about the current file, in the following order: TITLE - ARTIST - ALBUM - NORMAL DISPLAY - TITLE -... (nothing is displayed if the file does not contain song information).
8. Tune and enter button (ENTER)
Turning the knob clockwise displays the songs (categories) following the song currently playing (same level category). Turning the knob counterclockwise displays the songs (categories) preceding the song currently playing (same level category).
To play a song in the displayed category, press the button to go to that song and play it.
Press the button to cycle through bass, midrange, treble, front/rear balance, and left/right balance. The selected mode is shown on the display. Once the mode is selected, turn the knob clockwise or counterclockwise to adjust it.
Test yourself
A quick Kia Optima DL3 quiz: every answer comes with an explanation and a link to the manual page.