Front Brake Pads
* Brake pads must always be replaced on both wheels at the same time. Never replace brake pads on only one wheel. Dust produced by brake pad wear contains asbestos, which is hazardous to health. Do not blow it off with compressed air and do not inhale it. Always wear a dust mask when working on brakes. Do not use gasoline-based solvents to clean brakes. Use only a cleaning agent specifically designed for brake cleaning.
Replacement
PROCEDURE
1. Remove the brake fluid reservoir cap.
2. Loosen the wheel nuts, raise the front of the vehicle and support it on stands. Chock the rear wheels.
3. Remove the wheel. Precautions: Always replace all four front brake pads at the same time. To avoid mixing them up, work on one wheel at a time.
4. Thoroughly inspect the brake disc in accordance with the instructions in Section 7. If the surface requires machining, remove the disc in accordance with the instructions in the same section. The brake pads may also be removed when the disc is removed.
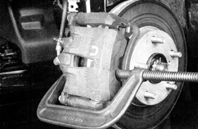
5. Push the piston back into the cylinder to make room for the new brake pads. A C-clamp may be used for this. After the piston is pushed back, the brake fluid level in the reservoir will rise. Make sure the fluid does not overflow. If necessary, remove some fluid with a clean syringe.
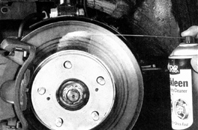
6. Vehicles may be fitted with one of two caliper types, PE54 or PD51. The illustrations show the PE54 caliper; however, both types are practically identical, apart from minor differences in the pin installation (see illustrations PE54 Caliper Components and PD51 Caliper Components). Always clean the brakes with brake cleaning fluid before disassembly.

7. Remove the bolts indicated by the upper and lower arrows. On the PE54 brake caliper, hold the pins with a spanner while loosening the bolts. Do not disconnect the brake hose connection (indicated by the middle arrow) unless the caliper is being removed for disassembly or replacement.

8. Remove the caliper.
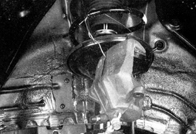
9. Suspend it from the suspension spring using a piece of wire. Do not let the caliper hang from the brake hose.
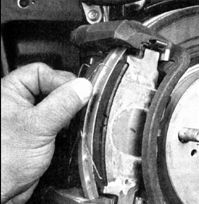
10. Remove the upper anti-rattle spring...
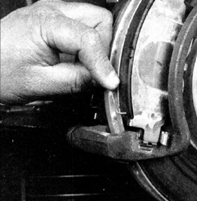
11. ... and the lower anti-rattle spring. Note that some later caliper models do not use these springs.
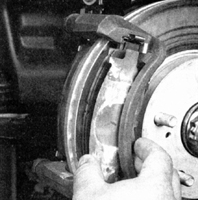
12. Remove the outer shim...
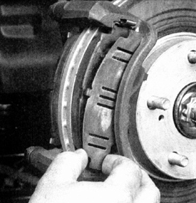
13. ... and, if fitted, the inner shim from the outer brake pad.
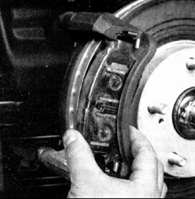
14. Remove the outer brake pad.
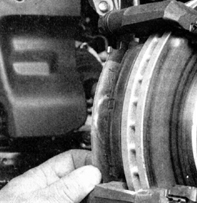
15. Remove the outer shim...
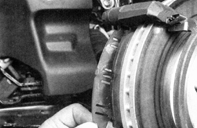
16. ... and, if fitted, the inner shim from the inner brake pad.
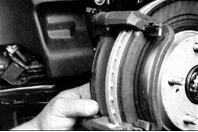
17. Remove the inner brake pad.
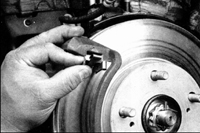
18. Remove the four brake pad retaining clips. Inspect the clips for damage and replace them if necessary. (Good clips should snap into place when installed on the pad carrier; if they are loose or deformed, replace them.)
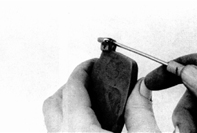
19. Remove the wear indicator from the old inner brake pad and install it on the new inner pad. (If the wear indicator is worn or bent, replace it.)
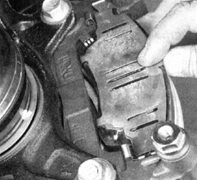
20. Install the brake pad retaining clips, the new inner brake pad and the shims. Make sure the pad ends are correctly seated in the retaining clips.
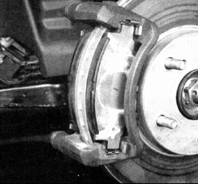
21. Install the retaining clips, the outer brake pad and the shims.
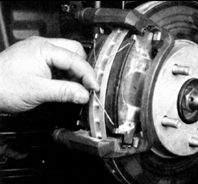
22. Install the upper and lower anti-rattle springs. Make sure both springs are correctly positioned on the pads as shown in the illustration.

23. On the PE54 caliper, remove the upper and lower pad carrier pins and clean them. If any rubber boot is damaged, remove it by bending back the edge of the metal bushing that retains the boot.
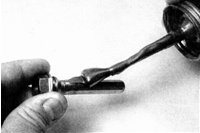
24. Apply a coat of high-temperature grease to the PE54 caliper pins before installing them.
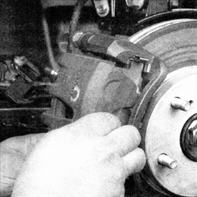
25. Install the caliper and tighten the caliper mounting bolts to the torque specified in the Specifications section at the beginning of this chapter.
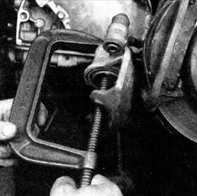
26. If you have difficulty fitting the caliper over the new brake pads, push the caliper piston back into the cylinder using a C-clamp, then try again. The caliper should fit over the pads.
27. When installing the caliper, tighten the mounting bolts to the torque specified in the Specifications section at the beginning of this chapter. After completing the work, depress the brake pedal several times to seat the pads. Check the brake fluid level and top up if necessary. Test the brakes before driving the vehicle normally.
Test yourself
A quick Toyota Corolla quiz: every answer comes with an explanation and a link to the manual page.