Rear Drum Brake Shoes
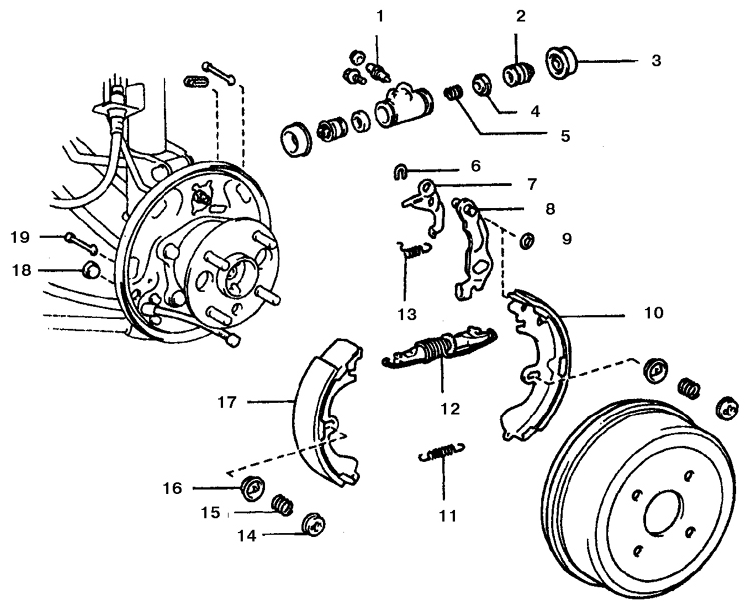
Rear Drum Brake Components 1. Bleeder valve
2. Piston
3. Boot
4. Cap
5. Spring
6. Washer
7. Brake shoe lever
8. Parking brake lever
9. C-washer
10. Rear brake shoe
11. Return spring
12. Adjuster assembly
13. Adjuster lever spring
14. Cap
15. Hold-down spring
16. Cap
17. Front brake shoe
18. Plug
19. Pin
* Brake pads must be replaced on both wheels at the same time – never replace brake pads on only one wheel.
* Dust produced by brake shoe wear contains asbestos, which is hazardous to health. Do not inhale it.
* Do not use gasoline-based solvents to clean the brakes. Use only a cleaner specifically designed for brake cleaning.
When replacing the brake shoes, the return spring and hold-down spring must also be replaced. Because the springs are subjected to constant heating and cooling, they lose their tension over time, which may cause the brake shoe to fail to retract from the drum and wear much faster.
Replacement
PROCEDURE
1. Loosen the wheel nuts, raise the rear of the vehicle and support it on stands. Chock the front wheels to prevent the vehicle from rolling unexpectedly.
2. Release the parking brake.
3. Remove the wheel.
* All four rear drum brake shoes must be replaced at the same time. To avoid mixing them up, work on one wheel at a time.
4. Mark the installation position of the brake drum relative to the hub so that the drum maintains dynamic balance after installation.

5. If the brake drum is stuck on the brake shoes due to excessive wear, insert two screwdrivers through the opening in the rear brake backing plate, disengage the adjuster lever from the toothed wheel, and turn it to retract the brake shoes.
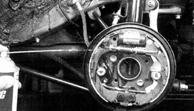
6. Before removing any brake components, place a drain pan under the brake and clean the brake assembly with brake cleaning fluid, then allow it to dry. Do not use compressed air to blow off dust produced by brake shoe wear (hub removed for illustration purposes).
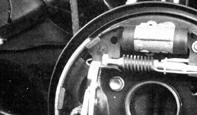
7. Disconnect the return spring from the front brake shoe.
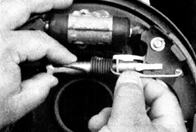
8. Remove the second end of the spring from the hole in the rear shoe and remove the adjuster assembly together with the spring.
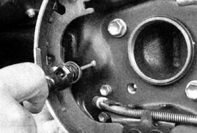
9. Using the spring compressor tool, remove the hold-down spring by pressing it down and turning it a quarter turn.

10. Remove the outer cap, spring and inner cap.

11. Remove the pin through the hole in the rear brake backing plate.
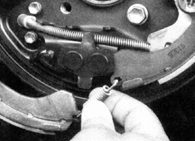
12. Remove the front brake shoe and disconnect the adjuster spring from the rear brake shoe.
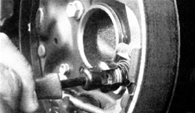
13. Remove the rear shoe hold-down spring, caps and pin.
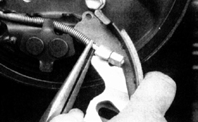
14. Turn the rear shoe over and disengage the spring from the parking brake lever.
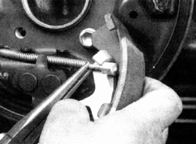
15. Disconnect the parking brake cable from the lever.
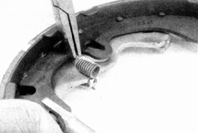
16. Place the rear brake shoe on a clean workbench and disconnect the adjuster lever spring from the shoe.

17. Remove the C-washer (do not lose the washer located underneath it).

18. Remove the parking brake lever and adjuster lever from the old brake shoe.
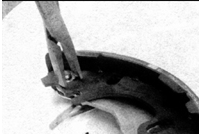
19. Install the parking brake lever and adjuster lever onto the new rear brake shoe and secure them with a new C-washer (do not forget to install the regular washer).
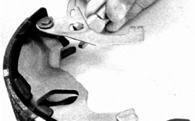
20. Insert the protrusion on the rear of the adjuster lever into the hole in the brake shoe lever.

20. Insert the protrusion on the rear of the adjuster lever into the hole in the brake shoe lever.
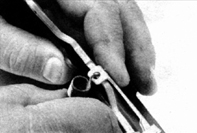
22. Hook the short end of the adjuster lever spring onto the brake shoe lever.
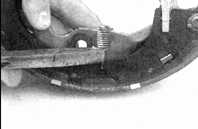
23. Hook the long end of the spring into the hole in the rear brake shoe.

24. Apply a coat of high-temperature grease to the rear brake backing plate at the points where it contacts the brake shoes.
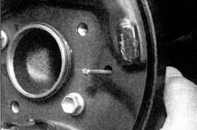
25. Insert the rear brake shoe hold-down spring pin into the hole in the rear brake backing plate.
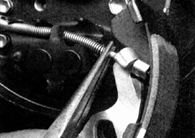
26. Connect the parking brake cable to the parking brake lever.
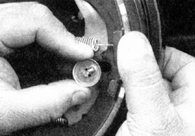
27. Position the rear brake shoe, insert the pin into the hole in the shoe, and install the inner retainer cup onto the pin.
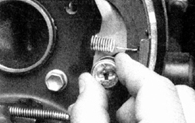
28. Install the hold-down spring and the outer retainer cup.
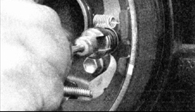
29. Compress the spring using the spring compressor tool, turn the outer retainer cup a quarter turn, and lock it in place.
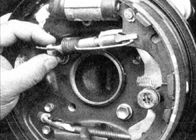
30. Install the adjuster mechanism and insert it into the hole in the adjuster lever that was previously installed on the rear brake shoe.
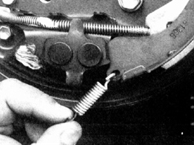
31. Hook the return spring onto the rear shoe.
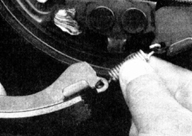
32. Hook the return spring onto the front shoe.
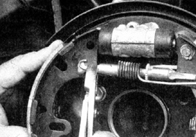
33. Install the front brake shoe and hook both ends of the return spring into the holes in the front and rear shoes.

34. Install the pin, hold-down spring, and inner and outer retainer cups of the front brake shoe hold-down spring, and lock the outer retainer cup in place using the spring compressor tool.
35. If the brake drum cannot be removed from the axle shaft or the brake shoes, make sure the vehicle is released from the parking brake. If the drum still cannot be removed, back off the brake shoes (see step 5).
36. Before installing the drum, inspect it for cracks, scoring, and hard spots that appear as discolored spots. If they cannot be removed with sandpaper, or if other damage described above is present, take the brake drum to a repair shop for resurfacing. It is recommended to resurface the brake drum surface every time the brakes are disassembled. Resurfacing eliminates the possibility of radial runout of the drum.
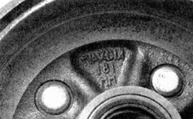
37. If the brake drum is worn beyond what can be resurfaced without exceeding the maximum allowable diameter (marked on the drum), a new brake drum must be purchased.
38. If you decide not to resurface the drum, at least remove the glaze from its surface with sandpaper. Perform the surface finishing using circular motions.
39. Install the brake drum onto the axle shaft.
40. Install the wheel and tighten the wheel nuts. Using a screwdriver inserted through the hole in the rear brake backing plate (see step 5), turn the adjuster gear so that the brake shoes contact the drum when it rotates, then back off the adjuster gear until the shoes no longer contact the drum. Lower the vehicle and tighten the wheel nuts to the torque specified in the Specifications section of the relevant chapter.
41. Apply the brakes several times while moving forward and in reverse to stop the vehicle, and apply the parking brake several times to finish adjusting the rear brakes.
42. Check the brake operation before returning the vehicle to normal use.
Test yourself
A quick Toyota Corolla quiz: every answer comes with an explanation and a link to the manual page.