Brake Disc
Inspection
PROCEDURE
1. Loosen the wheel nuts, raise the vehicle and support it on stands. Remove the wheel and install two wheel nuts to secure the disc.
2. Remove the brake caliper following the instructions in (refer to Subsection 9.4) (front brake disc) or (refer to Subsection 9.6) (rear brake disc). It is not necessary to disconnect the brake hose.
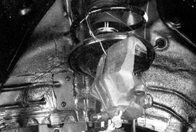
3. After removing the caliper mounting bolts, suspend the caliper from a piece of wire so that it does not interfere with further work.
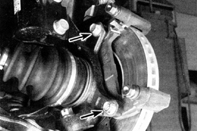
4. Remove the two bolts securing the pad retainer to the steering knuckle or hub carrier, and remove the pad retainer.
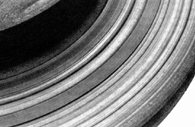
5. Inspect the brake disc surface for scoring or other damage. Light scratches and fine grooves are normal and usually do not adversely affect brake performance. However, deep scoring (as shown in the illustration) over 1.0 mm requires removal of the disc and resurfacing at an automotive workshop.
6. Check both sides of the disc. If you experienced brake pedal pulsation during braking, check the disc runout.
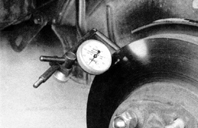
7. To check disc runout, install a dial indicator approximately 12.5 mm from the outer edge of the disc (left illustration). Set the indicator to zero and rotate the disc. The gauge reading must not exceed the specified limit. If it exceeds the limit, the disc must be resurfaced at an automotive workshop.
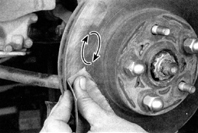
8. The disc surface must be resurfaced regardless of the dial indicator reading, as this produces a perfectly smooth surface, which ensures good brake performance. As a last resort, if you decide not to resurface the disc, at least remove the glaze from the disc surface using sandpaper, working in circular motions.
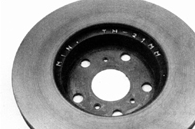
9. It is essential that after resurfacing the disc, its thickness does not fall below the minimum allowable limit. The minimum allowable disc thickness (at which the disc must be replaced) is marked on the inner side of the disc.
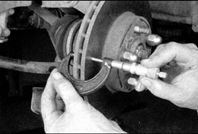
10. Disc thickness can be checked using a micrometer.
Removal
PROCEDURE
Remove the nuts that were installed to hold the brake disc, and remove the disc from the hub.
Installation
PROCEDURE
1. Install the disc onto the bolts.
2. Install the brake caliper bracket and caliper onto the brake disc, and insert the mounting bolts into the steering knuckle or hub carrier bracket. Tighten the caliper bracket and caliper mounting bolts to the specified torque (refer to Torque Specifications table).
3. Install the wheel, then lower the vehicle to the ground. Tighten the wheel nuts to the specified torque (refer to Torque Specifications table). Depress the brake pedal several times to seat the brake pads against the disc. Bleeding the brake system is not necessary if the brake hose was not disconnected from the caliper. Check brake operation before normal vehicle use.
Test yourself
A quick Toyota Corolla quiz: every answer comes with an explanation and a link to the manual page.