Brake Hoses and Lines
Inspection
Approximately every six months, raise the vehicle and support it on stands, then inspect the rubber hoses connecting the steel brake lines to the front and rear brakes for cracks, signs of wear, brake fluid leakage, swelling, and other damage.
Rubber brake hoses are an important and easily damaged part of the brake system, so the inspection must be thorough and careful. A flashlight and mirror will be helpful during the inspection. If the hose shows any of the damage listed above, replace it.
Replacement
PROCEDURE
Front Brake Hoses
1. Loosen the wheel mounting nuts, raise the vehicle, and support it on stands. Remove the wheel.

2. Near the body bracket, loosen the brake hose-to-brake line fitting. Use a flare nut wrench when loosening the fitting to avoid rounding off its flats. If the bracket bends, hold the hose fitting with a conventional open-end wrench.
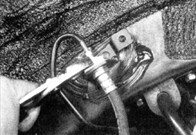
3. Remove the U-clip from the retaining clip on the bracket using pliers, then pull the hose out through the hole in the bracket.
4. At the end of the hose where it attaches to the caliper, unscrew the banjo bolt and disconnect the hose from the caliper. Note that there are two copper sealing washers on either side of the fitting; they must be replaced when installing the hose.
5. Remove the U-clip from the suspension strut bracket and pull the hose out through the bracket hole.
6. To install the hose, feed the end that connects to the caliper through the hole in the suspension strut bracket, then connect the hose to the caliper by tightening the banjo bolt and installing new copper sealing washers. Make sure the hose opening is aligned with the caliper opening, then tighten the banjo bolt to the torque specified in the Specifications section at the beginning of this chapter.
7. Install the retaining clip and U-clip on the bracket. Make sure the hose is not twisted between the caliper and the suspension strut bracket.
8. Route the hose to the bracket on the body frame, making sure it is not twisted, and connect it to the brake pipe by hand-threading the fitting. Install the U-clip, then securely tighten the connection.
9. Bleed the brake system (see sub-section 9.12).
10. Install the wheel and hand-tighten the wheel nuts. Lower the vehicle to the ground and tighten the nuts to the torque specified in the Specifications section of the relevant chapter.
Rear Brake Hose
11. The rear brake hose connects two metal brake pipes, one of which is attached to the vehicle body and the other to the rear axle. Both ends of the hose are connected to these metal pipes by threaded fittings and U-clips. When replacing the hose, follow the instructions given above (see steps 2, 3 and 4). Be sure to bleed the rear wheel cylinder or caliper after replacing the hose (see sub-section 9.12).
Metal Brake Pipes
12. Do not use copper pipes when replacing brake pipes. Obtain steel brake pipes.
13. Pre-formed brake pipes with fittings already installed on the ends can be purchased from an auto parts store or dealer. These pipes are often already bent to the required shape.
14. When installing a new brake pipe, make sure it is securely held in the brackets and that there is adequate clearance between it and any moving or hot components.
15. After installation is complete, check the brake fluid level in the master cylinder reservoir and add brake fluid if necessary. Bleed the brake system (see sub-section 9.12). Thoroughly test the brakes before normal vehicle operation.
Test yourself
A quick Toyota Corolla quiz: every answer comes with an explanation and a link to the manual page.