Sliding/Tilting Sunroof*
GENERAL INFORMATION
With the ignition switched on, the sunroof can be opened and closed using the rotary switch shown in the illustration.
The sunroof can be operated for ten minutes after the ignition is switched off. The switch will not function only if the driver's door is opened and closed again.
CAUTION
Be careful when closing the sunroof! Careless or uncontrolled closing of the sunroof can result in injury. Therefore, remove the key from the ignition lock when leaving the vehicle.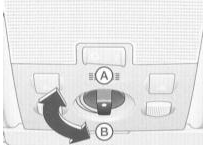 Sunroof Operation
Opening
Turn the switch in the direction indicated by the arrow (A). It is also possible to set the sunroof to any intermediate position. To do this, turn the switch only until you feel a distinct resistance point.
Closing
Turn the switch in the direction indicated by the arrow (B).
Tilt
A brief press of the switch opens the sunroof, and a brief pull closes it. A longer press/pull of the switch allows the sunroof to be set to any position.
CAUTION
The sliding sunroof has overload protection. If it cannot be closed in normal mode, it can be closed by pulling the switch. When the glass sunroof is slid open, the sun shade opens automatically to protect against intense sunlight. When the sunroof is closed, the sun shade can also be closed by hand.It is recommended to close the sun shade when the vehicle is parked in the sun.
When the vehicle is parked or in case of sudden rain (with the sun shade closed), do not forget to close the sunroof.
Comfort closing
The sliding sunroof can also be closed when locking the vehicle from the driver's or front passenger's door:
To do this, hold the key in the locking position or press the button on the remote control transmitter* until the sunroof is closed.
CAUTION
Vehicles with remote control central locking cannot be locked or unlocked from the front passenger door.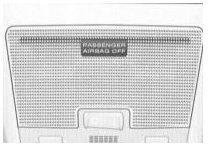 Emergency Closing of the Sunroof
If the power drive fails, the sunroof can be closed manually.
For this purpose, use the crank handle included in the vehicle tool kit. Refer to the subsection Tool Kit and Jack.
Pull down the plastic cover (refer to the illustration).
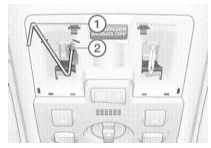
Turn the crank handle (1), inserting it as far as it will go and pressing the hexagonal end into the internal hexagonal socket (2).
Have the malfunction rectified at an Audi service station.
Test yourself
A quick Audi A3 quiz: every answer comes with an explanation and a link to the manual page.