Removing and installing radiator
After a long period of operation, the thin channels in the radiator can become clogged by deposits in the coolant and limescale. This greatly reduces cooling performance and the engine overheats. In this case the radiator must be removed and treated with a commercially available scale remover, following the manufacturer's instructions. Usually, however, the only remedy is to replace the radiator.
RemovalDisconnect the battery negative (-) cable. Warning: this erases electronic memories, such as engine operating values. Observe the notes in the chapter "Remove and install battery".
Drain the coolant, see page 71.
Disconnect the upper and lower coolant hoses from the radiator. Before this, loosen the clamps with a screwdriver and push them fully back. If clamps with pinch-type fittings are fitted, cut them with side cutters and replace them with commercially available screw-type clamps during installation.
With separate expansion tank: disconnect the hose to the expansion tank from the radiator, loosening the hose clamp beforehand.
Disconnect the thermoswitch cable from the radiator. Disconnect the radiator fan cable at the connector.
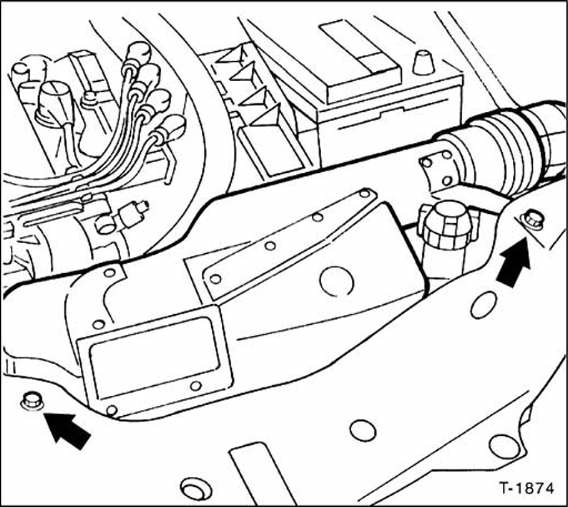
All except 1.4 L engine: unscrew the air intake duct from the front closing panel -arrows-.
1.8/1.9/2.0 L engine: remove the radiator fan, see page 77.
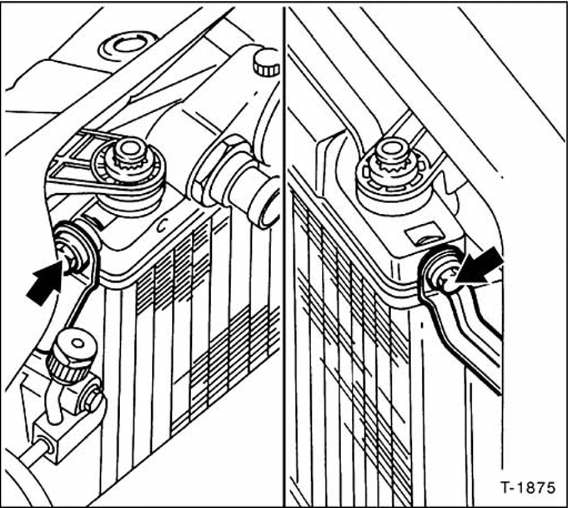
1.8/1.9/2.0 L engine with air conditioning: unscrew the upper condenser bolts -arrows- from the radiator.
Only loosen the lower bolts. Pull the condenser off the radiator and hang it on the body with wire.
Warning: do not open the air conditioning refrigerant circuit. Risk of injury from escaping refrigerant spray. The refrigerant circuit may only be refilled by a qualified workshop.
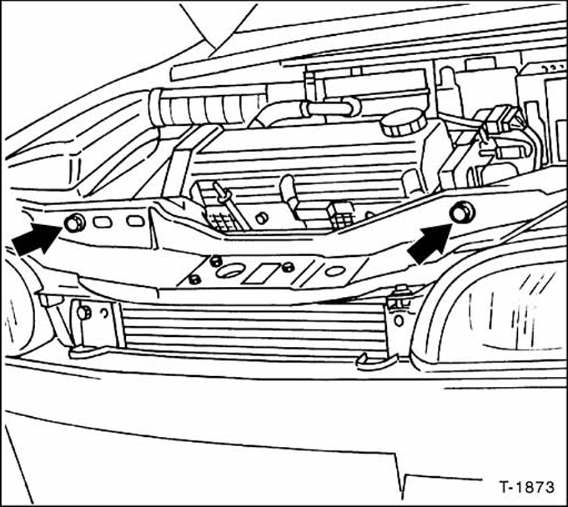
Unscrew the radiator at the top left and right.
Swing the radiator towards the rear and remove it complete with fan upwards from the lower rubber mounts.
Check all coolant hoses for cuts, cracks and other damage and replace if necessary. Check the rubber mounts of the radiator bracket for proper condition.
Insert the radiator from above so that the locating pins on the radiator engage the rubber mounts at the bottom of the bracket.
Bolt the radiator on at the top left and right.
1.8/1.9/2.0 L engine with air conditioning: bolt the condenser to the radiator on the left and right.
1.8/1.9/2.0 L engine: install the radiator fan, see page 77.
Push the upper and lower coolant hoses on and secure them with screw clamps.
Push the coolant hose onto the expansion tank and secure it with a clamp.
Connect the thermoswitch and fan connecting cables.
All except 1.4 L engine: bolt the air intake duct to the front closing panel.
Disconnect the negative (-) battery terminal. Set the clock and enter the radio anti-theft code.
Refill the coolant. See page 71.
Check the hose connections for leaks.
Test yourself
A quick Fiat Bravo quiz: every answer comes with an explanation and a link to the manual page.