Intake Air Temperature (IAT) Sensor Inspection and Replacement
INSPECTION
PROCEDURE
1. The IAT sensor is a thermistor (a resistor whose resistance changes with temperature). A change in resistance changes the sensor signal voltage: the HIGHER the temperature, the LOWER the resistance, and vice versa. Sensor faults result in diagnostic trouble codes P0112 or P0113 being stored in the OBD system memory.
2. Check the IAT sensor resistance. Disconnect the wiring harness connector from the sensor located on the intake manifold.
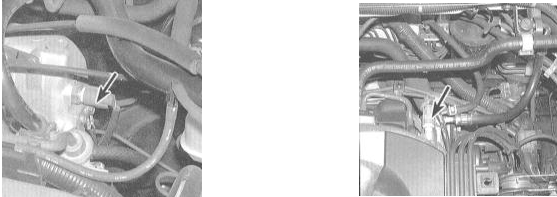
3. Using an ohmmeter, measure the resistance between the two terminals of the sensor. Sensor resistance depends on temperature and should be approximately 2500 ÷ 3500 Ω at 20°C. Start the engine (or remove the sensor and heat it with a hair dryer). At 83°C, sensor resistance should drop to 250 ÷ 350 Ω. If the test results are unsatisfactory, replace the IAT sensor.
If the engine was run with the sensor disconnected, be sure to clear the OBD system memory (see Section On-Board Diagnostics (OBD) - Operating Principles and Diagnostic Trouble Codes).
REPLACEMENT
PROCEDURE
1. Disconnect the negative battery cable.
If the vehicle is equipped with an anti-theft radio, make sure you have the correct code for activating the audio system before disconnecting the battery!
2. Disconnect the wiring harness from the IAT sensor.
3. Remove the sensor from the intake air duct plenum housing.
4. Installation is the reverse of removal.
Test yourself
A quick Honda Accord quiz: every answer comes with an explanation and a link to the manual page.