Removal and Installation of Rear Bumper
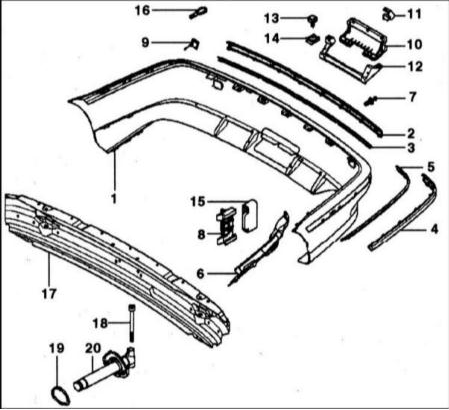
1 — cover
2 — rear stop plate
3 — center visor
4 — side stop plate
5 — visor
6 — heat insulation
7 — rivet
8 — holder
9 — tow hook cover
10 — cover
11 — clip
12 — reinforcement
13 — self-tapping screw
14 — nut
15 — sliding element
16 — tow hook
17 — beam
18 — bolt
19 — seal
20 — damper
The rear bumper is designed so that it withstands an impact at vehicle speeds up to 4 km/h without damage. In this case, the impact energy is absorbed by the internal fiberglass beam and two hydraulic dampers.
REMOVAL
1. Remove the bolts securing the left and right rear wheel arch liners. To do this, remove the clip, first driving out the pins in the center of the clips with an offset hex key (2.5 - 3.0 mm). If the pins have a cap, first remove the pins with a screwdriver, then remove the clip. After that, remove the wheel arch liners from the side at the dampers.
* It is not necessary to remove the wheels.

2. Open the luggage compartment, remove the rear trim panel. Refer to Removal and Installation of Luggage Compartment Rear Trim.
3. Remove the three bumper mounting nuts, left and right, using a 13 mm wrench.

4. On vehicles with parking distance control, cut the cable tie, disconnect the connector and release the cable. Pull the bumper slightly rearward and remove the cable grommet and cable.
5. Remove the bumper rearward with the help of an assistant.
INSTALLATION
1. If necessary, assemble the bumper into one unit, see the illustration at the beginning of the section.
2. If necessary, fit the plastic cap onto the damper. The cap often remains in the seat when the damper is removed.
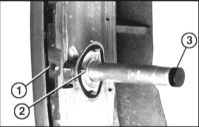
3. With the help of an assistant, insert the bumper into the side guides (1) and shift it rearward, install the front element on the side and slide it forward until it stops. The front guide must engage the catch (2) on the bumper.
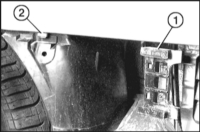
4. On vehicles with parking distance control, insert the cable grommet and cable. Connect the connector and secure the cable with a cable tie, as before removal.
5. Lift the bumper slightly, align it parallel and secure it with torque 20 N·m. The gap between the bumper and the body must be 5±1 mm.
6. The bumper installation height is adjusted with the damper removed by turning the plastic insert with an internal hex.
7. Install the rear trim panel in the luggage compartment.
8. Install the rear wheel arch liners, secure the clips and fully insert the safety pins.
Test yourself
A quick BMW 1 quiz: every answer comes with an explanation and a link to the manual page.