Removal and Installation of Door Trim Panel
This section describes removal of the front door trim panel. The procedure for removing the rear door trim panel is similar. Differences are described at the end of the section.
REMOVAL
1. Disconnect the negative battery cable from the battery. The battery is located in the luggage compartment behind the right side trim.
* Disconnecting the battery erases data in electronic control module memories, such as engine fault memory. Refer to the instructions in the section Removal and Installation of Battery.
2. Insulate the negative battery terminal to prevent accidental electrical contact.
3. Unscrew bolt (1) in the air duct.

4. Using a screwdriver, pry out the lower interior light lens, disconnect the connector and remove the bulb.
5. Using a small screwdriver, remove seat memory switch (2). Disconnect the connector and remove the switch.
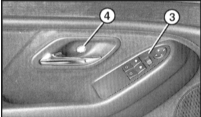
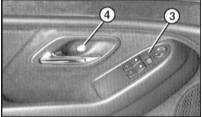
6. Using a small screwdriver, remove window regulator and outside mirror control panel (3).
7. Remove the connector as follows:
- Connector 1: Press the latch on the side with a small screwdriver without removing it. The switch is removed upward by the lever mechanism.
- Connector 2: Press down the locking hook and tilt the locking clip to the side. The switch is removed upward.
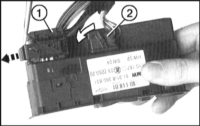
8. Remove the control panel.
9. Remove the cover (4) from the door handle recess and unscrew the bolt located underneath it.
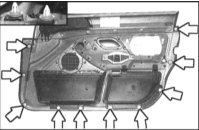
10. Detach the door trim panel from the side and bottom. To do this, pull the edges of the trim panel with your fingers. The location of the clips (arrows) is shown in the illustration.
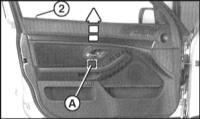
11. Move the trim panel upward and release it from the center clip and the upper retainers. The clip is located on the inner side of the trim panel at area (A).
12. Pull the door operating rod through the opening in the trim panel.
13. Lift and remove the trim panel under the door lock button (2).
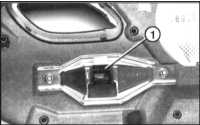
14. If the center clip (1) remains on the door, remove it as shown in the accompanying illustration and attach it to the trim panel.
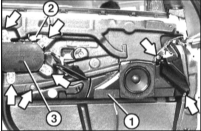
15. Disconnect the speaker cable. Unscrew the mounting screws and remove the speaker box (1).
* Observe safety precautions when working with the airbag; refer to the section Airbag Safety Precautions.
16. Disconnect the side airbag connector (orange). Unscrew the mounting screws and place the side airbag with its cover facing up, for example in the luggage pocket.
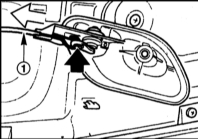
17. Disconnect cable (1) from the inner door handle and remove it.
8. If necessary, carefully remove the foam trim panel from the inside of the door.
* To keep the adhesive seal on the foam, it is recommended to remove it in short pulls at low temperature.
INSTALLATION
1. Carefully glue the foam trim panel to the door.
* Avoid damaging the trim panel, as this may cause draughts in the cabin. Adhesive must be applied along the entire edge of the trim panel.
2. Connect the cable to the inner door handle.
3. Secure the side airbag to the door. Connect the connector.
4. Secure the speaker box and connect the connector.
5. Check that all inner door trim clips are present. Replace any damaged clips.

6. Install the trim panel. Pass the inner door handle and electrical wires through the openings. Route the sound insulation (1) around the window regulator cable and glue it into the trim panel opening. Make sure the door operating rod is seated in the plastic support.
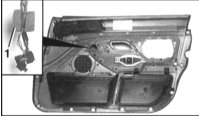
7. Insert the top of the trim panel over the lock button. Position it at the level of the door sill strip, slightly pull up from below and secure it with fingertips at an angle downward toward the door in the five upper retainers.

Additions to Removal and Installation of Rear Door Trim Panel
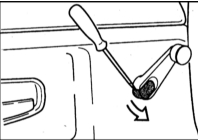
Remove the door handle (refer to the accompanying illustration)
a) Pry off the cover with a screwdriver.
b) Unscrew the screw underneath it.
c) Remove the window regulator handle from the spindle and remove the glass.
Test yourself
A quick BMW 1 quiz: every answer comes with an explanation and a link to the manual page.