Hood Position Adjustment
The cable drive of both hood latches must have no play. The cable sheath must be fully seated in the latch guide. Otherwise, when the hood release is operated, the cable may slip in the guide, making it impossible to open the latches.
* If the adjusted hood shifts from its position, unpainted areas will be visible.
PROCEDURE
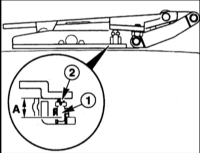
1. Adjust the position of the stop screw (1) of the left and right hinges so that dimension A = 25 ± 1 mm.
2. Check the stop (2). If necessary, replace the hinge
Hood Release Cable Adjustment
PROCEDURE
1. Adjust the position of the hood using the adjusting device. Refer to the accompanying illustration.
* The cable must not be taut. The illustration shows the cable and latches in an inset detail.
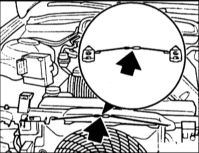
2. If necessary, adjust the travel of the hood release cable using the adjusting screw (arrow in the accompanying illustration).
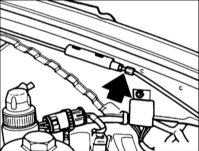
3. Screw the stop in fully.
Hood Lateral Position Adjustment
1. Refer to the accompanying illustration.
PROCEDURE
1. Loosen mounting bolts (1) and (2) of the left and right hinges so that the hood can be moved sideways.
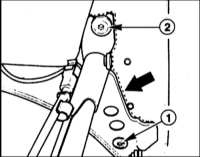
2. Close the hood and align it with respect to the right and left fenders.
* If the adjustment range is insufficient, loosen the hood hinge mounting bolts to the body and shift the hinges relative to the body.
3. Carefully open the hood and tighten the hood bolts.
Rear Hood Height Adjustment
PROCEDURE
1. Adjust the hood height at the hinge area. To do this, close the hood and measure the hood height deviation relative to the fenders.
2. Open the hood and support it with a prop or have an assistant hold it.
3. Loosen bolts (1) and (2) and, depending on the deviation from the correct position, remove or insert shims.

4. Tighten the mounting bolts on the left and right.
5. Check the height position again. If necessary, repeat the adjustment.
Front Hood Height Adjustment
PROCEDURE
1. Loosen the latch pivot mounting bolts so that they can move.
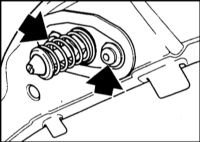
2. Close the latch several times so that the latches align.
* Do not latch the hood closed.
3. Tighten the latch pivot mounting bolts.
4. Loosen the lock nut (1) and turn the latch pivot with a screwdriver.
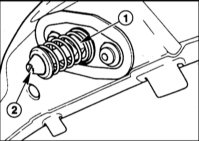
5. In this way, adjust the hood to be level with respect to the fenders. Make sure the gap to the trim is parallel.
6. Tighten the lock nut.
7. Check that the latches engage securely. If necessary, repeat the adjustment.
Bumper Stop Adjustment
PROCEDURE
1. Open the hood.
2. Turn the stop so that the hood is under some pressure. To do this, make two plasticine posts approximately 10 mm high. Place them under the stops and close the hood. Then open the hood and measure the height of the stops and the compressed posts. Turn the stops by the obtained height value minus 0.5 mm. Adjust all stops in this way.
3. Check that the hood rests on all stops without gaps. If necessary, repeat the adjustment.
* The hood must not protrude beyond the fenders. Otherwise, wind noise occurs while driving.
4. Measure the hood protrusion above the headlamp lens. It must be A = 4 ± 1 mm. Otherwise, adjust the headlamp position.
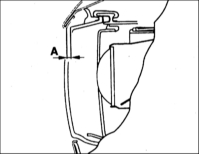
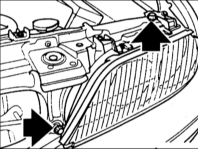
5. Loosen the bolts (arrows in the accompanying illustration) and shift the headlamp forward or backward.
* Do not apply pressure to the headlamp. If necessary, shift the lower mounting bolts.
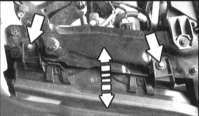
6. If the headlamp was shifted, check its adjustment.
Test yourself
A quick BMW 1 quiz: every answer comes with an explanation and a link to the manual page.