Removal and Installation of Front Bumper

1 — cover
2 — opening grille
3 — closing grille
4 — visor
5 — lining
6 — visor
7 — lining
8 — grille
9 — seal
10 — cover
11 — visor
12 — stop plate
13 — beam
14 — buffer
15 — bolt
The front bumper is designed so that it withstands an impact at vehicle speeds up to 4 km/h without damage. In this case, the impact energy is absorbed by the internal aluminum beam and two hydraulic dampers. The dampers are attached to two easily detachable deformable elements, the so-called impact boxes. At speeds up to 15 km/h, the energy is absorbed by deformation of the hydraulic dampers and impact boxes, which prevents damage to the engine beams.
REMOVAL
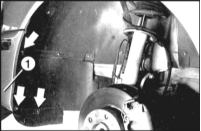
1. Remove the three outer bolts securing the wheel arch liners, left and right. Remove the liners from the side of the bumper (1). Refer to the accompanying illustration.
* It is not necessary to remove the front wheels.
2. Disconnect and remove the decorative grille from the top.
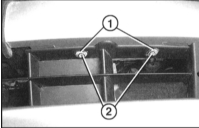
3. Remove the Torx T50 bolts securing the bumper to the dampers, left and right, and remove the bumper.

4. Disconnect the connector of the fog lamps and/or disconnect the headlamp washer hoses. Pinch the hoses with clamps to prevent fluid from leaking.
INSTALLATION
1. If necessary, assemble the bumper assembly.
2. Install the bumper horizontally with the help of an assistant. Connect the fog lamp connector and/or connect the headlamp washer hoses.
3. Insert the bumper into the side guides and press it in.
4. Align the bumper parallel to the body and secure it with the screws, torque 40 N·m.
5. The gap between the bumper and the body must be A = 5 ± 1 mm.
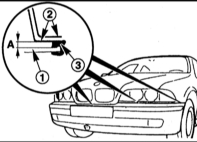
6. Adjust the bumper height by turning the plastic inserts (5) in the dampers.
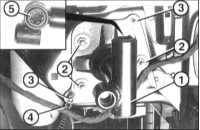
7. Install the decorative grille, insert the rivets and press them flush.
8. Secure the front wheel arch liner.
Test yourself
A quick BMW 1 quiz: every answer comes with an explanation and a link to the manual page.