Audio System (Vehicles with GPS) - Radio Station Search
In any band, the radio allows tuning in five ways:
manually (TUNE), semi-automatically (SEEK), automatically by scanning the band and tuning (SCAN), by automatically programming all automatic preset buttons with stations (AUTO SELECT), or by pressing one of the fixed preset buttons for preprogrammed radio stations.
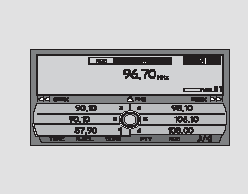
MANUAL TUNING (TUNE): The TUNE switch is used for smooth manual tuning to the desired radio station. Pressing the side of the switch increases the tuning frequency of the radio, and pressing the other side of the

switch decreases the frequency.
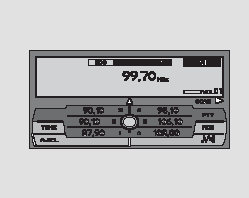
To tune to a station using the interface switch, press the lower part of the selector, then turn the knob to switch to manual tuning mode. Press the ENT (Enter) button on the interface switch, then turn the knob to tune to the required radio frequency. When tuning is complete, press the ENT (Enter) button.
SEMI-AUTOMATIC TUNING (SEEK):
When the SEEK button is pressed, the radio searches the current band for a station with a strong signal and tunes to it.
To activate the radio search mode, press and release the left or right

side of the SEEK button. When using the interface switch, press the right or left side of the selector.
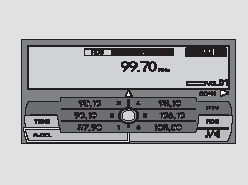
Automatic tuning in scan mode (SCAN): The radio searches the entire selected band for stations with strong signals. To activate scan mode, press and release the SCAN button. The SCAN indicator will appear on the display. You can also enter scan mode by first pressing the lower part of the interface selector switch, then pressing its right side.
When a station with a strong signal is found, the search stops, and the radio receives the broadcast on that frequency for approximately 10 seconds.
If no buttons are pressed during this time, the radio resumes scanning the band and searches for the next station, which it also receives for approximately 10 seconds. If a station you want to listen to is found during scanning, press the SCAN button again or press the right side of the interface selector switch.
Preset buttons: Each preset button can store one station in the AM (MW) or LW band and two stations in the FM band. To view the frequencies assigned to the preset buttons, press the AUDIO button.
1. Select the required radio band: AM (MW), LW, or FM. To program any preset button for two FM stations, use the FM1 and FM2 sub-bands.
2. Use the TUNE, SEEK, or SCAN buttons to tune the radio to the desired station.
3. Select one of the preset buttons for this station, then press and hold it until you hear a short beep.
To store the frequency shown on the display as a preset icon in the system memory, first press the AUDIO button to display the audio system window on the screen.
Then turn the interface selector switch to highlight the preset icon. The selected icon will be highlighted on the screen. Press and hold the ENT (Enter) selector button for 2 seconds or longer to store the setting.
4. Repeat steps 1 through 3 to store the frequencies of all six AM (MW) and LW stations and all twelve FM stations in the radio memory.
AUTOMATIC MEMORY PROGRAMMING (AUTO SELECT):
If you are away from home and the radio can no longer receive the stations it was preset to, you can quickly reprogram all preset buttons to local stations automatically.
To activate automatic memory programming, press the A.SEL button. The A.SEL indicator will appear on the side display, and the radio will scan all bands for several seconds and store the frequencies of the stations with the strongest signals. The radio automatically stores six FM stations and assigns them to the preset (icon) buttons.
To activate automatic memory programming using the interface selector switch, press the AUDIO button to display the audio system window on the screen, then press the lower part of the interface selector switch and turn it to select the A.SEL icon. Press the ENT (Enter) selector button.
The flashing A.SEL indicator will appear on the side display, and the radio will enter scan mode for several seconds.
The radio may not find enough local stations with strong signals. In this case, pressing the corresponding preset button will display the "0" indicator.
If you do not like the stations found automatically, you can manually reprogram some preset buttons to other stations as described above.
To deactivate automatic memory programming, press the A.SEL button or the ENT (Enter) button again. Access to the originally stored station frequencies will be restored.
Test yourself
A quick Honda Civic quiz: every answer comes with an explanation and a link to the manual page.