Climate Control System - Vehicles Equipped with Navigation System
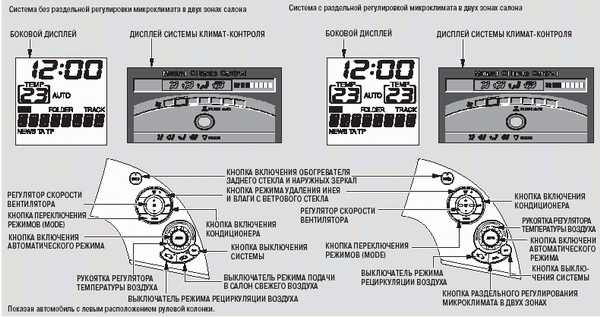
Climate Control System - Vehicles Equipped with Navigation System
Voice control system
For vehicles equipped with a navigation system
In addition to the conventional climate control system controls, you can operate the system using the voice control system.
For more detailed information, refer to the separate Navigation System Owner's Manual.
Automatic Climate Control System
To fully activate automatic climate control operation, perform the following steps:
1. Press the AUTO button built into the temperature control knob.
2. Use the rotary knob to set the desired air temperature supplied to the passenger compartment. The information display will show the AUTO icon and the set temperature.
The system automatically selects the optimal mix of heated and air-conditioned air to reach the required cabin temperature as quickly as possible.
If you set the minimum ( ) or maximum (
 ) the temperature setting, the system will supply the entire airflow only from the air conditioner or from the heater, respectively. In this case, automatic control of the cabin air temperature is not performed.
In cold weather, the blower does not turn on until the heater is ready to deliver warm air to the cabin.
For vehicles equipped with a dual-zone climate control system: If the indicator built into the DUAL switch is illuminated, you can independently adjust the air temperature for the driver and front passenger zones (see page 209).
Turning Off the Heating, Ventilation and Air Conditioning Systems
The climate control system is completely turned off by pressing the OFF button.
Do not turn off the climate control system for extended periods of time.
It is recommended that the cabin fan remain on at all times to prevent stagnant air and unpleasant odors in the cabin.
Semi-Automatic Operation of the Climate Control System
During fully automatic operation, you can manually set the desired mode for any system function:
blower speed, temperature, etc. The system will continue to control all other functions automatically.
However, the word AUTO will disappear from the climate control display.
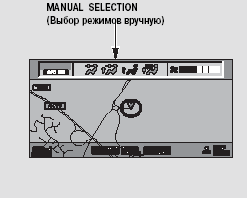
If you make any manual adjustment, the current status of the climate control system will be shown in the upper part of the information display. Approximately 5 seconds after completing the adjustments, the climate control display turns off. To confirm manual settings, press the CLIMATE button on the navigation system control panel.
You can manually adjust the climate control settings using the selector on the navigation system interface rotary switch knob. Each time the lower part of the selector is pressed, the function switches between fan speed adjustment mode and airflow distribution mode, and back. To set the fan speed or airflow distribution mode, respectively, turn the switch knob. The selected modes are shown on the display.
For information on using the interface rotary switch, see page 188.
Air Conditioner Switch
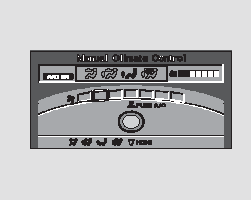
Press the CLIMATE button to display air conditioning information.
The air conditioning is turned on and off by pressing the ENT button located in the center of the interface rotary switch. The display shows A/C ON or A/C OFF, respectively.
The air conditioning can also be turned on or off using the A/C button on the side panel.
After the air conditioner has been turned off manually, the climate control system will not be able to maintain the set temperature of the air supplied to the cabin if it is lower than the ambient air temperature.
Recirculation Button
For vehicles equipped with dual-zone automatic climate control
When the recirculation indicator is illuminated, air circulates within the vehicle cabin in a closed loop. When the recirculation indicator is off, outside air enters the cabin.
Fresh Air and Recirculation Switches
For vehicles not equipped with dual-zone automatic climate control
These switches are used to select the source of air supplied to the air conditioning system. In fresh air mode
outside air is supplied into the cabin. In recirculation mode
air circulates inside the cabin.
Outside air enters the climate control system through the air intake grille located in front of the windshield. Periodically clear the air intake grille openings of leaves and other debris that obstruct airflow.
In the vast majority of cases, the best performance of comfort climate systems is achieved in outside air mode. Prolonged use of recirculation mode, especially with the air conditioner off, causes moisture to condense on the windows.
Therefore, it is recommended to use recirculation mode only when necessary, for example, when driving in areas with smoky or polluted air. Once it is no longer necessary to isolate the cabin from outside air, turn off recirculation mode.
Fan Speed Control
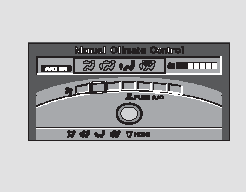
Press the CLIMATE button to display air conditioning information.
To select fan speed adjustment mode, press the center button on the interface rotary switch.
Turn the interface rotary switch to increase or decrease fan speed, which controls the volume of air entering the passenger compartment.
The fan speed is shown on the display as a bar indicator. Select the fan speed by pressing the upper or lower side of the button (
or ). You can also set the fan speed by turning the interface rotary switch knob.
Dual-Zone Climate Control Switch
For vehicles equipped with dual-zone automatic climate control
If this button is pressed (the indicator built into it is illuminated), you can independently adjust the air temperature for the driver and front passenger zones.
If the indicator built into the DUAL button is not illuminated, the same temperature is set in both zones when adjusting with the rotary knob on the driver's side.
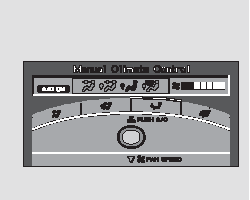
Changing Airflow Distribution Modes
Press the CLIMATE button to display air conditioning information.
then press the selector of the interface rotary switch. Turn the interface rotary switch to select the ducts through which air will enter the passenger compartment. Some air will enter the passenger compartment through the side vents regardless of the selected mode.
The MODE button on the side panel can also be used to select the ducts.
Each time the MODE button is pressed, the selected mode is shown on the display.

The main airflow enters the cabin from the center and side ventilation grilles on the instrument panel.

Airflow enters the cabin from the center and side ventilation grilles on the instrument panel, as well as from the lower ventilation outlets.

Airflow comes from the lower vents and side vents.

Airflow enters the cabin from the slot-type windshield defroster outlets, as well as from the lower and side ventilation outlets.
Windshield Defrost Button
Pressing this button directs the main airflow to the windshield to quickly clear it of frost and moisture. The previously active airflow mode is canceled.
When the button is pressed,
outside air mode is automatically activated (on some air conditioners), and the air conditioner turns on. To speed up windshield defrosting, it is recommended to manually set a high blower speed. It is also recommended to temporarily close the side ventilation grilles on the instrument panel.
If you want to turn off the mode
press the button again. The system will return to normal operation.
For safety reasons, do not start driving until all vehicle windows are clear of condensation, frost, or ice, so that you have a clear view from the vehicle.
Rear Window Defogger switch
This switch is used to turn the rear window defogger on and off (see page 145).
This button, together with the rear window defroster, also turns the electric heaters of the outside rearview mirrors on and off.
Test yourself
A quick Honda Civic quiz: every answer comes with an explanation and a link to the manual page.