Removal and Installation of Rear Suspension Arms - Front Trailing Arm, Trailing Arm, Control Arm
Front Trailing Arm
PROCEDURE
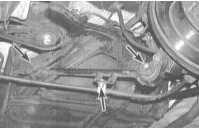
1. Disconnect the parking brake cable support bracket from the trailing arm.
2. Remove the bolt securing the trailing arm to the hub carrier assembly.
3. Remove the bolt securing the trailing arm to the chassis.
4. Remove the front trailing arm.
5. Inspect the bushing installed in the front of the arm. Replace the arm if defects are found.
6. Install in the reverse order of removal. Make sure all fasteners are tightened to the specified torque.
Trailing Arm
PROCEDURE
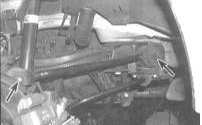
1. Remove the bolt securing the trailing arm to the hub carrier assembly.
2. Remove the bolt securing the arm to the chassis.
3. Remove the arm.
4. Inspect the bushing installed at the inner end of the arm. Replace the arm if defects are found.
5. Install in the reverse order of removal. Make sure all fasteners are tightened to the specified torque.
Control Arm
PROCEDURE
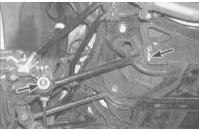
1. Loosen the nut (see accompanying illustration).
2. Mark the position of the adjusting cam relative to the support bracket at the inner end of the arm. Loosen the nut and remove the bolt securing the arm to the chassis.
3. Remove the arm.
4. Inspect the rubber bushings of the arm. Replace the arm if defects are found.
5. Install in the reverse order of removal. Make sure the alignment marks made during removal are matched correctly (refer to paragraph 2). Tighten all fasteners to the specified torque.
Test yourself
A quick Honda Accord quiz: every answer comes with an explanation and a link to the manual page.