Steering Knuckle Removal
PROCEDURE
If the wheel cover is not secured by the wheel nuts, start with step 4.
1. Loosen the wheel nuts, raise the front of the vehicle and support it on safety stands.
2. Remove the wheel nuts and the decorative wheel cover from the wheel, then remove the wheel.
3. Using a drift, stake the hub nut washer, then reinstall the wheel without the cover and lower the vehicle to the ground.
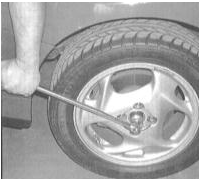
4. Using a long-handled socket wrench, loosen the hub nut.
5. Loosen the wheel nuts, raise the front of the vehicle and support it on safety stands. Remove the wheel and the hub nut.
6. Release the flexible brake hose from the bracket on the steering knuckle assembly. Unbolt the brake caliper and secure it with wire to the coil spring. Also remove the caliper bracket and the brake disc (refer to Brake System section).
7. Remove the two mounting screws and remove the brake disc from the hub assembly (refer to Brake System section).
8. Remove the ABS wheel speed sensor (refer to Brake System section).
9. Disconnect the tie rod end from the steering knuckle (refer to Tie Rod End Removal and Installation).
10. Separate the lower control arm from the ball joint at the bottom of the steering knuckle (refer to Front Lower Control Arm Removal and Installation).
11. Separate the upper end of the knuckle from the upper control arm ball joint (refer to Front Upper Control Arm Removal and Installation).
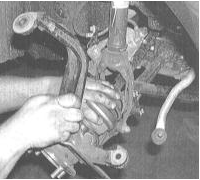
12. Carefully pull the knuckle and hub assembly outward, removing it from the drive shaft stub axle. If necessary, tap the end of the stub axle with a soft-faced hammer to release the CV joint from the hub. Secure the drive shaft assembly with wire to prevent damage to the inner CV joint.
13. If the wheel hub bearing needs to be replaced, take the steering knuckle assembly to a repair shop.
Test yourself
A quick Honda Accord quiz: every answer comes with an explanation and a link to the manual page.