Removal and Installation of Steering Tie Rod Ends
REMOVAL
PROCEDURE
1. Loosen the wheel nuts of the applicable wheel. Raise the front of the vehicle and support it on stands. Remove the wheel.
2. Hold the tie rod end from turning with a second wrench, and loosen the lock nut. Unscrew the nut far enough to make it possible to mark the position of the end on the exposed threads of the rod.
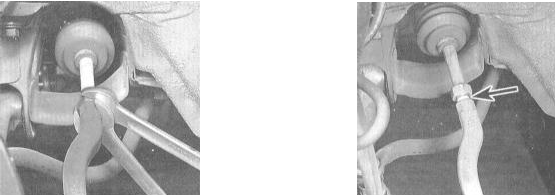
3. Remove the cotter pin and loosen the ball stud nut of the tie rod end. Do not remove the nut completely yet.
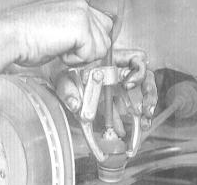
4. Using a 2-jaw puller, release the ball stud of the tie rod end from the steering knuckle arm. Remove the nut and separate the tie rod from the knuckle.
5. Unscrew and remove the tie rod end from the rod.
INSTALLATION
PROCEDURE
1. Screw a new tie rod end onto the rod, up to the alignment mark made during removal on the exposed threads. Insert the ball stud of the tie rod end into the steering knuckle arm. Do not tighten the tie rod end lock nut yet.
2. Install the castle nut onto the ball stud and tighten it to the specified torque. Secure the nut with a new cotter pin.
3. Tighten the tie rod end lock nut securely.
4. Install the wheel, lower the vehicle to the ground, and tighten the wheel nuts to the specified torque (refer to Specifications in the Maintenance and Adjustment Chapter).
5. Take the vehicle to a specialist workshop to check and adjust the front wheel alignment.
Test yourself
A quick Honda Accord quiz: every answer comes with an explanation and a link to the manual page.