Removal and Installation of Rear Suspension Arms - Upper Arm, Lower Arm
PROCEDURE
Loosen the wheel nuts of the applicable wheel. Raise the rear of the vehicle and support it on safety stands. Remove the wheel.
Upper Arm
PROCEDURE
1. Remove the nut from the through bolt securing the upper suspension arm to the hub carrier assembly. Also remove the ball joint stud nut from the arm support. Using a 2-jaw puller, separate the arm from the hub carrier assembly.
2. Remove the bolts securing the brake hose bracket and move the brake line aside.
3. On models equipped with ABS, remove the wheel speed sensor to prevent accidental damage to its wiring.
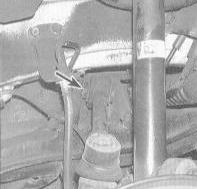
4. Remove the bolt securing the inner end of the upper arm to the chassis.
5. Remove the upper arm. Inspect the arm rubber bushings, check for play and the degree of ball joint wear. Replace worn or damaged components.
6. Install in the reverse order of removal. Make sure all fasteners are tightened to the specified torque. Be sure to secure the ball joint castellated nut with a new cotter pin (refer to the Note to paragraph 1 in the Removal and Installation of Steering Knuckle section).
Lower Arm
PROCEDURE
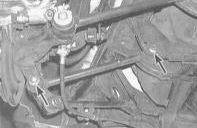
1. Remove the nut from the bolt securing the lower arm to the hub carrier assembly.
2. Remove the pivot bolt securing the inner end of the lower arm to the chassis.
3. Remove the lower arm assembly.
4. Inspect the rubber bushings and replace the arm if necessary.
5. Install in the reverse order of removal. Make sure all fasteners are tightened to the specified torque.
Test yourself
A quick Honda Accord quiz: every answer comes with an explanation and a link to the manual page.