Single-Use Parts

Interior Trim

19steps
~114min
4/5difficulty
0102030405011.89N·mlb·ft
Tightening torque found on this page
Done 0 of 19

Contents:

Components and Components Location

Component

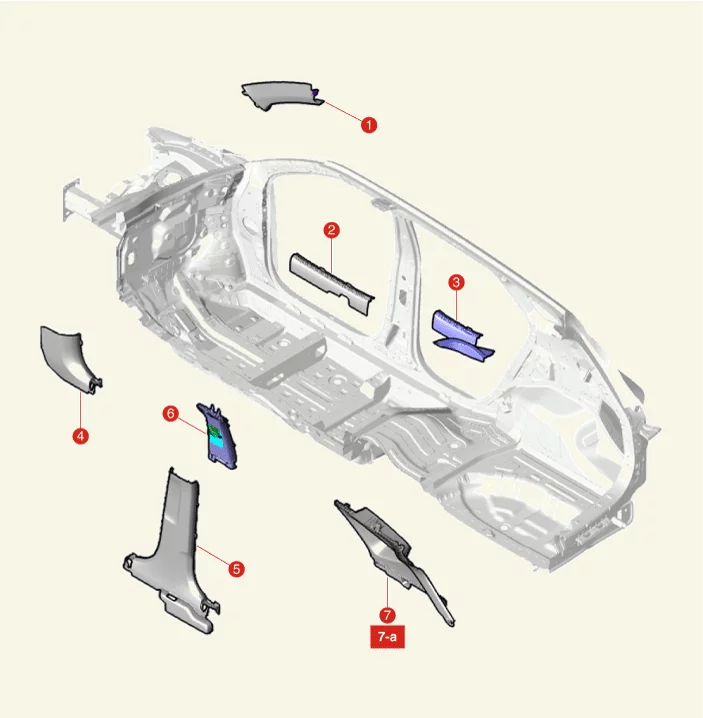
Body (Interior and Exterior) — Interior Trim / Components and Components Location / Component illustration
1. Front Pillar Trim
2. Front Door Scuff Trim
3. Rear Door Scuff Trim
4. Cowl Side Trim
5. Center Pillar Lower Trim
6. Center Pillar Upper Trim
7. Rear Pillar Trim
7-a. 7.8 - 11,8 N·m

Front Pillar Trim Removal and Installation

Removal

  1. Remove the front door body side weatherstrip. (Refer to Front Door - "Front Door Weatherstrip")
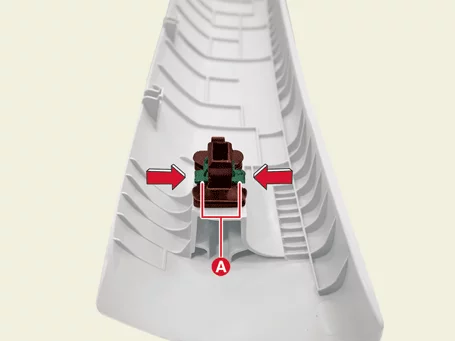
  2. Press the hook (A) to release the clip after removing the front pillar trim.
    Body (Interior and Exterior) — Interior Trim / Front Pillar Trim / Removal and Installation / Removal illustration
    Note
    When the clip is removed once, be sure to replace it with a new one.
    Body (Interior and Exterior) — Interior Trim / Front Pillar Trim / Removal and Installation / Removal illustration
    Front Pillar Trim Mounting Clip Separation (Play ▶)Body (Interior and Exterior) — Interior Trim / Front Pillar Trim / Removal and Installation / Removal illustration

    Video: Front Pillar Trim Mounting Clip Separation

    Notes When Refering Video This video helps clearly identify areas that are hard to distinguish in manual images, such as component locations or assembly structures. It also allows visual confirmation of areas that are difficult to see directly due to restricted visibility caused by surrounding components, from a technician’s perspective.
    • This video is created using common specifications and may differ from the actual vehicle.
    • The location and repair procedures of the parts may vary depending on vehicle model, model year, region, and specifications.
    • Check the KDS guide for detailed information on how to use the KDS.
    • Check the manual for detailed maintenance procedures.
    • Unauthorized reproduction, distribution, or sharing of this video is prohibited.
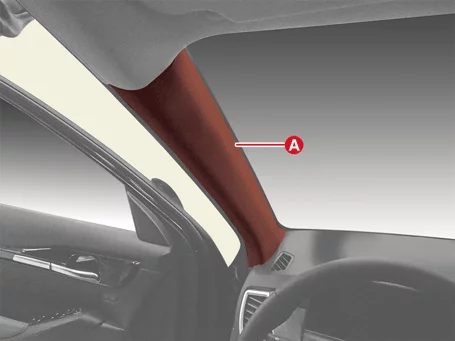
  3. Remove the front pillar trim (A).
    Body (Interior and Exterior) — Interior Trim / Front Pillar Trim / Removal and Installation / Removal illustration
    Body (Interior and Exterior) — Interior Trim / Front Pillar Trim / Removal and Installation / Removal illustration
    Information
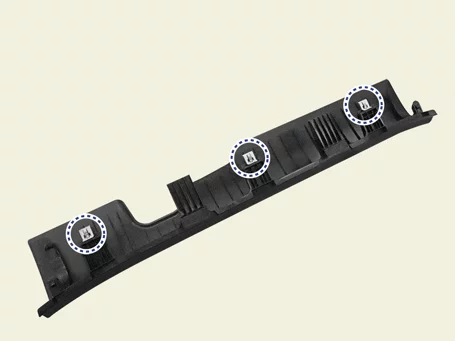
    Clip position :
    Body (Interior and Exterior) — Interior Trim / Front Pillar Trim / Removal and Installation / Removal illustration

Installation

  1. Install in reverse order of removal.

Door Scuff Trim Removal and Installation

Removal

Front Door Scuff Trim
  1. Remove the front door body side weatherstrip. (Refer to Front Door - "Front Door Weatherstrip")
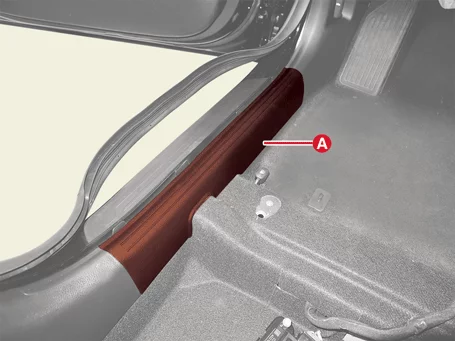
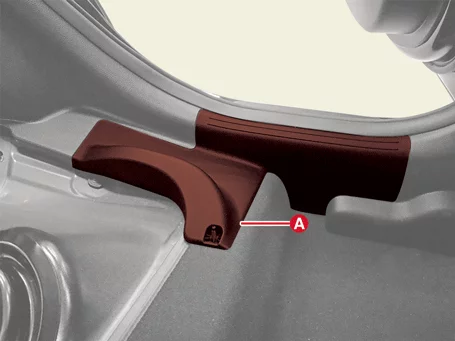
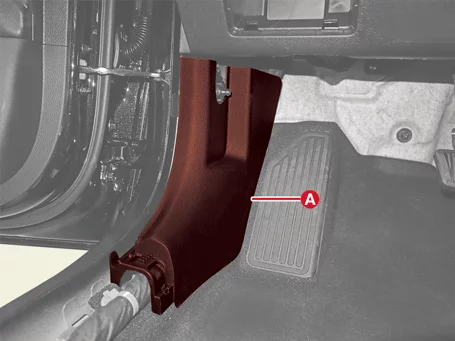
  2. Remove the front door scuff trim (A).
    Body (Interior and Exterior) — Interior Trim / Door Scuff Trim / Removal and Installation / Removal illustration
    Body (Interior and Exterior) — Interior Trim / Door Scuff Trim / Removal and Installation / Removal illustration
    Information
    Clip position :
    Body (Interior and Exterior) — Interior Trim / Door Scuff Trim / Removal and Installation / Removal illustration
  3. Remove the rear seat cushion assembly. (Refer to Rear Seat - "Rear Seat Assembly")
  4. Remove the rear door body side weatherstrip. (Refer to Rear Door - "Rear Door Weatherstrip")
  5. Remove the rear door scuff trim (A).
    Body (Interior and Exterior) — Interior Trim / Door Scuff Trim / Removal and Installation / Removal illustration
    Body (Interior and Exterior) — Interior Trim / Door Scuff Trim / Removal and Installation / Removal illustration
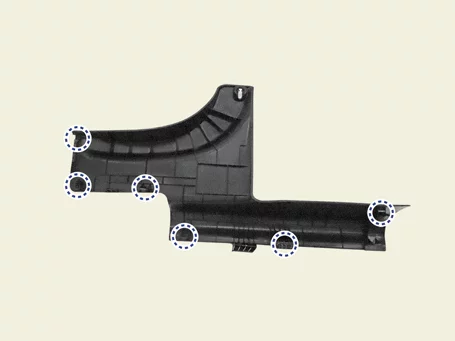
    Information
    Clip position :
    Body (Interior and Exterior) — Interior Trim / Door Scuff Trim / Removal and Installation / Removal illustration
Rear Door Scuff Trim

Installation

  1. Install in reverse order of removal.

Cowl Side Trim Removal and Installation

Removal

  1. Remove the front door scuff trim. (Refer to Interior Trim - "Door Scuff Trim")
  2. Remove the hood latch release handle. [Driver's side] (Refer to Hood - "Hood Latch Release Handle")
  3. Remove the cowl side trim (A).
    Body (Interior and Exterior) — Interior Trim / Cowl Side Trim / Removal and Installation / Removal illustration
    Body (Interior and Exterior) — Interior Trim / Cowl Side Trim / Removal and Installation / Removal illustration
    Body (Interior and Exterior) — Interior Trim / Cowl Side Trim / Removal and Installation / Removal illustration
    Information
    Clip position :
    Body (Interior and Exterior) — Interior Trim / Cowl Side Trim / Removal and Installation / Removal illustration

Installation

  1. Install in reverse order of removal.

Center Pillar Trim Removal and Installation

Removal

Center Pillar Lower Trim
  1. Remove the front, rear door scuff trim. (Refer to Interior Trim - "Door Scuff Trim")
  2. Remove the center pillar lower trim (A).
    Body (Interior and Exterior) — Interior Trim / Center Pillar Trim / Removal and Installation / Removal illustration
    Information
    Clip position :
    Body (Interior and Exterior) — Interior Trim / Center Pillar Trim / Removal and Installation / Removal illustration
  3. Remove the center pillar lower trim.
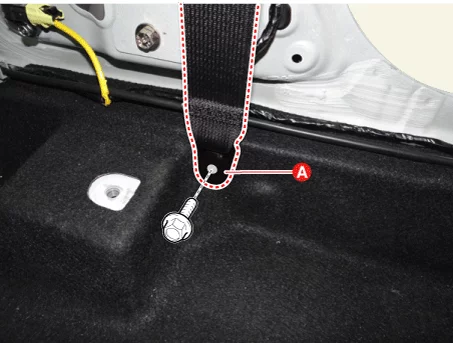
  4. Remove the front seat belt lower anchor (A) after removing the bolt.

    Tightening torque : 39.2 - 54 N·m

    Body (Interior and Exterior) — Interior Trim / Center Pillar Trim / Removal and Installation / Removal illustration
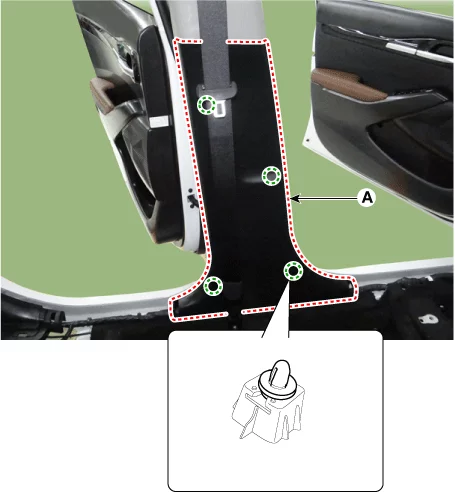
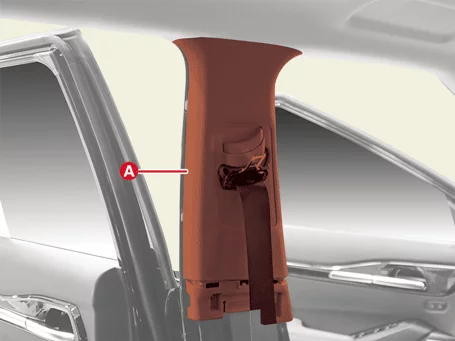
  5. Remove the center pillar upper trim (A).
    Body (Interior and Exterior) — Interior Trim / Center Pillar Trim / Removal and Installation / Removal illustration
    Body (Interior and Exterior) — Interior Trim / Center Pillar Trim / Removal and Installation / Removal illustration
    Information
    Clip position :
    Body (Interior and Exterior) — Interior Trim / Center Pillar Trim / Removal and Installation / Removal illustration
Center Pillar Upper Trim

Installation

  1. Install in reverse order of removal.

Rear Pillar Trim Removal and Installation

Removal

  1. Remove the luggage side trim. (Refer to Tailgate Trim - "Luggage Side Trim")
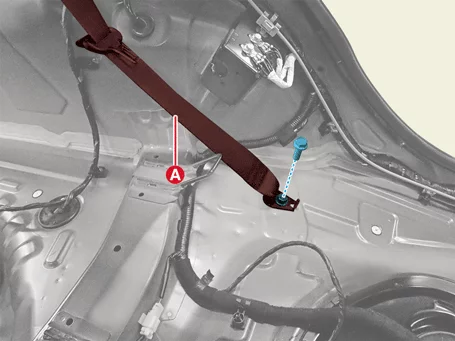
  2. Remove the rear seat belt anchor (A) after removing the bolt.

    Tightening torque : 39.2 - 54 N·m

    Body (Interior and Exterior) — Interior Trim / Rear Pillar Trim / Removal and Installation / Removal illustration
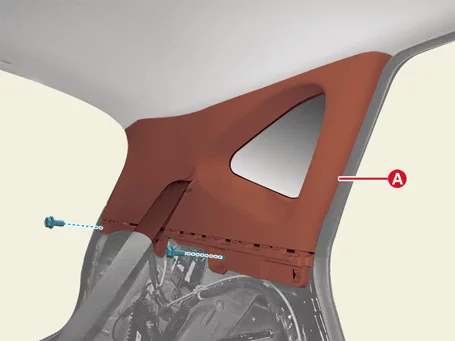
  3. Remove the rear pillar trim (A) after removing the bolts.
    Tightening torque : 7.8 - 11,8 N·m

    Body (Interior and Exterior) — Interior Trim / Rear Pillar Trim / Removal and Installation / Removal illustration
    Body (Interior and Exterior) — Interior Trim / Rear Pillar Trim / Removal and Installation / Removal illustration
    Information
    Clip position :
    Body (Interior and Exterior) — Interior Trim / Rear Pillar Trim / Removal and Installation / Removal illustration

Installation

  1. Install in reverse order of removal.