Single-Use Parts
Tailgate Glass
In this manual: Single-Use Parts
19steps
~114min
4/5difficulty
Done 0 of 19
Contents:
Removal and Installation
Removal
- Remove the tailgate lid trim. (Refer to Tailgate - "Tailgate Lid Trim")
- Remove the rear spoiler. (Refer to Body Side Molding - "Rear Spoiler")
- Remove the rear wiper motor. (Refer to Body Electrical System - "Wiper Motor")
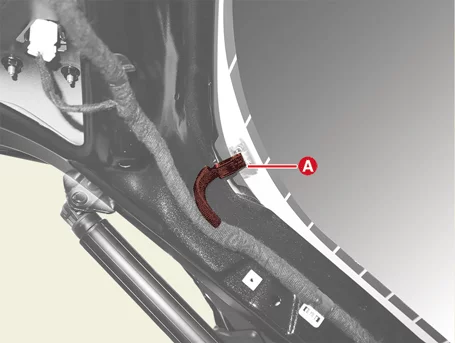
- Disconnect the tailgate heated wire connector (A).
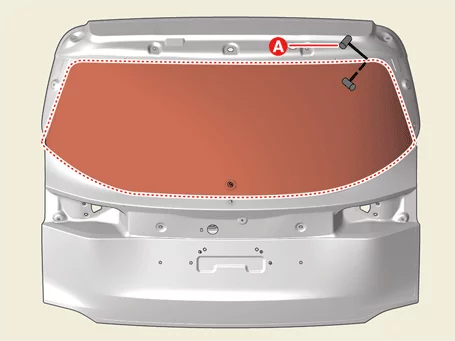
- Insert the piano wire (A) in the corner side.
- Cut the sealant of forward edge side (B) by pulling the piano wire (A) left and right.
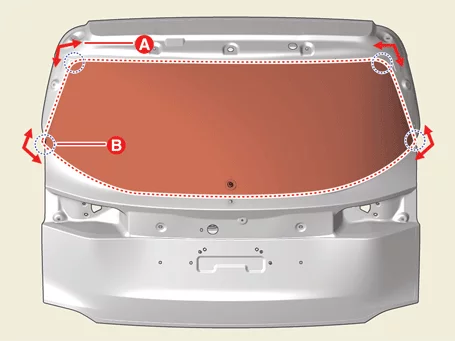

- Be careful not to burn hands as the excessive heat may be generated while using the wire.
- Be careful as the wire may break when working.
- Cut the sealant in the sections (A-A), (B-B), and (C-C) by pulling the piano wire left and right.
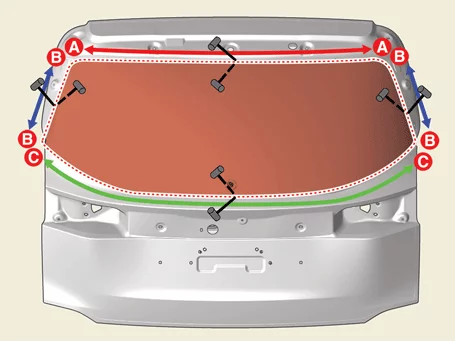
- Be careful not to burn hands as the excessive heat may be generated while using the wire.
- Be careful as the wire may break when working.
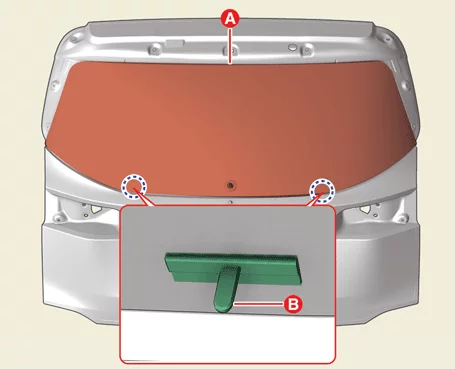
- Remove the tailgate glass (A) carefully using a glass holder (B).
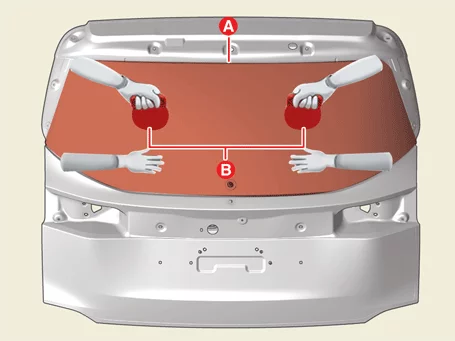
Installation
- Clean the edges of the body panel and the tailgate glass with alcohol, etc.
- Apply the body primer to the edge of the body panel (A).
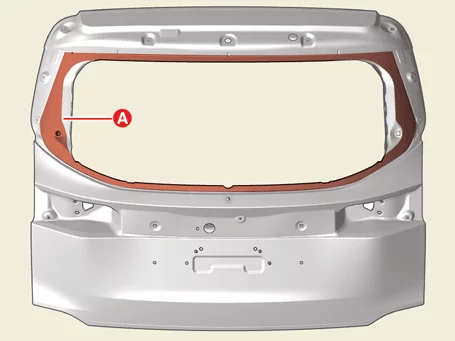

- Be careful not to touch the primed surface with your hands, as water leakage may occur after the tailgate glass is installed.
- Do not apply the glass primer to the body.
- Do not smear the primer-covered surface to any foreign materials.
- Apply the glass primer to the edge of tailgate glass.
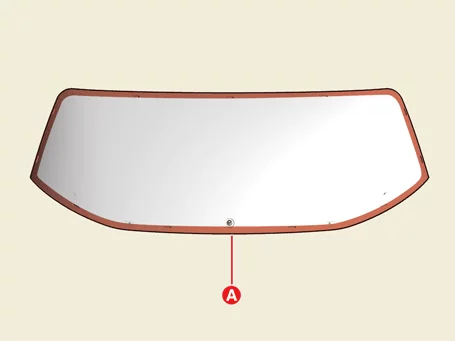
- Be careful not to touch the primed surface with your hands, as water leakage may occur after the tailgate glass is installed.
- Do not smear the primer-covered surface to any foreign materials.
- Apply the sealant (B) around the tailgate glass (A) using the sealant gun.
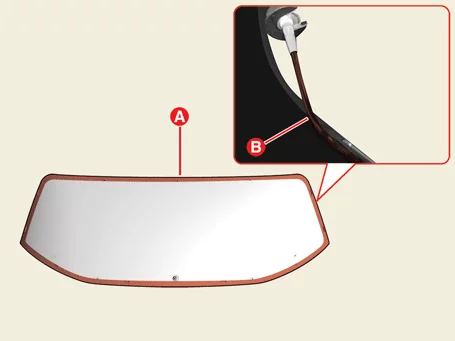
- Using the glass holder, adjust the tailgate glass (A) to stopper hole (B) on the body and carefully tap the tailgate glass to make the edges fully seated on the bonding surface of body.
- Connect the tailgate heated wire connector (A).
- Perform a water leak test at least 3 to 4 hours later after installing the tailgate glass.
Keep the water stream away from directly touching the newly installed adhesive surface and let the water fall on the side of the glass. - If a water leak occurs, apply sealant to the water leak area.
- Leave the car on a flat surface for at least 4 hours after installing the tailgate glass. If driving the car is inevitable, drive at a low speed in least 8 hours.
- The driver should be careful to drive the vehicle aggressively or avoid uneven road driving for 2-3 days.
- Install the rear wiper motor. (Refer to Body Electrical System - "Wiper Motor")
- Install the rear spoiler. (Refer to Body Side Molding - "Rear Spoiler")
- Install the tailgate lid trim. (Refer to Tailgate - "Tailgate Lid Trim")
Was this page helpful?