Single-Use Parts
Windshield Glass
In this manual: Single-Use Parts
29steps
~174min
4/5difficulty
Done 0 of 29
Contents:
Removal and Installation
Removal
- Remove the front pillar trim. (Refer to Interior Trim - "Front Pillar Trim")
- Remove the inside rear view mirror assembly. (Refer to Mirror - "Inside Rear View Mirror")
- Remove the auto defogging sensor. (Refer to Heater and Air Conditioning Unit - "Auto Defogging Sensor")
- Remove the rain sensor. (Refer to Body Electrical System - "Rain Sensor")
- Remove the front view camera unit. (Refer to Advanced Driver Assistance Systems (ADAS) - "Front Camera")
- Remove the cowl top cover. (Refer to Cowl Top Cover - "Removal and Installation")
- Remove the A pillar garnish. (Refer to Body Side Molding - "A Pillar Garnish")
- Insert the piano wire (A) in the corner side.

- While pulling the piano wire (A) in the direction of the arrow, cut out the sealant on the front edge side (B).
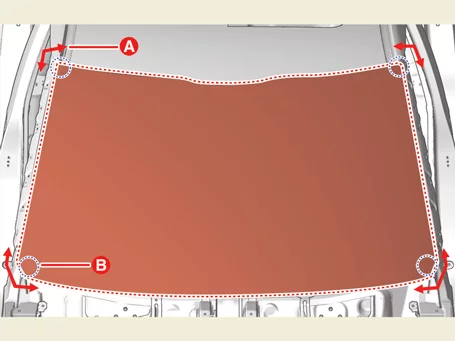

- Be careful not to burn hands as the excessive heat may be generated while using the wire.
- Be careful as the wire may break when working.
- Cut the sealant in sections (A-A) and (B-B) while pulling the piano wire left and right.
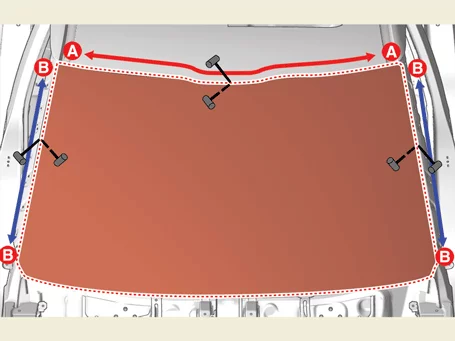
- Cut the sealant in section (A-A) using a cutter knife.

Cut the sealant carefully as it may damage the crash pad when working the area (A-A). Be careful not to damage the body painting surface.
When using a cutter knife, use the blade of a knife with a 20 to 30 cm-long.
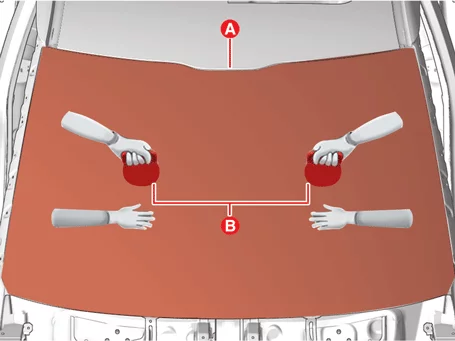
- Carefully remove the windshield glass (A) using the glass holder (B).
- Remove the glass molding (A) using a cutter knife.
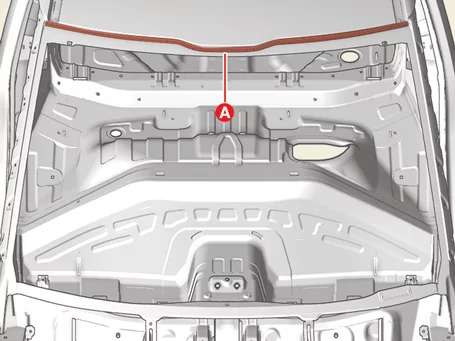
When using a cutter knife, use the blade of a knife with a 20 to 30 cm-long.
Installation
|
- Cut off leaving about 2 mm (0.079 in.) thick sealant at the bonding surface around the body panel by using a cutter knife. Marking the glass and body if a new windshield glass is used.
- Do not damage the body paintwork.
- If the body painting surface is damaged, apply the repair paint or anti-corrosion agent.
- Clean the edges of the body panel and the windshield glass with alcohol, etc.
- Apply the body primer to the edge of the body panel (A).
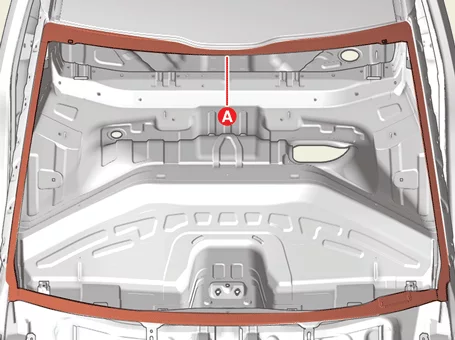
- Be careful not to touch the primed surface with your hands, as water leakage may occur after the windshield glass is installed.
- Do not apply the glass primer to the body.
- Do not smear the primer-covered surface to any foreign materials.
- Apply a body primer to the edge of the body panel.

- Be careful not to touch the primed surface with your hands, as water leakage may occur after the windshield glass is installed.
- Do not apply the glass primer to the body.
- Do not smear the primer-covered surface to any foreign materials.
- Apply the sealant within 5 minutes after applying the primer.
- Attach the glass molding (A) to the windshield glass.
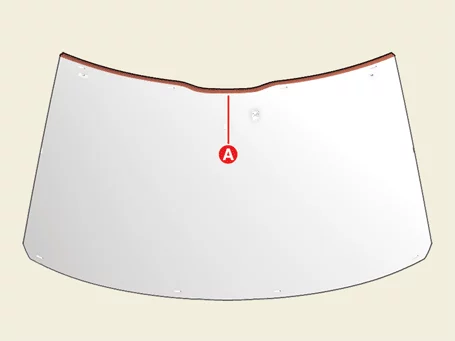
- Apply the sealant (B) around the windshield glass (A) using the sealant.
Sealant Bead Width Height : 12 mm (0.47 in.) Width : 8 mm (0.31 in.)
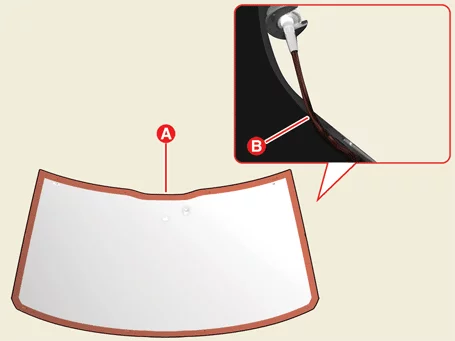
- Align the windshield glass (A) with the stopper hole (B) of the body using a glass holder and press the windshield glass to the body flange surface by carefully tapping.
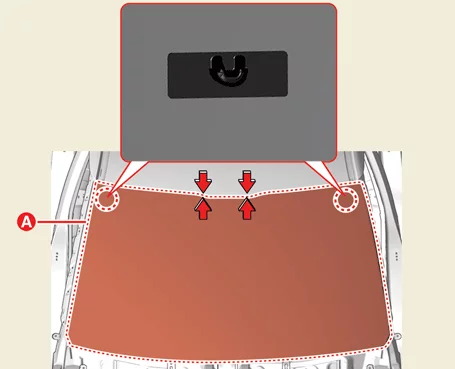
- Test for water leakage.
Keep the water stream away from directly touching the newly installed adhesive surface and let the water fall on the side of the glass. - If water leak occurs, apply sealant to the leak area.
- After installing the windshield glass, park the vehicle on a flat surface for at least 4 hours.
- If the vehicle needs to be used, drive slowly at least for 8 hours.
- The driver should be careful to drive the vehicle aggressively or avoid uneven road driving for 2-3 days.
- Install the front view camera. (Refer to Advanced Driver Assistance Systems (ADAS) - "Front Camera")
- Install the rain sensor. (Refer to Body Electrical System - "Rain Sensor")
- Install the auto defogging sensor. (Refer to Heater and Air Conditioning Unit - "Auto Defogging Sensor")
- Install the inside rear view mirror assembly. (Refer to Mirror - "Inside Rear View Mirror")
- Install the front pillar trim. (Refer to Interior Trim - "Front Pillar Trim")
- Install the A pillar garnish. (Refer to Body Side Molding - "A Pillar Garnish")
- Install the cowl top cover. (Refer to Cowl Top Cover - "Removal and Installation")
When installing the cowl top cover, clean the windshield glass surface that matches the cowl top cover and then install it.
Was this page helpful?