Strut Disassembly / Shock Absorber / Coil Spring Removal and Installation

Shock absorber
Coil spring
Cover cap
Fastening nut, 100 N·m
Strut mount
Spacer
Rubber bump stop
Dust boot and bump stop
Bolt and nut for lower mounting, 70 N·m
Remove the strut assembly, see page 140.
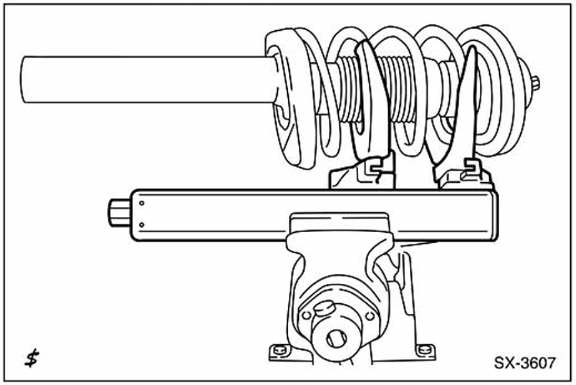
To remove the shock absorber, the coil spring must be compressed. Compress the coil spring with a suitable, commercially available spring compressor.
To protect the spring surface, use a plastic pad.
Warning: never loosen the shock absorber if the spring is not compressed.

Press off the dust boot with a screwdriver.
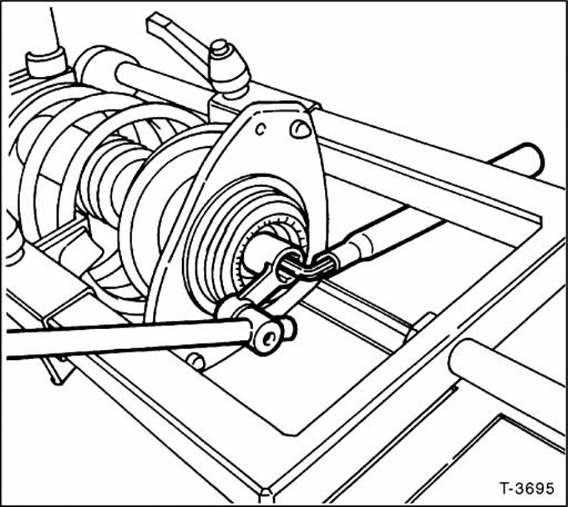
Unscrew the fastening nut for the strut mount. Hold the piston rod with a 6 mm hex key (wrench size 6).
Remove the spring washer and spacer from the piston rod.
Remove the strut mount and upper spring seat.
Remove the shock absorber from the coil spring.
If the spring is to be replaced, slowly release and remove the spring. If only the shock absorber is to be replaced, leave the spring compressed and remove the shock absorber from the spring.
If fitted, remove the dust boot.
Pull the rubber bump stop off the piston rod.
Before installation, check the shock absorber, see page 142.
If necessary, compress the new coil spring. Warning: when buying a replacement spring, note that different spring rates are fitted depending on the model.
Coil springs are divided into 2 classes, which can be identified by a yellow or green paint mark on the main spring coil. Use only coil springs of the same classification.
Slide the bump stop over the piston rod.
If fitted, install the dust boot.
Push the shock absorber through the spring. Make sure the coil spring sits correctly against the recess in the lower spring seat.
Position the upper spring seat so that the end of the spring sits correctly in the recess of the spring seat.
Slide on the strut mount. Install the spacer sleeve and washer. Screw on the nut finger-tight, holding the piston rod with a hex key.
Warning: before tightening the nut, check that the mount is correctly seated on the piston rod.
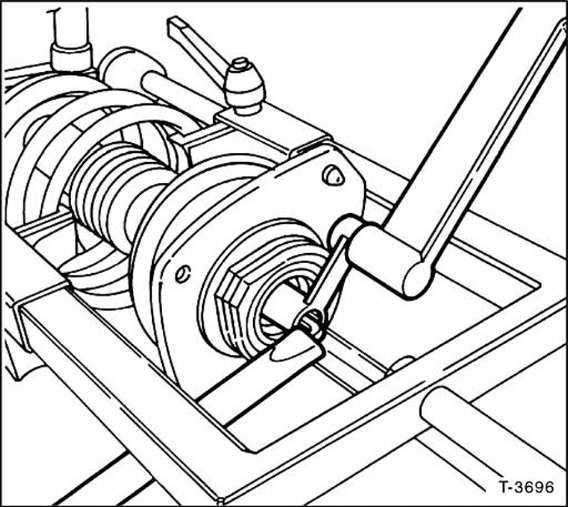
Tighten the flange nut for the upper shock absorber mounting to 100 N·m. Hold the piston rod with a 6 mm hex key.
Slowly release the coil spring. Make sure the spring ends and the mounts sit correctly in the moulded parts of the spring seats.
Install the strut assembly, see page 140.
Test yourself
A quick Fiat Bravo quiz: every answer comes with an explanation and a link to the manual page.