Engine Removal
Remember that gasoline is an extremely flammable liquid! When working on fuel system components, observe all fire safety precautions. Do not smoke or approach the work area with open flames or an unshielded inspection lamp. Do not service the system in a room equipped with natural gas appliances that have a pilot light, such as water heaters and clothes dryers. Remember that gasoline is a carcinogenic substance that can cause cancer. Avoid getting fuel on exposed skin; use protective rubber gloves, and if accidental contact occurs, wash hands thoroughly with warm water and soap. Collect spilled fuel immediately and do not store fuel-soaked rags near open flames. Remember that the fuel system of fuel-injected models is always under pressure. Before disconnecting fuel lines, relieve the residual pressure in the system. Wear protective eye wear when working on fuel system components. Always keep a Class B fire extinguisher within reach!
The air conditioning system is also always under pressure, so the refrigerant system must be discharged at a specialized workshop before disconnecting refrigerant lines.
Vehicles of this model are equipped with the SRS system, the main components of which are the airbags. Before performing any work near the SRS impact sensors, in the area of the steering column or instrument panel, always disable the system to prevent accidental airbag deployment, which can cause serious injury.
REMOVAL
PROCEDURE
The authors of this Manual recommend removing the engine together with the transmission as one assembly. The assembly is lowered and removed from under the vehicle, so make sure the vehicle is securely supported in the raised position.
1. Relieve the fuel system pressure and remove the air cleaner assembly with air ducts (refer to the Fuel and Exhaust Systems Chapter).
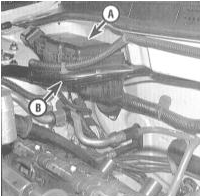
2. Disconnect the negative battery cable first, then the positive cable.
If the vehicle is equipped with a radio with an anti-theft code, make sure you have the correct code to reactivate the audio system before disconnecting the battery!
Disconnect the battery cables from the fuse/relay box in the engine compartment. After disconnecting the wiring harness from the fuse box, remove the bolts and the strut tower brace. On V6 models, remove the battery, its tray and mounting bracket.
3. Cover the fenders and the cowl panel below the windshield with protective covers or old blankets. Remove the hood (refer to Chapter Body).
4. Remove the alternator, distributor and spark plug high-tension wires (refer to Chapter Engine Electrical).
5. Remove the oil filter, drain the cooling system, drain the engine and transmission oil, and remove the drive belts (refer to Chapter Maintenance and Tune-Up).

6. Clearly label and disconnect all vacuum lines, emission control hoses, electrical connectors, ground straps and fuel lines from the engine. Label the wiring, lines and hoses using masking tape. It is also helpful to make a routing diagram or take a series of photographs.
The procedure for disconnecting the wiring from the PCM is described in Chapter Engine Controls.
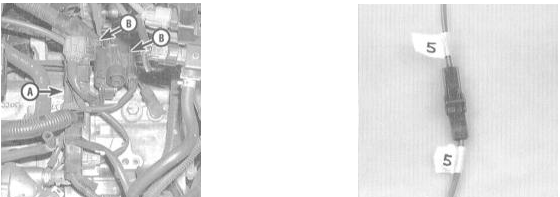
7. Remove the cooling fan(s) and the radiator (refer to Chapter Cooling and Heating).
8. Remove the fuel filler cap to relieve residual pressure in the fuel tank, then disconnect the fuel lines running from the engine to the chassis (refer to Chapter Fuel and Exhaust). Immediately plug all open lines and fittings.
9. Disconnect the throttle cable from the engine and, if equipped, the cruise control cable (refer to Chapter Fuel and Exhaust).
10. Remove the bolts and move the power steering pump aside without disconnecting the hydraulic lines (refer to Chapter Suspension and Steering). Make sure the pump remains in a vertical position; if necessary, remove it completely.
11. Remove the lower splash shields. On models equipped with air conditioning (A/C), remove the bolts and move the compressor aside without disconnecting the refrigerant lines (refer to Chapter Cooling and Heating).
Secure the removed compressor with wire, making sure it does not hang by its hoses.
12. Disconnect the wiring from the oxygen sensors. Separate the exhaust pipe from the exhaust manifold(s) (refer to Chapter Fuel and Exhaust) and from the catalytic converter flange, then remove it from under the vehicle.
13. Remove the drive axles (refer to Chapter Clutch and Driveshafts). Disconnect the wiring and the shift linkage/speedometer cables (or VSS sensor) from the transmission (refer to Chapter Transmission). On models with a manual transmission, remove the clutch slave cylinder from the transmission (refer to Chapter Clutch and Driveshafts). On models with an automatic transmission, disconnect the ATF cooler lines from the transmission case (refer to Chapter Transmission).
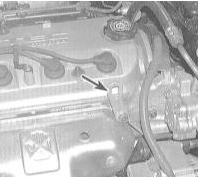
14. Attach lifting straps to the engine lifting eyes. Raise the vehicle, leaving enough clearance underneath to remove the powertrain. Position the hoist/A-frame arms over the engine compartment. Take up the slack in the straps, keeping them under light tension.
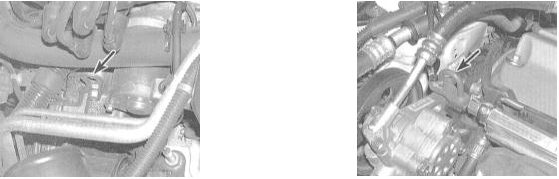
15. Make sure nothing else is still connecting the powertrain to the vehicle. If necessary, disconnect any forgotten lines, clearly labeling them first.
16. Remove the powertrain mount fasteners. Mark the position of the subframe relative to the chassis with paint, then remove the mounting bolts, lower the subframe and remove it from under the vehicle (refer to Chapter Transmission).
17. Slowly lower the powertrain assembly a few centimeters and check again that no lines remain connected. Continue lowering the engine until it rests on the floor or on the platform of the trolley jack. Remove the powertrain assembly from under the vehicle.
18. On models with an automatic transmission, remove the bolts securing the torque converter to the flexplate. Remove the engine-to-transmission bolts and separate the assembly.
19. Remove the flywheel/flexplate and mount the engine on an engine stand.
Test yourself
A quick Honda Accord quiz: every answer comes with an explanation and a link to the manual page.