Removal of Connecting Rod and Piston Assemblies
PROCEDURE
Before removing the connecting rod and piston assemblies from the engine, remove the cylinder head(s), oil pan, and oil pump with oil pickup tube.
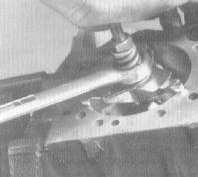
1. Using a special ridge reamer, completely remove the ridge wear from the top of the cylinders. Follow the instructions supplied by the reamer manufacturer. The ridge forms at the limit of piston travel, approximately 6.4 mm below the top edge of the cylinder, due to metal wear and carbon buildup. Check for its presence by feeling with a fingernail. Attempting to remove the connecting rod and piston assemblies without removing the ridge may damage the pistons.
2. After completing cylinder preparation, turn the engine upside down so that the crankshaft is on top.
3. To provide access to the connecting rods, remove the oil baffle plate.
On 4-cylinder engines the main bearing caps are joined by a common bridge, which is bolted to the cylinder block. Crankshaft end play on these engines must be checked before removing this bridge (see Crankshaft Removal) (and the oil baffle plate). Connecting rod side clearance on the crankshaft journals can be checked through the holes in the bridge. The bridge must be removed to remove the connecting rod assemblies.
4. Before removing the connecting rods from the crankshaft, measure their side clearance on the crankshaft journals. Insert the feeler gauge blade(s) firmly into the gap between the side face of the connecting rod big end and the crank web, fully taking up the rod play on the journal. The total thickness of the feeler gauge blades equals the connecting rod side clearance. Compare the result with the Specifications. If the side clearance exceeds the maximum permissible value, replace the connecting rod. The side clearance of a new connecting rod, or of an old rod on a new crankshaft, may be less than the minimum limit. In this case the connecting rod may be machined; consult an automotive service specialist. Check all remaining connecting rods in turn.
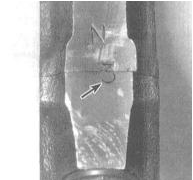
5. Make sure the connecting rod big ends and their caps bear identification marks showing which cylinder they belong to. Do not confuse the connecting rod number with the connecting rod bearing size marking,
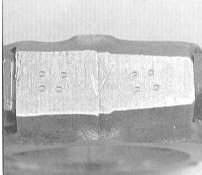
If necessary, make the marks yourself using a small centre punch.
6. In several steps (1/2 turn per pass), loosen the nuts securing the lower connecting rod cap caps just enough to allow them to be unscrewed by hand. Remove the first connecting rod cap together with its bearing shell installed in it - take care not to drop the shell.
On 4-cylinder engines, the connecting rod and piston assemblies may only be removed after the main bearing cap bridge has been removed (see Section Crankshaft Removal).
7. Remove the bearing shell from the lower connecting rod end, then, resting the wooden handle of a hammer against the bearing seat in the lower connecting rod end, push the connecting rod and piston assembly out through the top of the cylinder bore. If resistance is encountered, stop removal immediately and check that the ridge at the top of the cylinder has been fully removed.
8. In the same manner, remove the remaining connecting rod and piston assemblies from the engine.
Position the connecting rod to be removed coaxially with its cylinder by rotating the crankshaft accordingly - begin removal only after the connecting rod is positioned strictly parallel to the cylinder axis!
9. To prevent accidental mechanical damage to the bearings and loss of components, reinstall the bearing shells and secure the bearing caps on the lower connecting rod ends, tightening the nuts by hand.
10. Do not remove the pistons from the connecting rods (for details see Section Inspection of Connecting Rod and Piston Components).
Test yourself
A quick Honda Accord quiz: every answer comes with an explanation and a link to the manual page.