Piston Ring Installation
PROCEDURE
1. Before installing new piston rings, check the ring end gaps. It is assumed that the side clearances of the rings in the piston grooves have already been checked and are within specification (refer to Connecting Rod and Piston Assembly Component Inspection).
2. Lay out the piston and connecting rod assemblies with their ring sets on a clean workbench. From this point on, each ring set is to be kept matched to its piston. Now you can proceed to measure the ring end gaps.
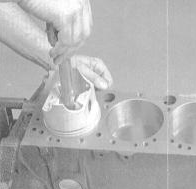
3. Insert the top (first) compression ring into cylinder No. 1 and square it in the bore by pushing it down with the piston crown. The ring should be located near the lower limit of the ring travel in the cylinder.
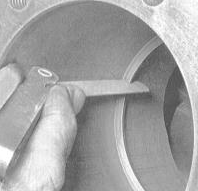
4. Measure the ring end gap with a feeler gauge of the blade type. The feeler gauge blade(s) must slide snugly into the ring gap. Compare the measurement with the specifications. If the gap is outside the specified range in either direction, first double-check that the rings have not been mixed up.
5. If the end gap is too small, it can be increased by filing with a fine-toothed file. Clamp a flat file in a vise, then place the ring over the file with the gap engaging the file so that the end of the file is inside the ring's circumference. Slowly pull the ring toward you, removing excess metal from its ends at the gap. When you reach the end of the file, remove the ring, check the gap again, and repeat the procedure if necessary.
Never push the ring away from you across the file, as the ring ends will close together and there is a high risk of breaking the metal.
6. An excessive ring end gap is not critical as long as it does not exceed the limit specified in the Specifications. Again make sure that the purchased ring sets meet the requirements of your engine.
7. Repeat the procedure for the remaining rings (second compression and oil control) of piston No. 1, then for all other pistons. Remember that each ring set is now matched to its own piston and must be installed on that piston.
8. After checking and correcting the ring end gaps as required, you can proceed to install the rings on their pistons.
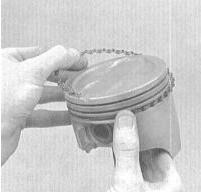
9. The oil control (bottom) ring is installed first. The oil control ring consists of three separate components. First, install the oil ring expander spring in the bottom piston ring groove. If the expander is equipped with an anti-rotation tang, make sure the tang engages the matching hole in the piston groove. Now install the lower oil control rail in the groove.
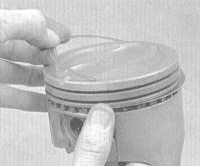
To avoid accidental damage to the oil control rails, do not use any tool to install them. Insert one end of the rail into the groove under/over the expander, hold it firmly with your finger, and work the remaining part into the groove while moving around the circumference of the piston. The upper oil control rail is installed last.
10. After installing all three components of the oil control ring in the bottom piston groove, check that the upper and lower rails rotate freely (slide freely in the groove).
11. Next, install the second compression ring. The ring must be installed with the mark facing up (toward the piston crown).
Strictly follow the ring manufacturer's instructions, which are usually printed on the ring set package. Do not confuse the second compression ring with the first (top) ring - they have different cross-sections.
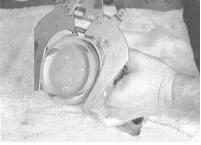
12. Using a ring expander, and making sure the ring is turned with the mark facing up, install it in the middle groove of the piston. Try not to spread the ring gap wider than is necessary to slide it over the piston.
13. In the same manner, install the first (top) compression ring with the mark facing up. Be careful not to confuse the top ring with the second ring.
14. In the same manner, fit the rings to all remaining pistons in turn.
Test yourself
A quick Honda Accord quiz: every answer comes with an explanation and a link to the manual page.