Back-up Battery
Components
COMPONENTS
ILLUSTRATION
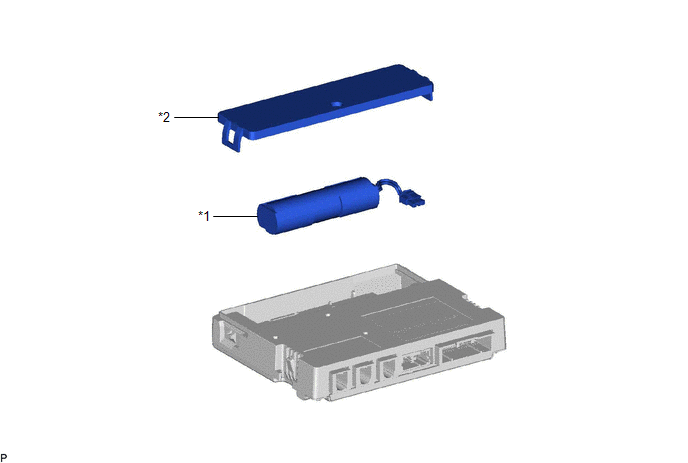
*1 |
BACK-UP BATTERY |
*2 |
BATTERY COVER |
Installation
INSTALLATION
PROCEDURE
1. INSTALL BACK-UP BATTERY
(a) Install the back-up battery shown in the illustration.
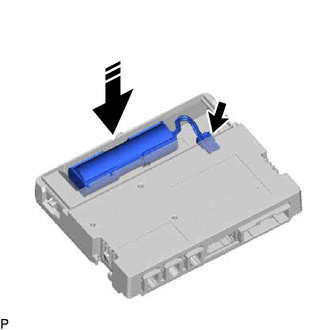
 |
Install in this Direction |
NOTICE:
Make sure that the back-up battery is securely installed.
(b) Connect the connector.
NOTICE:
Make sure that the connector is connected securely.
(c) Engage the 2 claws to install the battery cover as shown in the illustration.
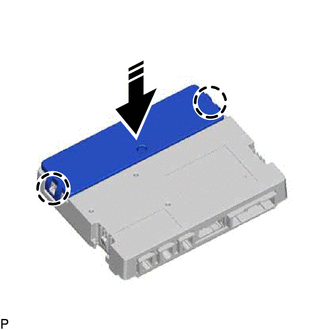
|
Install in this Direction |
NOTICE:
Make sure that the battery cover is securely installed.
2. INSTALL DCM (TELEMATICS TRANSCEIVER)
Click here 
3. PERFORM INITIALIZATION
for Gasoline Model: Click here
for HV Model: Click here
Removal
REMOVAL
The necessary procedures (adjustment, calibration, initialization, or registration) that must be performed after parts are removed and installed, or replaced during back-up battery removal/installation are shown below.
Necessary Procedure After Parts Removed/Installed/Replaced (for Gasoline Model)Replaced Part or Performed Procedure | Necessary Procedure | Effect/Inoperative Function When Necessary Procedures are not Performed | Link |
|---|---|---|---|
back-up battery |
Perform the reset back-up battery condition |
Safety Connect System |
 |
Replaced Part or Performed Procedure | Necessary Procedure | Effect/Inoperative Function When Necessary Procedures are not Performed | Link |
|---|---|---|---|
back-up battery |
Perform the reset back-up battery condition |
Safety Connect System |
|
PROCEDURE
1. REMOVE DCM (TELEMATICS TRANSCEIVER)
Click here
2. REMOVE BACK-UP BATTERY
(a) Disengage the 2 claws and remove the battery cover as shown in the illustration.
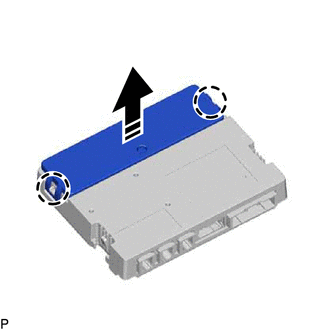
 |
Remove in this Direction |
(b) Disconnect the connector and remove the back-up battery as shown in the illustration.
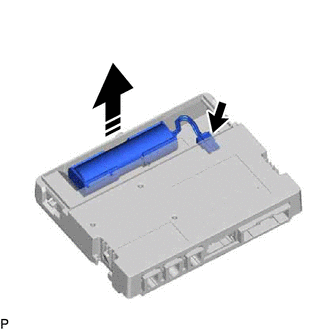
|
Remove in this Direction |