Cylinder Head
Disassembly WARNING: The manufacturer supplies new and remanufactured cylinder heads as spare parts. Because the disassembly, inspection and repair procedures require specialized tools, and spare parts are sometimes difficult to obtain, it is more practical to purchase a new cylinder head than to disassemble, inspect and repair a used one.
PROCEDURE
1. Remove the cylinder head.
2. Remove the intake and exhaust manifolds, if not already removed (see subsection 6.1.12 and subsection 6.1.13).
3. Remove the valve rocker arms and hydraulic lash adjusters.
4. Remove the bolts and remove the cooling system pipes from the cylinder head.
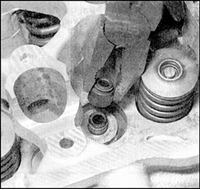
5. Compress the first valve spring using the special tool and remove the valve keepers. Carefully release the valve spring, then remove the spring retainer, spring and spring seat. Use pliers to remove the valve stem seals from the valve guides.
6. If the valve spring retainer does not move away and release the keepers when the tool is compressed, lightly tap the tool directly above the retainer with a soft-faced hammer. This will make it easier to remove the retainer.
7. Remove the valve from the cylinder head from the combustion chamber side.
8. Store the valve together with its keepers, spring, spring retainer and spring seat. Mark the valves so they can be reinstalled in their original positions, except for valves showing severe wear that requires valve replacement.

9. If the valves will be reinstalled, place them in separate plastic bags labeled with the corresponding number. Note that valve N1 is located next to the timing chain cover.
Assembly
PROCEDURE
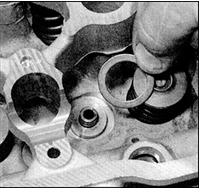
1. Install the spring seat, then dip the valve stem seal in fresh engine oil. Carefully install the seal over the valve stem and onto the guide. Do not damage the seals when installing them over the valve stem.
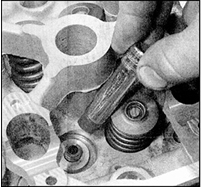
2. Press the seal onto the valve guide using a installer tool.
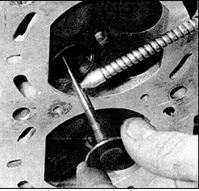
3. Lubricate the valve stems with fresh engine oil and install the valves into their corresponding guides in the cylinder head, observing the original installation order. New valves must be installed into the seats they were lapped to.

4. Install the spring onto the spring seat, oriented so that the closely wound coils face down.
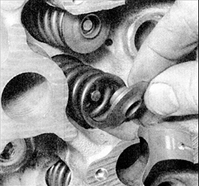
5. Install the spring retainer.
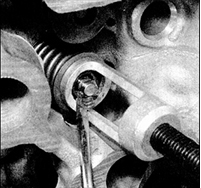
6. Compress the springs and insert the keepers into the groove on the valve stem. Release the valve spring and remove the tool. Install the keepers for the remaining valves in the same way.
WARNING: To hold the keepers in the valve groove while removing the tool, secure the keepers by applying a dab of grease to them.
7. After installing all valves, turn the cylinder head over and seat the valvetrain components by lightly tapping the end of each valve stem with a hammer through a wooden block.
8. Check that the mating surfaces of the cylinder head and the coolant pipe are clean. Apply a bead of sealant to these surfaces, install the pipe and tighten the bolts securely.
9. The cylinder head can now be assembled with the remaining components.
Test yourself
A quick Nissan Sunny quiz: every answer comes with an explanation and a link to the manual page.