Camshaft Timing Chain Cover
GENERAL INFORMATION
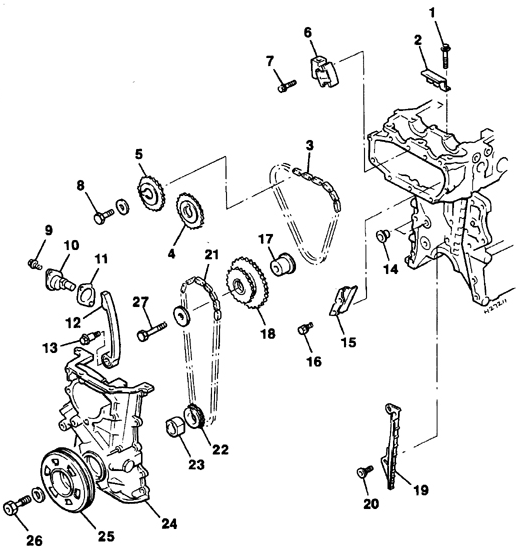
Camshaft Drive Components
1. Upper chain guide bolt
2. Upper chain guide
3. Upper timing chain
4. Exhaust camshaft sprocket
5. Intake camshaft sprocket
6. Upper chain tensioner 7–
9. Bolt
10. Lower chain tensioner
11. Gasket
12. Chain shoe
13. Chain shoe pivot bolt
14. Guide pin and gasket
15. Upper chain damper
16. Bolt
17. Idler sprocket shaft
18. Idler sprocket
19. Lower chain damper
20. Bolt
21. Lower timing chain
22. Drive sprocket
23. Oil pump drive sleeve (shaped)
24. Chain cover
25. Pulley
26. Pulley bolt
27. Bolt
WARNING: If the cover is removed without disturbing the attachment and sealing of the cylinder head, a slight oil leak may occur from under the gasket installed between the cover and the cylinder head after assembly. For this reason, it is recommended to combine cover removal with cylinder head removal and gasket replacement.
Removal
PROCEDURE
1. Remove the coolant pump (refer to subsection 4.7).
2. Remove the crankshaft pulley (refer to subsection 3.1.1.5).
3. Remove the oil pan and oil pickup with strainer (refer to subsection 3.1.1.12).
4. Remove the two bolts securing the power steering pump bracket to the timing chain cover, and the nuts and bolts securing the bracket to the pump, then remove the bracket.
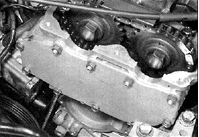
5. Remove the bracket from the engine mount by removing the three bolts, and release the wiring from the clips on the bracket.

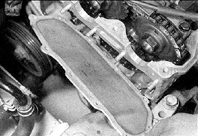
6. Remove the bolts and nuts (indicated by arrows) and remove the timing gear inspection cover from the right side of the cylinder head. Remove the gasket.
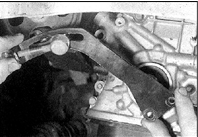
7. Remove the two bolts and the lower chain tensioner. Remove the tensioner gasket, noting its orientation.
WARNING: Do not rotate the crankshaft when removing the chain tensioner.
8. Remove the four bolts securing the cylinder head to the upper part of the timing chain cover. On early-production vehicles, the upper chain damper must be removed to access one of the bolts.
9. Raise the engine with a jack or support it with a hoist by attaching the hoist to the special lifting brackets on the engine.
10. Remove the through bolt of the right engine mount, then remove the three bolts and the mount. If the rubber cushions have separated from the body bracket, remove the cushions as well.
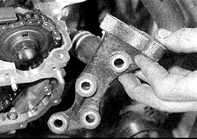
11. Remove the bolts securing the bracket and the bolt securing the generator adjusting strap to the bracket. Remove the right mount bracket.
12. Remove the bolts from the chain cover. The bolts are of different lengths, so mark their original positions.

13. Remove the cover from the crankshaft nose, then maneuver and remove the cover from the engine compartment. Remove the oil passage seals; they must be replaced. If the cover locating pins are loose, remove them and store them with the cover.
14. Remove the oil pump drive sleeve (shaped) from the crankshaft nose.
Installation
PROCEDURE
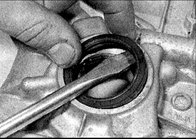
1. It is recommended to replace the crankshaft oil seal before installation.
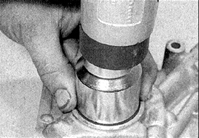
2. Press in the new oil seal until it seats against the shoulder. Press in using a driver that contacts only the outer edge of the seal.
3. Make sure the sealing surfaces of the cover and the cylinder block are clean and dry.
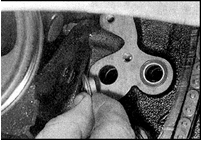
4. Insert new sealing sleeves into the oil passages of the cylinder block.
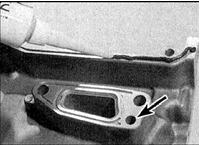
5. Apply a thin layer of sealant to the mating surface (arrow) of the cover and cylinder block. Also apply sealant to the area around the coolant pump passage in the center of the cover. If the cylinder head was not removed, also apply sealant to the upper surface of the cover.
6. Install the locating pins into the cylinder block.
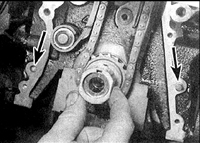
7. Align the keyway in the oil pump sleeve with the key, then install the sleeve onto the crankshaft nose (arrows indicate the locating pins).
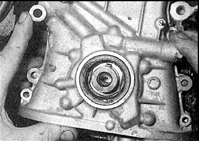
8. Position the cover and align the oil pump drive gear so that it engages the shaped sleeve when the cover is installed. Install the cover onto the crankshaft, taking care not to damage the seal lips, and seat the cover on the locating pins.
9. Install the cover bolts into their original holes and tighten the bolts in several stages, gradually increasing the torque.

10. Install the four M6 bolts securing the cylinder head to the cover and tighten the bolts to the specified torque. On early-production engines, install the upper guide.
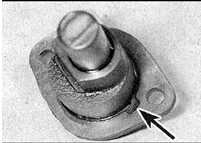
11. Install a new gasket on the lower chain tensioner, orienting it so that the cutout on the gasket aligns with the tensioner lubrication hole (indicated by arrow). Install the tensioner with the gasket and tighten the bolts to the specified torque.
12. Install the right engine mount bracket and tighten the bolts to the specified torque. Install the rubber cushions into the mount bracket on the body side (if removed), making sure the cushion pins engage the holes in the bracket. Install the mount and tighten the bolts to the specified torque.
13. Align the right engine mount with the body bracket, install the through bolt, and tighten the nut to the specified torque. Remove the hoist from the engine (or remove the jack).
14. Make sure the sealing surfaces of the front cover, camshaft driven sprockets and cylinder head are clean and free of moisture and oil. If a gasket was used on the cover, replace the gasket and install it on the cylinder head. If the seal is provided by sealant, apply sealant around the entire perimeter of the cover. Install the cover and tighten the bolts and nuts to the specified torque.
15. Install the bracket on the right engine mount and tighten the bracket bolts to the specified torque.
16. Install the power steering pump on the engine and tighten the pump bracket bolts.
17. Install the oil strainer with coarse filter and the oil pan (Refer to Sub-section 3.1.1.12).
18. Install the crankshaft pulley (Refer to Sub-section 3.1.1.5).
19. Install the coolant pump (Refer to Sub-section 4.7).
20. Fill the engine with oil and coolant.
Test yourself
A quick Nissan Sunny quiz: every answer comes with an explanation and a link to the manual page.