Turn Signal/Hazard Flasher Operational Check and Replacement
The vehicles covered by this manual are equipped with a Supplemental Restraint System (SRS). Before performing any work near the airbag module, steering column, or instrument panel, disable the SRS to prevent injury from accidental deployment (refer to Airbag System - General Information). SRS wiring can be easily identified by its yellow insulation.
PROCEDURE
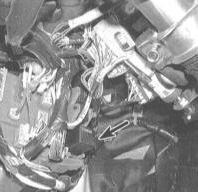
1. The flasher is a square-shaped relay installed in the fuse/relay box located on the left side under the instrument panel.
2. Proper flasher operation is confirmed by a clearly audible, rhythmic clicking. Failure of one of the indicator lamps prevents the flasher from operating. If one turn signal lamp fails, the flashing rate doubles, warning the driver that the lamp must be replaced.
3. Simultaneous failure of both turn signal lamps most likely indicates a blown fuse. A faulty flasher or combination switch is also possible. Check the condition of the wiring connections in the affected circuit. If the fuse blows, check the wiring for signs of a short circuit.
4. To replace the flasher, pull it straight up and remove it from its socket in the fuse/relay box (left side under the instrument panel).
5. Make sure the replacement flasher matches the failed one in size and type.
6. Install in the reverse order of removal.
Test yourself
A quick Honda Accord quiz: every answer comes with an explanation and a link to the manual page.