P219a Air Fuel Ratio
DTC DETECTION LOGIC
| DTC | CONSULT screen terms (Trouble diagnosis content) |
DTC detection condition | |
| P219A | AIR FUEL RATIO IMBALANCE B1 (Air-fuel ratio imbalance bank 1) |
Diagnosis condition | — |
| Signal (terminal) | — | ||
| Threshold | ECM detects a lean/rich air fuel ratio state in any cylinder for a specified length of time | ||
| Diagnosis delay time | — | ||
| P219B | AIR FUEL RATIO IMBALANCE B2 (Air-fuel ratio imbalance bank 2) |
Diagnosis condition | — |
| Signal (terminal) | — | ||
| Threshold | ECM detects a lean/rich air fuel ratio state in any cylinder for a specified length of time | ||
| Diagnosis delay time | — | ||
POSSIBLE CAUSE
DTC P219A
Fuel injector
Exhaust gas leaks
Incorrect fuel pressure
Mass air flow sensor
Intake air leaks
Lack of fuel
Incorrect PCV hose connection
Improper spark plug
Insufficient compression
The fuel injector circuit is open or shorted
Ignition coil
The ignition signal circuit is open or shorted
DTC P219B
Fuel injector
Exhaust gas leaks
Incorrect fuel pressure
Mass air flow sensor
Intake air leaks
Lack of fuel
Incorrect PCV hose connection
Improper spark plug
Insufficient compression
The fuel injector circuit is open or shorted
Ignition coil
The ignition signal circuit is open or shorted
FAIL-SAFE
Not applicable
CHECK DTC PRIORITY
If DTC P219A or P219B is displayed with other DTC, first perform the trouble diagnosis for the other DTC.
Is applicable DTC detected?
YES>>Perform diagnosis of applicable. Refer to DTC Index.
NO>>GO TO 2.
PRECONDITIONING-1
If DTC Confirmation Procedure has been previously conducted, always perform the following before conducting the next test.
Turn ignition switch OFF and wait at least 10 seconds.
Turn ignition switch ON.
Turn ignition switch OFF and wait at least 10 seconds.
GO TO 3.
PRECONDITIONING-2
Turn ignition switch ON.
Clear the mixture ratio self-learning value. Refer to Description.
Will CONSULT be used?
YES>>GO TO 4.
NO>>GO TO 7.
PERFORM DTC CONFIRMATION PROCEDURE-1
Turn ignition switch ON.
Select “COOLAN TEMP/S” in “DATA MONITOR” mode of “ENGINE” using CONSULT.
Start engine.
Make sure that “COOLAN TEMP/S” indicates more than 65 °C.
GO TO 5.
PERFORM DTC CONFIRMATION PROCEDURE-2
 With CONSULT
Select “SYSTEM 1 DIAGNOSIS B B1” and “SYSTEM 1 DIAGNOSIS A B1” in “DATA MONITOR” mode of “ENGINE” using CONSULT.
Drive Nissan Murano vehicle under the following conditions for at least 5 consecutive seconds.
ENG SPEED 1,000 – 1,600rpm COOLAN TEMP/S More than 65 °C B/FUEL SCHDL 5 – 12 msec Selector lever D position SYSTEM 1 DIAGNOSIS B B1 PRSENT Check “SYSTEM 1 DIAGNOSIS A B1” indication.
Is “CMPLT” displayed?
YES>>GO TO 6.
NO>>GO TO 3.
PERFORM DTC CONFIRMATION PROCEDURE-3
Check 1st trip DTC.
Is 1st trip DTC detected?
YES>>Proceed to Diagnosis Procedure.
NO>>To check malfunction symptom before repair: Refer to Intermittent Incident.
NO>>Confirmation after repair: INSPECTION END
PERFORM DTC CONFIRMATION PROCEDURE-4
 Without CONSULT
Start the engine and warm it up to normal operating temperature.
Drive Nissan Murano vehicle under the following conditions for at least 5 consecutive seconds.
Engine speed 1,000 – 1,600 rpm Calculated load value 27 – 63 % Selector lever D position Check 1st trip DTC.
Is 1st trip DTC detected?
YES>>Proceed to Diagnosis Procedure.
NO>>To check malfunction symptom before repair: Refer to Intermittent Incident.
NO>>Confirmation after repair: INSPECTION END
A/F sensor malfunction is not related to DTC P219A.
CHECK DTC PRIORITY
If DTC P219A or P219B is displayed with other DTC, first perform the trouble diagnosis for the other DTC.
Is applicable DTC detected?
YES>>Perform diagnosis of applicable. Refer to DTC Index.
NO>>GO TO 2.
CHECK FOR INTAKE AIR LEAK
Stop engine and check the following for connection.
Air duct
Vacuum hoses
PCV hose
Intake air passage between air duct to intake manifold
Start engine and let it idle.
Listen for an intake air leak after the mass air flow sensor.
Is the inspection result normal?
YES>>GO TO 3.
NO>>Repair or replace error-detected parts.
CHECK EXHAUST GAS LEAK
Stop engine and visually check exhaust tube, three way catalyst and muffler for dents connection.
Start engine and let it idle.
Listen for an exhaust gas leak before three way catalyst (manifold).
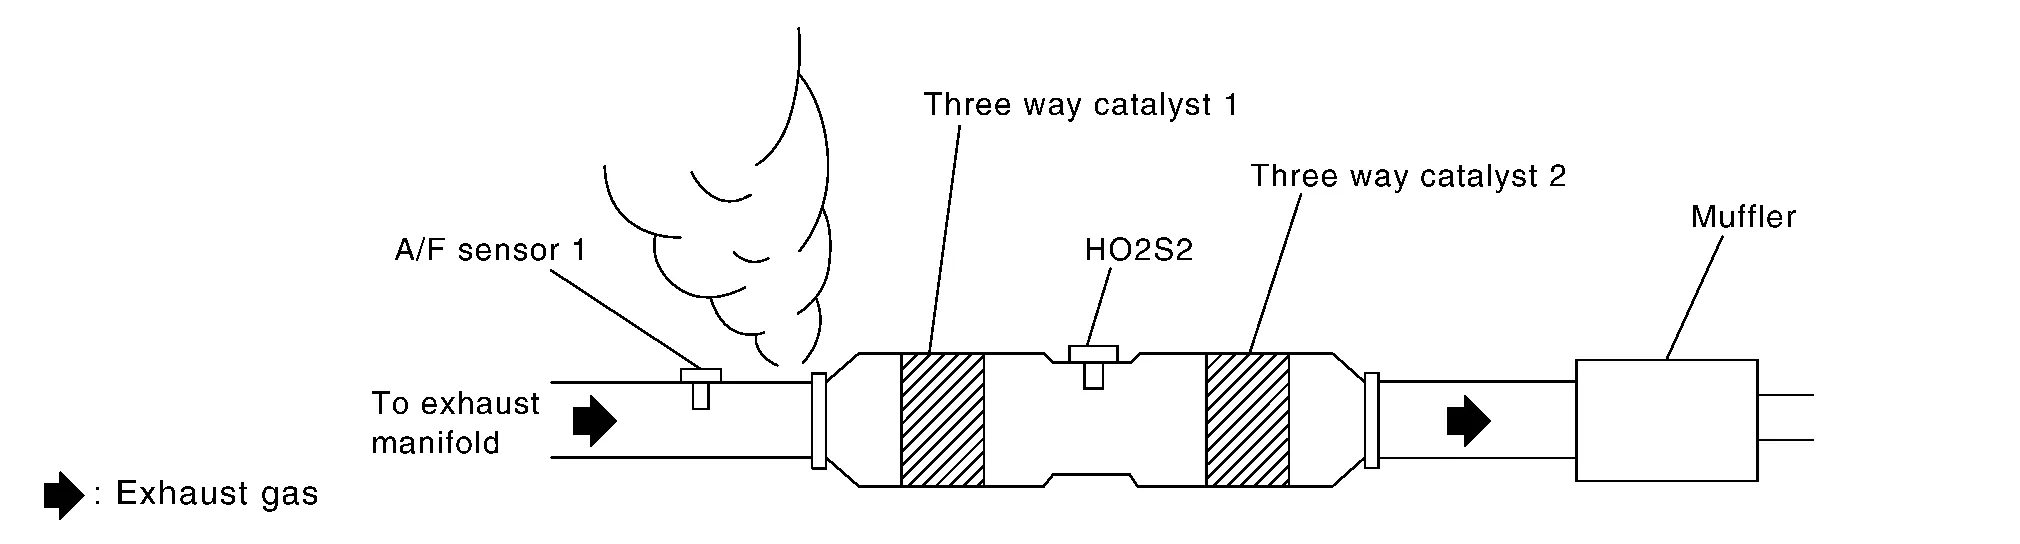
Is the inspection result normal?
YES>>GO TO 4.
NO>>Repair or replace error-detected parts.
CHECK FUEL PRESSURE
Release fuel pressure to zero. Refer to Work Procedure.
Check fuel pressure. Refer to Work Procedure.
Is the inspection result normal?
YES>>GO TO 5.
NO>>GO TO 10.
CHECK MASS AIR FLOW SENSOR
With CONSULT
Check “MASS AIR FLOW” in “DATA MONITOR” mode of “ENGINE” using CONSULT.
For specification, refer to Mass Air Flow Sensor.
 With GST
Check mass air flow sensor signal in Service $01 using GST.
For specification, refer to Mass Air Flow Sensor.
Is the inspection result normal?
YES>>GO TO 6.
NO>>Check connectors for rusted terminals or loose connections in the mass air flow sensor circuit or grounds. Refer to Diagnosis Procedure.
CHECK FUNCTION OF FUEL INJECTOR-1
With CONSULT
Start engine.
Perform “POWER BALANCE” in “ACTIVE TEST” mode of “ENGINE” using CONSULT.
Check that each circuit produces a momentary engine speed drop.
Without CONSULT
Let engine idle.
Listen to each fuel injector operating sound.
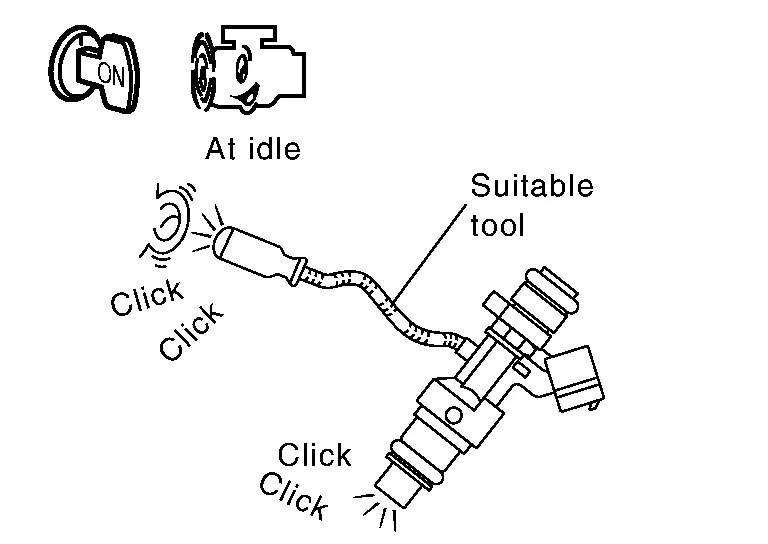
Clicking noise should be heard.
Is the inspection result normal?
YES>>GO TO 7.
NO>>Perform trouble diagnosis for fuel injector, refer to Component Inspection.
CHECK FUNCTION OF FUEL INJECTOR-2
Turn ignition switch OFF.
Confirm that the engine is cooled down and there are no fire hazards near the Nissan Murano vehicle.
Disconnect all fuel injector harness connectors.
Remove fuel tube assembly. Refer to Removal and Installation.
Keep fuel hose and all fuel injectors connected to fuel tube.
Disconnect all ignition coil harness connectors.
Prepare pans or saucers under each fuel injector.
Crank engine for approximately 3 seconds.
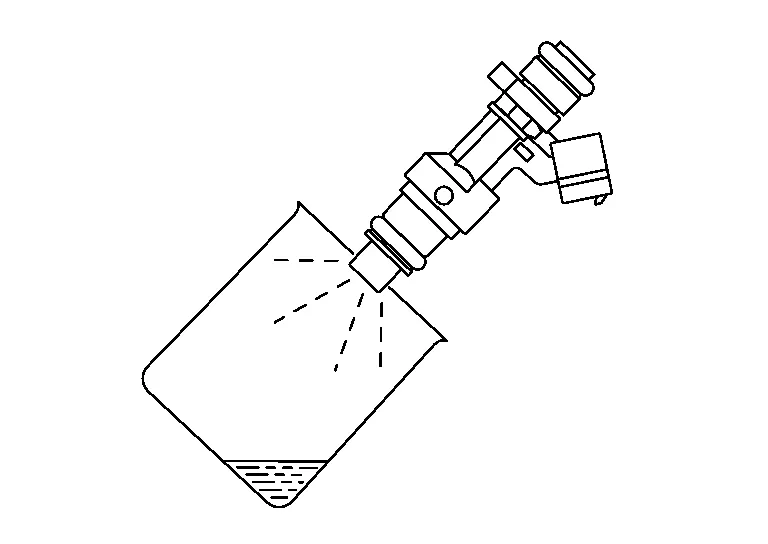
Fuel should be sprayed evenly for each fuel injector.
Fuel must not drip from the tip of fuel injector.
Is the inspection result normal?
YES>>GO TO 8.
NO>>Replace fuel injector. Refer to Removal and Installation.
CHECK FUNCTION OF IGNITION COIL-1
Turn ignition switch OFF.
Remove fuel pump fuse from IPDM E/R to release fuel pressure.
Start the engine.
After an engine stall, crank the engine two or three times to release all the fuel pressure.
Turn ignition switch OFF.
Disconnect all the harness connectors of ignition coil to prevent electric discharge from occurring in ignition coil.
Remove ignition coil assembly and spark plug of cylinder. Refer to Removal and Installation (bank 2), Removal and Installation (bank 1).
Crank engine for 5 seconds or more to remove combustion gas in the cylinder.
Connect spark plug and harness connector to ignition coil.
Allow a 13-17mm (0.52-0.66 in) spacing between spark plug and grounded metal portion as shown in the figure to fix the ignition coil with a rope or an equivalent.
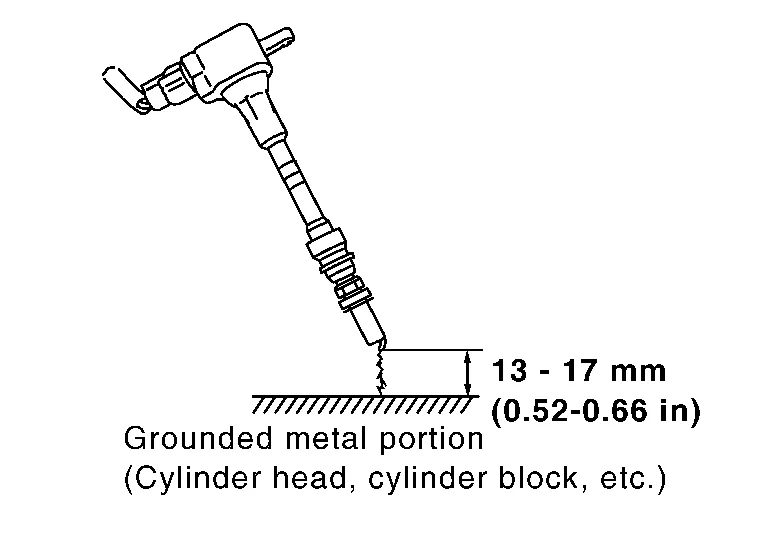
Crank the engine for approximately 3 seconds to see if sparking occurs between spark plug and the grounded metal portion.
Spark should be generated.
Is the inspection result normal?
YES>>GO TO 9.
NO>>GO TO 11.
CHECK COMPRESSION PRESSURE
Check compression pressure. Refer to Work Procedure.
Is the inspection result normal?
YES>>INSPECTION END
NO>>Check pistons, piston rings, valves, valve seats and cylinder head gaskets.
DETECT MALFUNCTIONING PART
Check fuel hoses and fuel tubes for clogging.
Is the inspection result normal?
YES>>Replace fuel filter and fuel pump assembly. Refer to Removal and Installation.
NO>>Repair or replace error-detected parts.
CHECK FUNCTION OF IGNITION COIL-2
Turn ignition switch OFF.
Disconnect spark plug and connect a non-malfunctioning spark plug.
Crank engine for approximately 3 seconds, and recheck whether spark is generated between the spark plug and the grounded metal portion.
Spark should be generated.
Is the inspection result normal?
YES>>GO TO 12.
NO>>Check ignition coil, power transistor and their circuits. Refer to Component Function Check.
CHECK SPARK PLUG
Check the initial spark plug for fouling, etc.
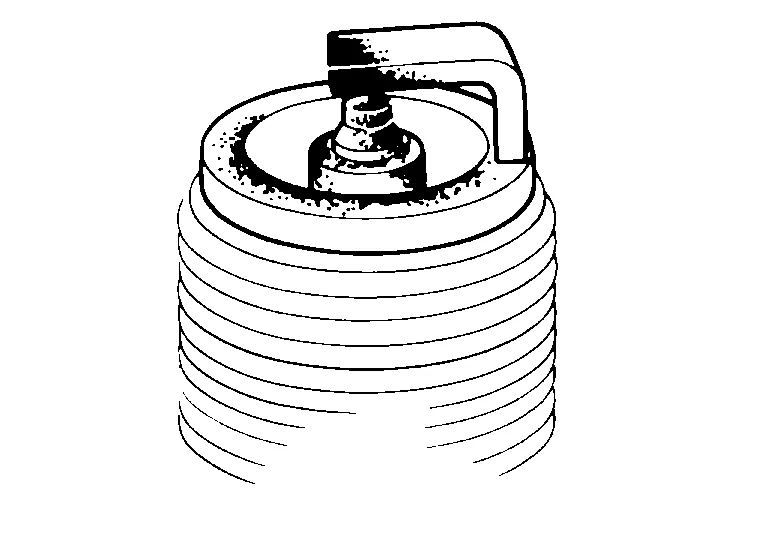
Is the inspection result normal?
YES>>Repair or clean spark plug. Refer to Removal and Installation.
GO TO 13.
Replace spark plug(s) with standard type one(s). For spark plug type, refer to Removal and Installation.
CHECK FUNCTION OF IGNITION COIL-3
Reconnect the initial spark plugs.
Crank engine for approximately 3 seconds, and recheck whether spark is generated between the spark plug and the grounded portion.
Spark should be generated.
Is the inspection result normal?
YES>>INSPECTION END
NO>>Replace spark plug(s) with standard type one(s). For spark plug type, refer to Spark Plug.