Oil, Transmission Fluid and Filter Replacement
PROCEDURE
1. The differential housing oil and transmission fluid require periodic replacement.
2. Purchase the transmission fluid in advance (refer to Subsection 2.1).
3. You will also need vehicle stands, wrenches, a drain pan with a capacity of at least 2.5 L, newspapers, and clean rags.
4. Drain the fluid immediately after driving, as hot fluid best flushes out contaminants.
* Transmission fluid temperature can reach 175 °C. Wear gloves when working.
5. Immediately after driving, raise the vehicle and place it on stands to gain access to the transmission and differential drain plugs, keeping the fluid warm.
6. Place all required tools and accessories under the vehicle, taking care not to touch hot components.
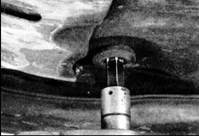
7. Position the drain pan under the transmission drain plug and remove the plug with a hex key. Before removing the plug, make sure the pan is positioned directly under the plug, as fluid will flow out under pressure. After the fluid has drained, install the plug and tighten it.

8. Loosen the front transmission pan bolts first, then the rear bolts.
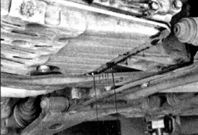
9. Pry the pan with a screwdriver and drain the remaining fluid. After the fluid has drained, remove the bolts completely and lower the pan.
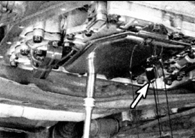
10. Remove the filter mounting bolts and disconnect the bracket (fitted on some vehicles). Be careful when lowering the filter, as it contains residual fluid. Note the stuck magnet (indicated by
arrow). The magnet must be cleaned and installed in the transmission pan.
11. Install a new filter, connect the bracket, and tighten the bolts. Tighten the bolts to the specified torque (refer to Subsection 2.1).
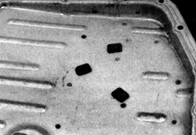
12. Thoroughly clean the pan gasket residue from the pan. Remove the magnets, noting their positions, wash the pan and magnets in clean solvent, and dry them with compressed air. The magnets must be cleaned and installed in the transmission pan.
13. Place a new gasket on the pan, install the pan, and tighten the bolts in the original sequence. Tighten the bolts to the specified torque (refer to Subsection 2.1).
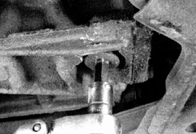
14. Locate the differential housing drain plug. Place a drain pan under the plug, remove the plug with a hex key, and drain the oil. After the oil has drained, tighten the plug securely.
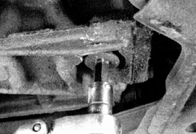
15. Be careful when removing the plug, as oil will flow out under pressure.
16. Fill the differential with fresh fluid (refer to Subsection 2.1). Fill the fluid up to the lower edge of the opening (refer to Subsection 2.5.1.2).
* Do not overfill. The automatic transmission and differential are separate units.
17. Lower the vehicle.
18. With the engine off, add transmission fluid through the dipstick tube. Pour the fluid through a funnel in small portions, checking the level frequently with the dipstick (refer to Subsection 2.5.1.2). Check the level after allowing time for the fluid to drain into the transmission case.
19. Start the engine and move the selector lever from P to L, then back to P, and apply the parking brake.
20. With the engine idling, check the transmission fluid level. Add fluid up to the Cool mark on the dipstick.
Test yourself
A quick Toyota Corolla quiz: every answer comes with an explanation and a link to the manual page.