Removing and installing valves
Caution: if valve train parts are reused, they must be reinstalled in exactly the same position.
To avoid mix-ups, it is recommended to make a suitable parts tray. Always replace the valve stem seals.Remove the cylinder head and place it on two wooden blocks.
1.4 L / 1.8 L / 1.9 L engine: remove the camshaft, see page 50.
1.6 L engine: unbolt the camshaft housing from the cylinder head, see page 37.
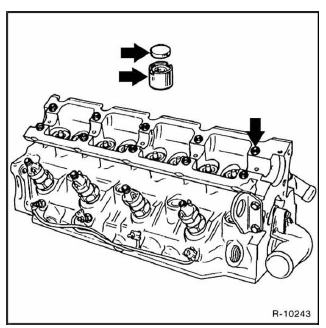
All except 1.4 L engine: mark the tappets and remove them.
If necessary, use a rubber suction cup to pull them out. The illustration shows the diesel engine, whose tappets have adjusting shims.
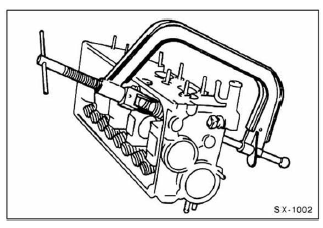
Remove the valve springs. Workshops use a special tool for this. The valve cone halves - and thus the valves including the valve springs - can also be removed using a commercially available valve spring compressor.
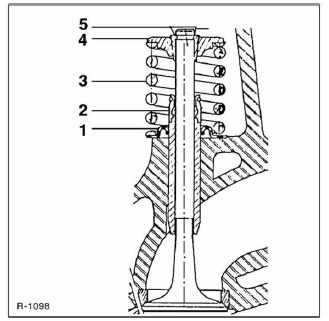
Lower valve spring seat
Valve stem seal
Valve spring
Upper valve spring retainer
Valve cotters.
Compress the valve springs and remove the valve cotters. Remove the upper valve spring retainer and valve springs. Pull out the valve. Depending on the engine, there may be 2 valve springs per valve.
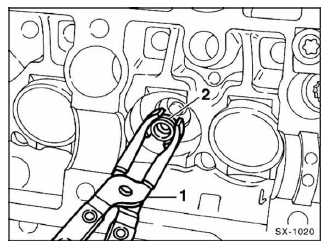
Pull off the valve stem seal - 2 - with special pliers - 1 -.
The Hazet valve stem seal pliers 791-5, for example, are suitable for this.
Pull the valve out of the cylinder head toward the combustion chamber side.
Remove the next valve.
Lightly oil the valve stem and install each valve in the same position as before removal. Lightly lap new valves into their seats with lapping compound, see page 54.
Clean all parts thoroughly and lubricate moving parts with engine oil.
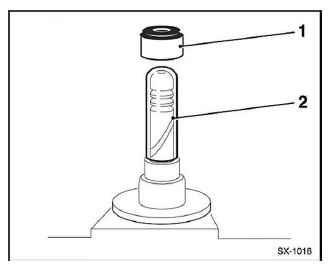
To avoid damaging the valve stem seals - 1 -, cover the valve stem - 2 - at the contact surfaces of the valve cotters with smooth adhesive tape before installation. Remove the adhesive tape after installation.
Lightly oil the valve stem seal and press it on with a suitable drift until it bottoms out.
Lightly oil the valve stem and valve guide with engine oil, and insert the valve from below.
Install the valve springs and upper valve spring retainers.
Compress the valve spring with a spring compressor and install the valve cotters. Slowly release the valve spring while checking that the cotters are seated correctly.
Then install the next valve. Do not mix up the intake and exhaust valves.
After installing the valves, insert all bucket tappets into the cylinder head according to their markings. On diesel engines, place the associated shims in position, see upper arrow in figure R-10243. Coat the tappet bore in the cylinder head, the inside and outside of the tappets, and the shims on both sides with clean engine oil.
1.4/1.8/1.9 L engine: install the camshaft(s), see page 50.
1.6 L engine: screw the camshaft housing onto the cylinder head with a new gasket, see page 37.
Install the cylinder head, see page 37.
Diesel engine: adjust valve clearance, see page 55.
Test yourself
A quick Fiat Bravo quiz: every answer comes with an explanation and a link to the manual page.