Body Electrical System
Power Windows
In this manual: Body Electrical System
12steps
~72min
3/5difficulty
Done 0 of 12
Contents:
On Vehicle Inspection
On Vehicle Inspection
Diagnosis with KDS
- The power windows can be more quickly diagnosed for problems with the KDS (Refer to "DTC guide").
- Self diagnosis : Inspect the Diagnostic Trouble Code (DTC) with the KDS. (Refer to DTC guide when fault code is found.)
Power Window Motor Terminal Function
Connector and Terminal Function
[Safety Window Motor]
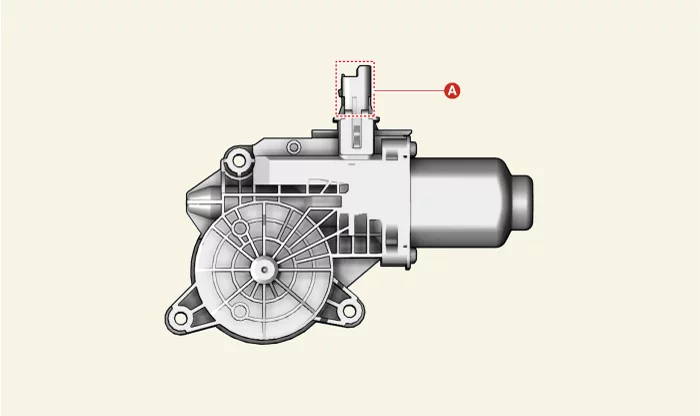
| Connector A | Terminal | Function |
 |
1 | Switch signal |
| 2 | - | |
| 3 | Ground | |
| 4 | Battery (+) | |
| 5 | - | |
| 6 | LIN |
[Manual Window Motor]
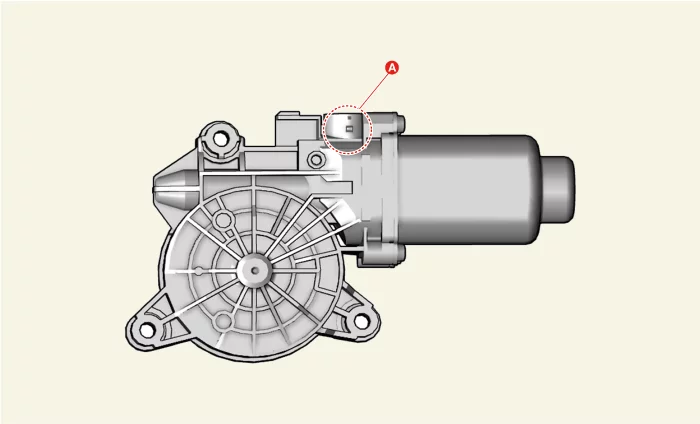
| Connector A | Position | Operate | Terminal | |
| 1 | 2 | |||
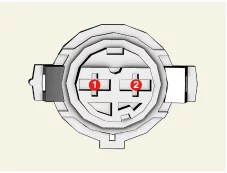 |
LH | Up (Counterclockwise) | + | - |
| Down (Clockwise) | - | + | ||
| RH | Up (Clockwise) | + | - | |
| Down (Counterclockwise) | - | + | ||
Power Window Motor Removal and Installation
Removal
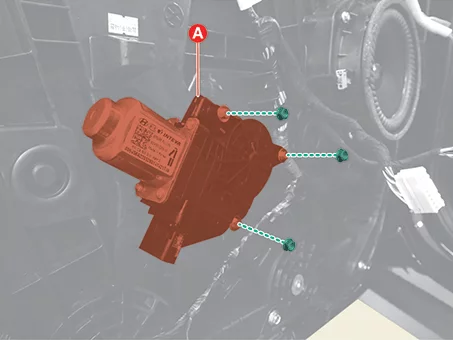
Front Power Window Motor- Remove the front door trim. (Refer to Body - "Front Door Trim")
- Disconnect the front power window motor connector (A).
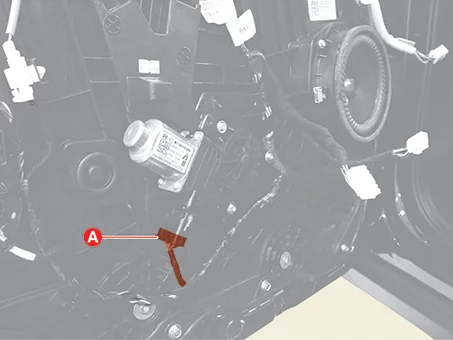
- Remove the front power window motor (A) after removing the bolts.
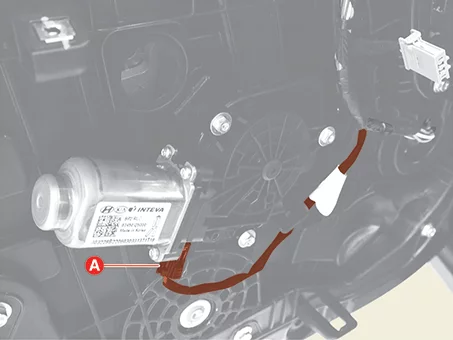
- Remove the rear door trim. (Refer to Body - "Rear Door Trim")
- Disconnect the rear power window motor connector (A).
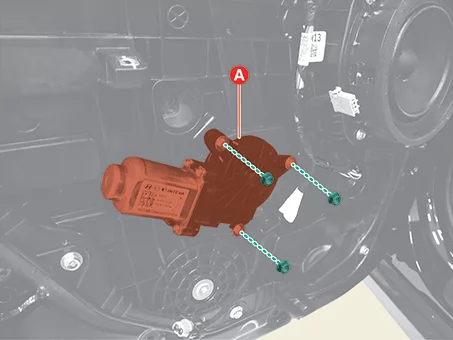
- Remove the rear power window motor (A) after removing the bolts.
Installation
- Install in reverse order of removal.
Power Window Switch Terminal Function
Connector and Terminal Function
Power Window Main Switch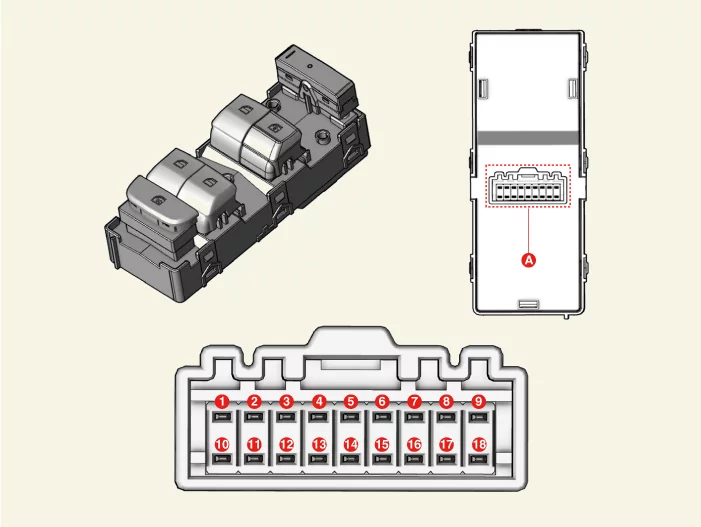
| Terminal | Connector A | ||
| Function | Terminal | Function | |
| 1 | Battery (+) | 10 | Right rear power window switch (Lock) |
| 2 | Passenger seat power window switch (Up) | 11 | Right rear power window switch (Down) |
| 3 | Passenger seat power window switch (Down) | 12 | Right rear power window switch (Up) |
| 4 | Illumination ( + ) | 13 | Left rear power window switch (Lock) |
| 5 | Door lock switch | 14 | Left rear power window switch (Up) |
| 6 | Door unlock switch | 15 | - |
| 7 | Ground | 16 | - |
| 8 | Door unlock IND | 17 | Left rear power window switch (Down) |
| 9 | Driver seat safety power window module | 18 | Ground |
[Auto-down Power Window]
| Terminal | Connector A | ||
| Function | Terminal | Function | |
| 1 | Battery (+) | 10 | Right rear power window switch (Lock) |
| 2 | Passenger seat power window switch (Up) | 11 | Right rear power window switch (Down) |
| 3 | Passenger seat power window switch (Down) | 12 | Right rear power window switch (Up) |
| 4 | Illumination ( + ) | 13 | Left rear power window switch (Lock) |
| 5 | Door lock switch | 14 | Left rear power window switch (Up) |
| 6 | Door unlock switch | 15 | Battery ( + )_LH |
| 7 | Driver seat power window motor (Down) | 16 | - |
| 8 | Door unlock IND | 17 | Left rear power window switch (Down) |
| 9 | Driver seat power window motor (Up) | 18 | Ground |
Power Window Sub Switch
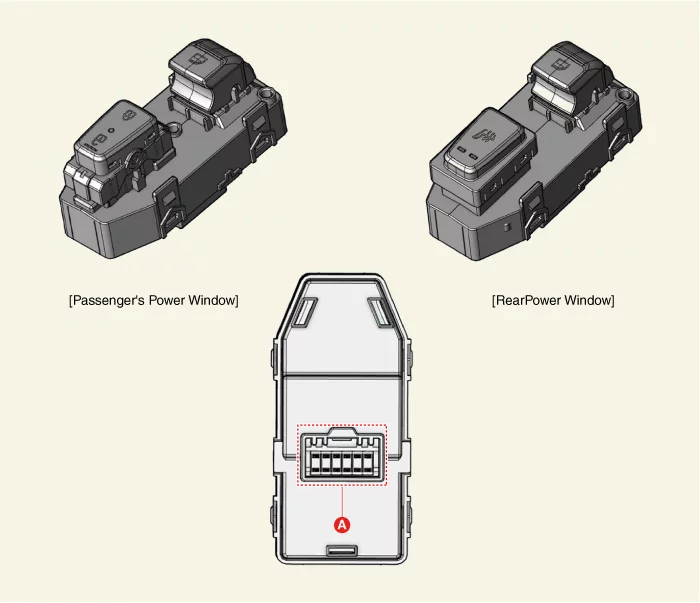
| Connector A | Terminal | Function | Terminal | Function |
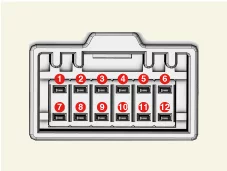 |
1 | Battery (+)_RH | 7 | Passenger seat power window switch (Down) |
| 2 | Door unlock switch | 8 | Ground | |
| 3 | Passenger seat power window motor (Up) | 9 | - | |
| 4 | Door lock switch | 10 | Passenger seat power window switch (Up) | |
| 5 | Passenger seat power window motor (Down) | 11 | Illumination ( + ) | |
| 6 | Door unlock IND | 12 | Battery (+) |
[Rear Power Window]
| Connector A | Terminal | Function | Terminal | Function |
|
1 | Battery (+) | 7 | Rear power window switch (Down) |
| 2 | Rear seat heater IND (High) | 8 | Ground | |
| 3 | Rear power window motor (Up) | 9 | - | |
| 4 | Rear seat heater IND (Low) | 10 | Rear power window switch (Up) | |
| 5 | Rear power window motor (Down) | 11 | Illumination ( + ) | |
| 6 | Rear seat heater switch signal | 12 | Rear power window switch (Lock) |
Power Window Switch Removal and Installation
Removal
Power Window Main Switch- Remove the front door trim [Driver's Side]. (Refer to Body - "Front Door Trim")
- Remove the power window main switch (A) after pulling the hooks in the direction of arrow.

- Remove the front door trim [Passenger's Side]. (Refer to Body - "Front Door Trim")
- Remove the power window sub switch (A) after pulling the hooks in the direction of arrow.
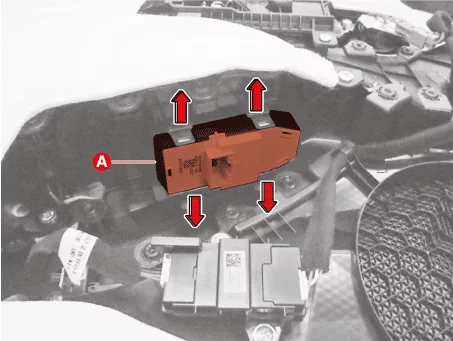
- Remove the rear door trim. (Refer to Body - "Rear Door Trim")
- Remove the power window rear switch (A) after pulling the hooks in the direction of arrow.
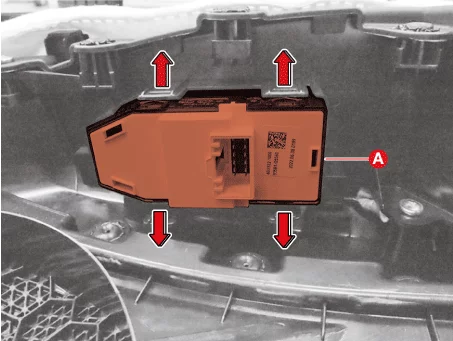
Installation
- Install in reverse order of removal.
Was this page helpful?