Door Glass and Window Regulator
Removal and installation
PROCEDURE
Glass1. Remove the panel and the water shield.
2. Install the window regulator handle (or connect the switch connector, and connect the battery ground cable).
3. Lower the glass so that the glass bracket bolt is positioned in the hole of the door frame.
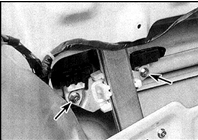
4. Supporting the glass, remove the bolts securing the glass to the bracket (shown by arrows). On coupe bodies, there is an additional bolt securing the glass to the front guide roller.
5. Remove the glass through the opening.
6. Install the glass in the reverse order. When installing, make sure the seal does not come out of position. Before installing the panel, check the operation of the window regulator.
Window Regulator (Hatchback and Sedan)
1. Disconnect the glass from the window regulator (see above).
2. Raise the glass and secure it with tape or wedges, or remove it.
3. Disconnect the power operation connectors (if equipped).
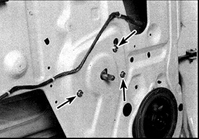
4. Remove the mounting bolts of the manual operating handle (or power operation) (indicated by arrows).
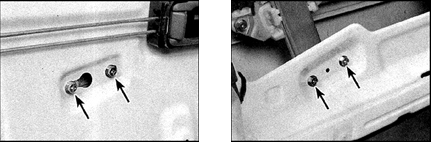
5. Remove the upper (photo left) and lower (photo right) regulator bolts and remove the regulator through the window opening. The power operation with cables is removed together with the regulator. Mark the positions of parts before disconnecting.
6. Install the window regulator assembly with regulator and drive in reverse order. Before installing the panel, check the operation of the window regulator.
Coupe
1. Disconnect the glass from the window regulator.
2. Disconnect the power operation connectors.
3. Remove the bolts of the power window regulator motor.
4. Remove the bolts of both guide rails and remove the window regulator assembly. Mark the positions of parts before disconnecting.
5. Install the window regulator in reverse order. Before installing the panel, check the operation of the window regulator.
Rear Door Window Corner – 5-Door Hatchback
1. Remove the lift glass section.
2. Remove the bolts and remove the rear guide while supporting the corner piece.
3. Carefully remove the corner piece with the seal.
4. Remove the seal from the corner piece.
5. Install the corner piece in reverse order.
Test yourself
A quick Nissan Sunny quiz: every answer comes with an explanation and a link to the manual page.