High Mounted Stop Light Assembly
Components
COMPONENTS
ILLUSTRATION
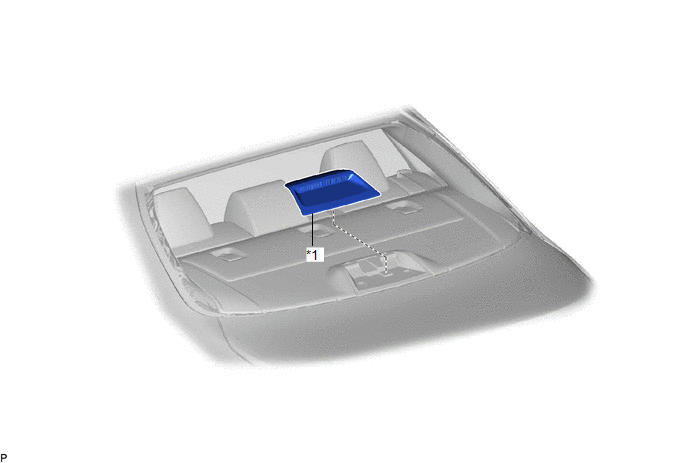
*1 |
CENTER STOP LIGHT SET |
- |
- |
Inspection
INSPECTION
PROCEDURE
1. INSPECT CENTER STOP LIGHT SET
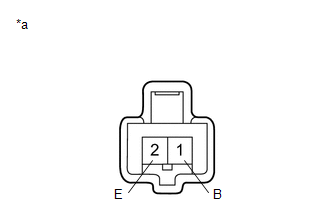
*a |
Component without harness connected (Center Stop Light Set) |
(a) Apply auxiliary battery voltage to the center stop light set and check that the light illuminates.
OK:
Measurement Condition | Specified Condition |
|---|---|
Auxiliary battery positive (+) → Terminal 1 (B) Auxiliary battery negative (-) → Terminal 2 (E) |
Center stop light illuminates |
If the result is not as specified, replace the center stop light set.
Installation
INSTALLATION
PROCEDURE
1. INSTALL CENTER STOP LIGHT SET
(a) Engage the 2 guides as shown in the illustration.
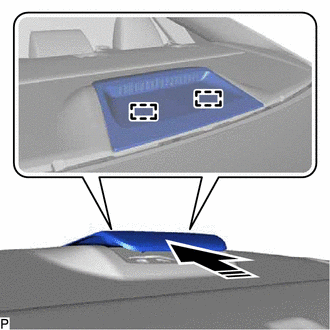
 |
Install in this Direction |
(b) Connect the connector.
(c) Engage the 2 claws as shown in the illustration to install the center stop light set.
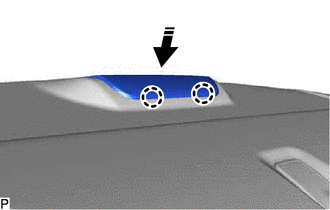
|
Install in this Direction |
Removal
REMOVAL
PROCEDURE
1. REMOVE CENTER STOP LIGHT SET
(a) Using a moulding remover, disengage the 2 claws as shown in the illustration.
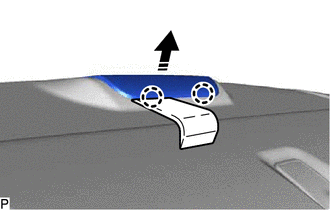
 |
Remove in this Direction |
(b) Disconnect the connector. |
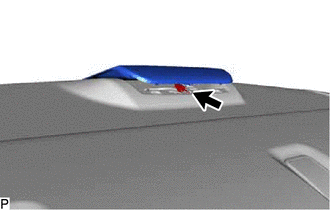 |
(c) Disengage the 2 guides as shown in the illustration to remove the center stop light set.
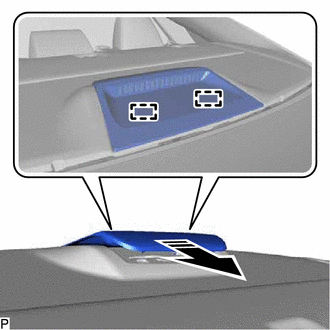
|
Remove in this Direction |