Rocker Panel Moulding
Components
COMPONENTS
ILLUSTRATION
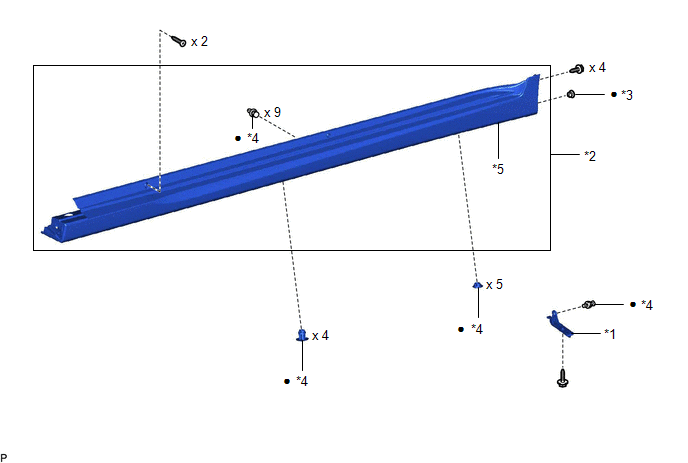
*1 |
FRONT ROCKER PANEL MOULDING END COVER |
*2 |
ROCKER PANEL MOULDING ASSEMBLY |
*3 |
GROMMET |
*4 |
CLIP |
*5 |
ROCKER PANEL MOULDING |
- |
- |
● |
Non-reusable part |
- |
- |
Installation
INSTALLATION
HINT:
- Use the same procedure for the RH side and LH side.
- The following procedure is for the LH side.
PROCEDURE
1. INSTALL ROCKER PANEL MOULDING ASSEMBLY
(a) Install 9 new clips to the rocker panel moulding.
(b) Engage the 9 clips as shown in the illustration.
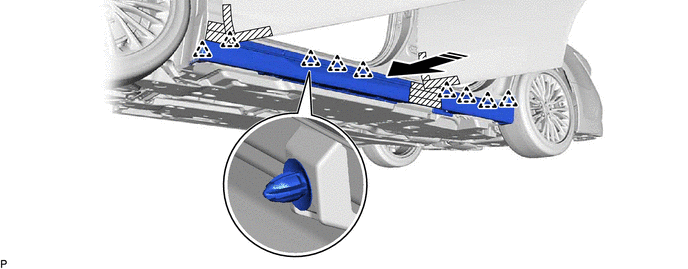
 |
Install in this Direction |
- |
- |
(c) Pull back the edge of the rear fender liner LH and install a new grommet as shown in the illustration. NOTICE: Do not apply excessive force when pulling back the rear fender liner LH. |
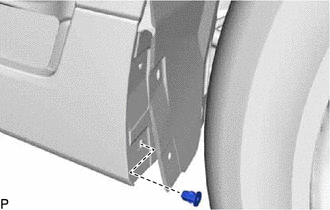 |
(d) Install the 6 screws.
(e) Install the rocker panel moulding assembly with 9 new clips.
2. INSTALL FRONT ROCKER PANEL MOULDING END COVER
Click here 
Removal
REMOVAL
HINT:
- Use the same procedure for the RH side and LH side.
- The following procedure is for the LH side.
PROCEDURE
1. REMOVE FRONT ROCKER PANEL MOULDING END COVER
Click here 
2. REMOVE ROCKER PANEL MOULDING ASSEMBLY
(a) Apply protective tape around the rocker panel moulding assembly and doors as shown in the illustration.
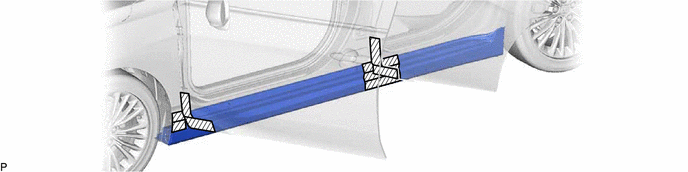
 |
Protective Tape |
- |
- |
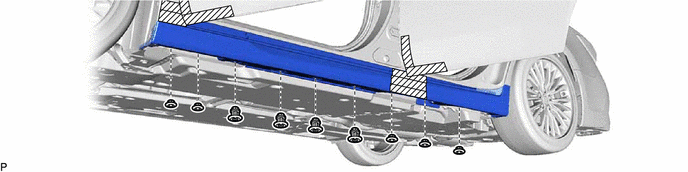
(b) Remove the 9 clips.
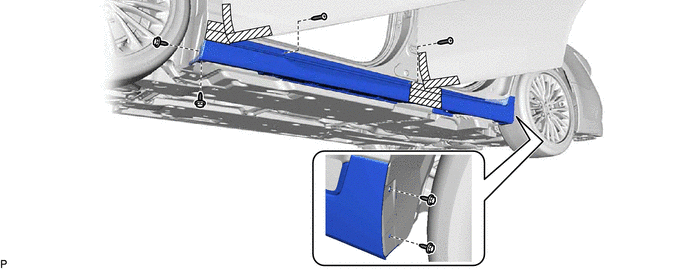
(c) Remove the 6 screws.
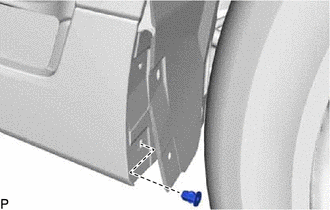
(d) Pull back the edge of the rear fender liner LH and remove the grommet as shown in the illustration. NOTICE: Do not apply excessive force when pulling back the rear fender liner LH. |
 |
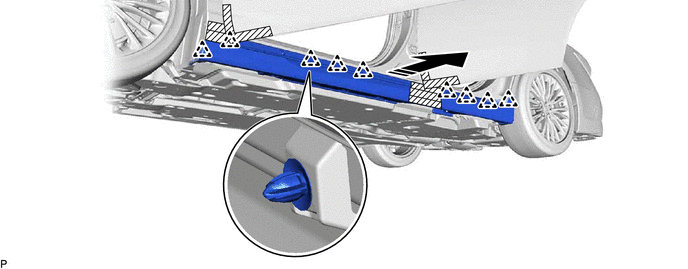
(e) Disengage the 9 clips to remove the rocker panel moulding assembly as shown in the illustration.
 |
Remove in this Direction |
- |
- |
(f) Remove the 9 clips from the rocker panel moulding.