License Plate Light Assembly
Components
COMPONENTS
ILLUSTRATION
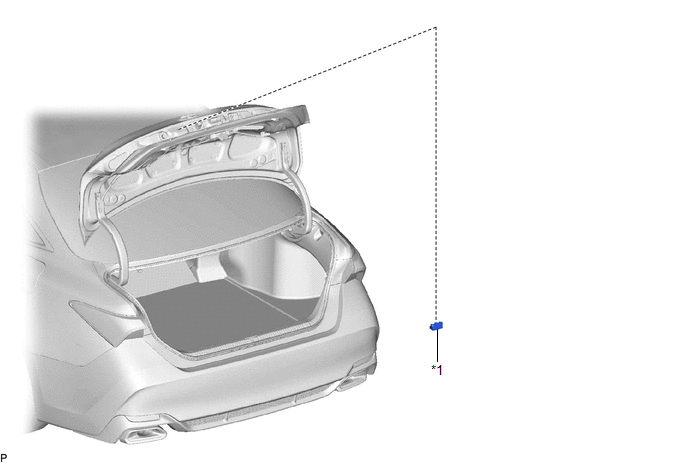
*1 |
LICENSE PLATE LIGHT ASSEMBLY |
- |
- |
Inspection
INSPECTION
PROCEDURE
1. INSPECT LICENSE PLATE LIGHT ASSEMBLY
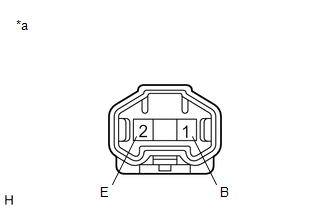
*a |
Component without harness connected (License Plate Light Assembly) |
(a) Connect 4 dry-cell batteries (1.5 V) in series.
NOTICE:
Do not use rechargeable batteries as they may not output a voltage of 1.5 V.
(b) Apply 6 V batter voltage to the terminals of the connector and check that the license plate light illuminates.
OK:
Measurement Condition | Specified Condition |
|---|---|
Positive (+) lead from the batteries → Terminal 1 (B) Negative (-) lead from the batteries → Terminal 2 (E) |
License plate light illuminates |
If the result is not as specified, replace the license plate light assembly.
Installation
INSTALLATION
HINT:
- Use the same procedure for the RH side and LH side.
- The following procedure is for the LH side.
PROCEDURE
1. INSTALL LICENSE PLATE LIGHT ASSEMBLY
(a) Engage the 2 claws to install the license plate light assembly.
(b) Connect the connector.
2. INSTALL LUGGAGE COMPARTMENT DOOR OUTSIDE GARNISH SUB-ASSEMBLY
Click here 
Removal
REMOVAL
HINT:
- Use the same procedure for the RH side and LH side.
- The following procedure is for the LH side.
PROCEDURE
1. REMOVE LUGGAGE COMPARTMENT DOOR OUTSIDE GARNISH SUB-ASSEMBLY
Click here 
2. REMOVE LICENSE PLATE LIGHT ASSEMBLY
(a) Disconnect the connector. |
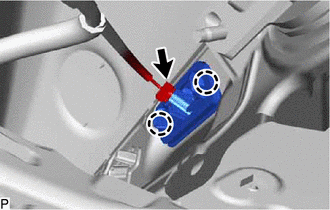 |
(b) Disengage the 2 claws to remove the license plate light assembly.