Grille Shutter
Components
COMPONENTS
ILLUSTRATION
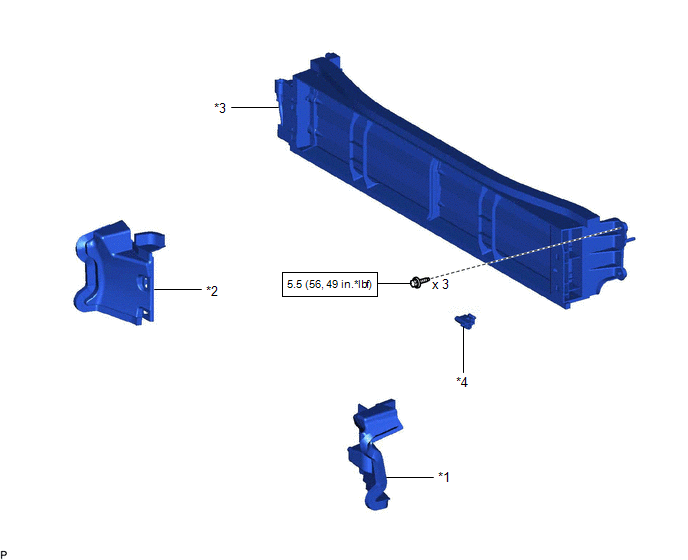
*1 |
FRONT RADIATOR SIDE AIR GUIDE PLATE LH |
*2 |
FRONT RADIATOR SIDE AIR GUIDE PLATE RH |
*3 |
RADIATOR SHUTTER SUB-ASSEMBLY |
*4 |
THERMISTOR ASSEMBLY |
 |
N*m (kgf*cm, ft.*lbf): Specified torque |
- |
- |
ILLUSTRATION
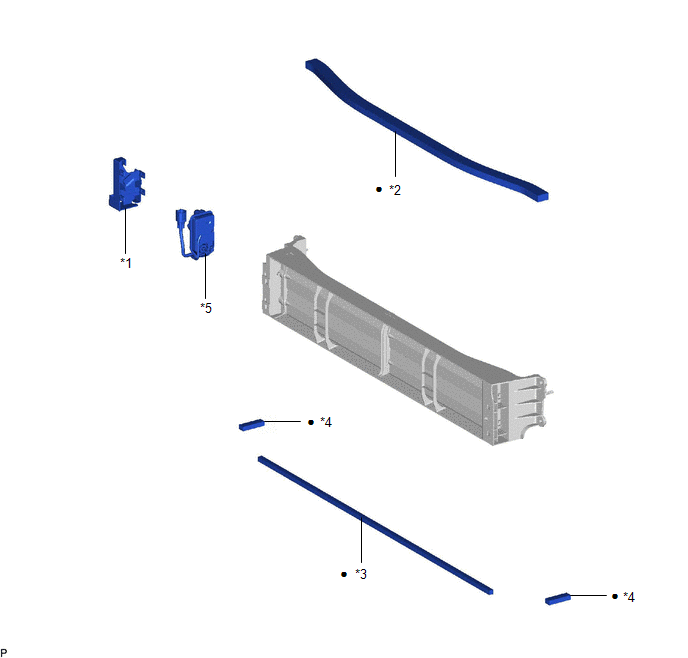
*1 |
MOTOR COVER |
*2 |
NO. 1 RADIATOR GRILLE SEAL |
*3 |
NO. 2 RADIATOR GRILLE SEAL |
*4 |
NO. 3 RADIATOR GRILLE SEAL |
*5 |
SWING GRILLE ACTUATOR ASSEMBLY |
- |
- |
● |
Non-reusable part |
- |
- |
Disassembly
DISASSEMBLY
PROCEDURE
1. REMOVE MOTOR COVER
(a) Disconnect the connector. |
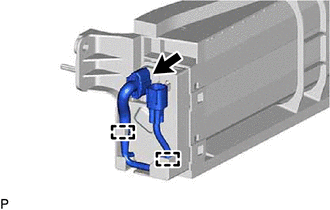 |
(b) Disengage the 2 clamps.
(c) Disengage the 4 claws to remove the motor cover as shown in the illustration.
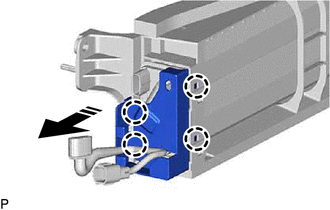
 |
Remove in this Direction |
2. REMOVE SWING GRILLE ACTUATOR ASSEMBLY
(a) Remove the swing grille actuator assembly as shown in the illustration.
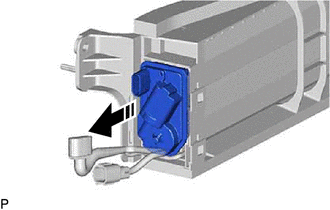
|
Remove in this Direction |
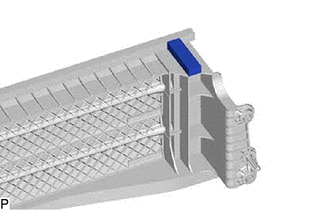
3. REMOVE NO. 3 RADIATOR GRILLE SEAL
(a) Remove the No. 3 radiator grille seal. HINT: Use the same procedure for the RH side and LH side. |
 |
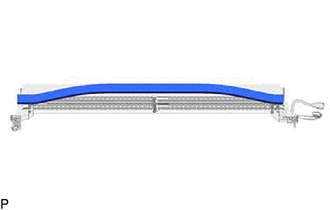
4. REMOVE NO. 1 RADIATOR GRILLE SEAL
(a) Remove the No. 1 radiator grille seal. |
 |
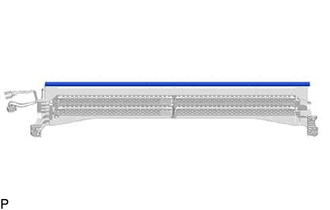
5. REMOVE NO. 2 RADIATOR GRILLE SEAL
(a) Remove the No. 2 radiator grille seal. |
 |
Installation
INSTALLATION
PROCEDURE
1. INSTALL RADIATOR SHUTTER SUB-ASSEMBLY
(a) Engage the 2 guides as shown in the illustration.
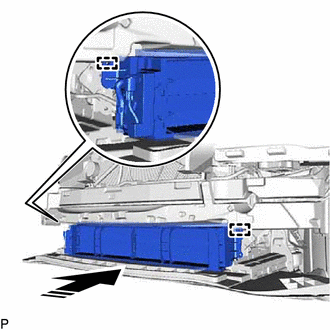
 |
Install in this Direction |
(b) Install the radiator shutter sub-assembly with the 3 bolts.
Torque:
5,5 N·m {56 kgf·cm, 49 in·lbf}
(c) Engage the clamp.
(d) Connect the connector.
2. INSTALL THERMISTOR ASSEMBLY
Click here 
3. INSTALL FRONT RADIATOR SIDE AIR GUIDE PLATE LH
(a) Engage the 2 claws to install the front radiator side air guide plate LH.
4. INSTALL FRONT RADIATOR SIDE AIR GUIDE PLATE RH
(a) Engage the 2 claws to install the front radiator side air guide plate RH.
5. INSTALL FRONT BUMPER ASSEMBLY
Click here
Reassembly
REASSEMBLY
PROCEDURE
1. INSTALL NO. 2 RADIATOR GRILLE SEAL
HINT:
When installing the No. 2 radiator grille seal, heat the radiator shutter using a heat light.
Heating TemperatureItem | Temperature |
|---|---|
Radiator Shutter |
20 to 30 °C |
CAUTION:
- Do not touch the heat light and heated parts, touching the heat light may result in burns.
- Touching heated parts for a long time may result in burns.
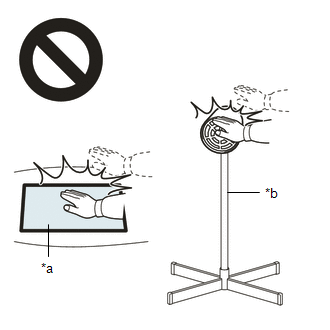
*a |
Heated Part |
*b |
Heat Light |
NOTICE:
Do not heat the radiator shutter excessively.
(a) Clean the radiator shutter surface.
(1) Using a heat light, heat the radiator shutter surface.
(2) Remove any remaining double-sided tape from the radiator shutter.
(3) Wipe off any tape adhesive residue with cleaner.
(b) Remove the release paper from a new No. 2 radiator grille seal.
HINT:
After removing the release paper, keep the exposed adhesive free from foreign matter.
(c) Install the No. 2 radiator grille seal. NOTICE:
|
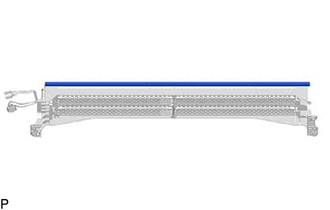 |
2. INSTALL NO. 1 RADIATOR GRILLE SEAL
HINT:
When installing the No. 1 radiator grille seal, heat the radiator shutter using a heat light.
Heating TemperatureItem | Temperature |
|---|---|
Radiator Shutter |
20 to 30 °C |
CAUTION:
- Do not touch the heat light and heated parts, touching the heat light may result in burns.
- Touching heated parts for a long time may result in burns.
*a |
Heated Part |
*b |
Heat Light |
NOTICE:
Do not heat the radiator shutter excessively.
(a) Clean the radiator shutter surface.
(1) Using a heat light, heat the radiator shutter surface.
(2) Remove any remaining double-sided tape from the radiator shutter.
(3) Wipe off any tape adhesive residue with cleaner.
(b) Remove the release paper from a new No. 1 radiator grille seal.
HINT:
After removing the release paper, keep the exposed adhesive free from foreign matter.
(c) Install the No. 1 radiator grille seal. NOTICE:
|
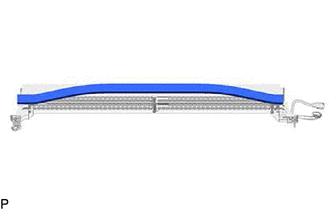 |
3. INSTALL NO. 3 RADIATOR GRILLE SEAL
HINT:
- When installing the No. 3 radiator grille seal, heat the radiator shutter using a heat light.
- Use the same procedure for the RH side and LH side.
Item | Temperature |
|---|---|
Radiator Shutter |
20 to 30 °C |
CAUTION:
- Do not touch the heat light and heated parts, touching the heat light may result in burns.
- Touching heated parts for a long time may result in burns.
*a |
Heated Part |
*b |
Heat Light |
NOTICE:
Do not heat the radiator shutter excessively.
(a) Clean the radiator shutter surface.
(1) Using a heat light, heat the radiator shutter surface.
(2) Remove any remaining double-sided tape from the radiator shutter.
(3) Wipe off any tape adhesive residue with cleaner.
(b) Remove the release paper from a new No. 3 radiator grille seal.
HINT:
After removing the release paper, keep the exposed adhesive free from foreign matter.
(c) Install the No. 3 radiator grille seal. NOTICE:
|
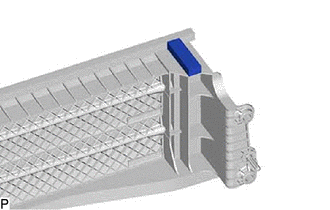 |
4. INSTALL SWING GRILLE ACTUATOR ASSEMBLY
(a) When installing a new swing grille actuator assembly:
(1) Open the grille shutter fin as shown in the illustration.
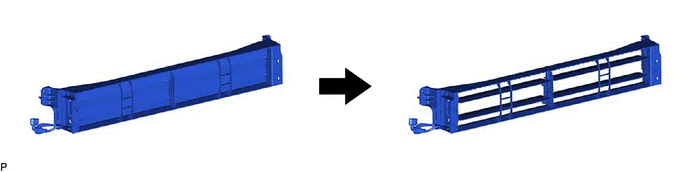
(b) Install the swing grille actuator assembly as shown in the illustration.
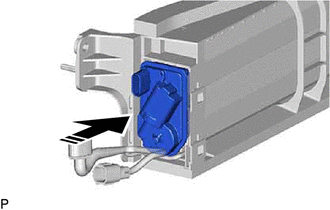
 |
Install in this Direction |
5. INSTALL MOTOR COVER
(a) Engage the 4 claws to install the motor cover as shown in the illustration.
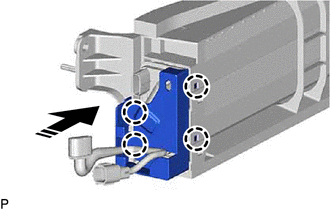
|
Install in this Direction |
(b) Engage the 2 clamps. |
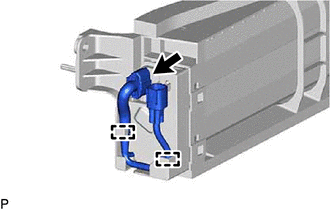 |
(c) Connect the connector.
Removal
REMOVAL
The necessary procedures (adjustment, calibration, initialization, or registration) that must be performed after parts are removed and installed, or replaced during grille shutter removal/installation are shown below.
Necessary Procedure After Parts Removed/Installed/ReplacedReplaced Part or Performed Procedure | Necessary Procedure | Effect/Inoperative Function when Necessary Procedure not Performed | Link |
|---|---|---|---|
| *: Applies only for when removing and installing or replacing the television camera assembly. | |||
Front television camera assembly, front bumper assembly or radiator grille |
|
Panoramic View Monitor System |
|
Front bumper assembly |
|
|
 |
|
Change grille shutter control mode and/or perform initialization |
Grille Shutter System |
|
PROCEDURE
1. REMOVE FRONT BUMPER ASSEMBLY
Click here
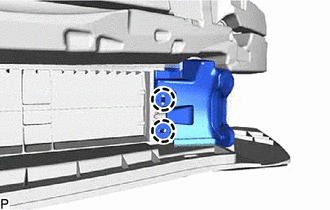
2. REMOVE FRONT RADIATOR SIDE AIR GUIDE PLATE LH
(a) Disengage the 2 claws to remove the front radiator side air guide plate LH. |
 |
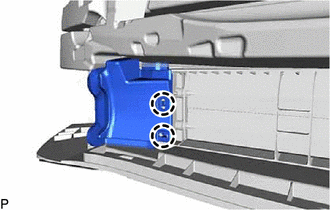
3. REMOVE FRONT RADIATOR SIDE AIR GUIDE PLATE RH
(a) Disengage the 2 claws to remove the front radiator side air guide plate RH. |
 |
4. REMOVE THERMISTOR ASSEMBLY
Click here
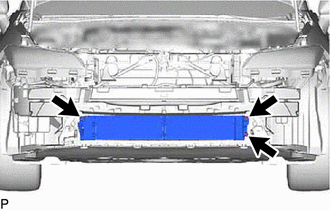
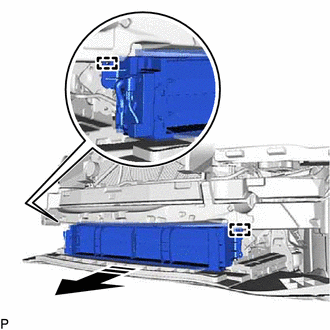
5. REMOVE RADIATOR SHUTTER SUB-ASSEMBLY
(a) Disconnect the connector. |
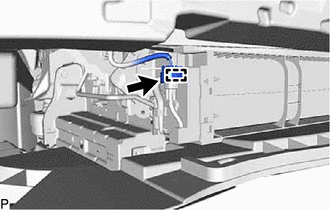 |
(b) Disengage the clamp.
(c) Remove the 3 bolts. |
 |
(d) Disengage the 2 guides to remove the radiator shutter sub-assembly as shown in the illustration.
 |
Remove in this Direction |