Removal
Remove battery, see page 251.
Warning: disconnecting the battery may erase electronic memories, such as the radio code.
Observe the notes in the chapter "Removing and installing the battery".Remove air filter and air hose from throttle body, see page 100.
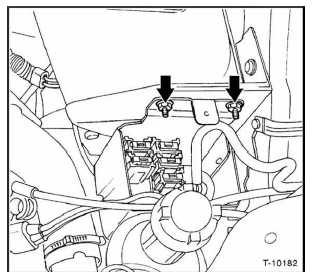
Remove the cover of the fuse and relay box on the battery holder with 1 screw. Unscrew 2 nuts -arrows- and set the box aside.
Remove engine control unit, see page 89.
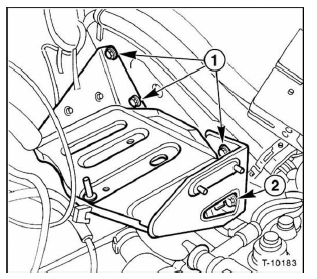
Unscrew battery holder bracket with screws -1- and -2-.
Lift the bracket and unclip the cable holder underneath.
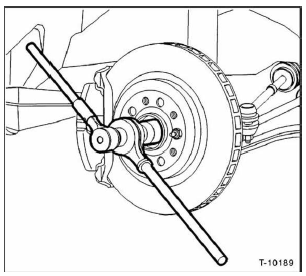
Loosen the hub nut on the left and right drive shaft. The vehicle must be standing on the ground. Warning: high torque, use a sturdy tool.
Have an assistant press the brake pedal while the nut is loosened.
Mark the position of the front wheels relative to the wheel hub with paint.
This allows the balanced wheel to be refitted in the same position. Loosen the wheel bolts. The vehicle must be standing on the ground.
Raise the vehicle at the front and remove the front wheels.
If fitted, remove the engine undershield, see page 14.
Drain engine oil and transmission oil, see chapter "Maintenance".
Drain coolant and remove the radiator, see page 78.
Disconnect the cable at the starter motor, see page 261.
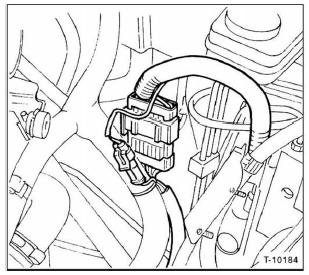
Disconnect the multiple connector for the engine wiring harness in the area of the brake fluid reservoir.
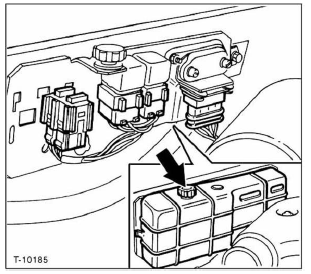
Unscrew the screw -arrow- from the protective cover on the engine bulkhead and remove the cover. Pull off the underlying connectors from the relays and the absolute pressure sensor of the fuel injection system.
Remove the clutch cable from the transmission, see page 131.
If fitted, unscrew the speedometer cable from the transmission.
Otherwise, disconnect the connector for the electronic sensor on the transmission.
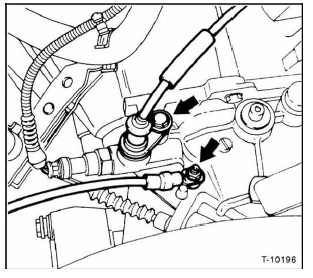
Unscrew the ground cable on the top of the transmission -arrow down-,
1.4 L engine: unscrew the reverse gear lockout cable on the transmission -arrow up-
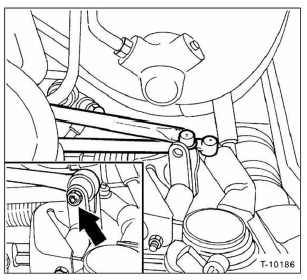
Unscrew the 2 shift rods and the counter rod from the gear lever -arrow-,
Unhook the throttle cable, see page 98.
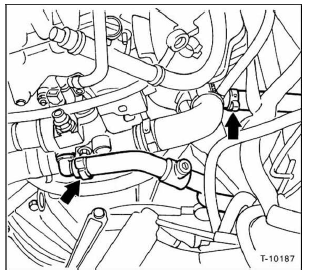
Pull off the supply and return lines for the heater at the engine by opening the hose clamps. If clamp-type clips are fitted, cut them with side cutters; during installation they can be replaced with screw-type clamps.
To prevent mixing up the lines during installation, mark the connections and hoses with a felt-tip pen.
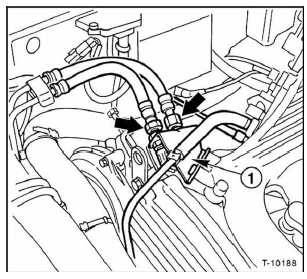
Unscrew the retaining bracket -1- for the fuel lines from the intake manifold.
Unscrew the fuel supply line and return line, see illustration. Warning: the fuel system is under pressure. Catch escaping fuel with a thick rag.
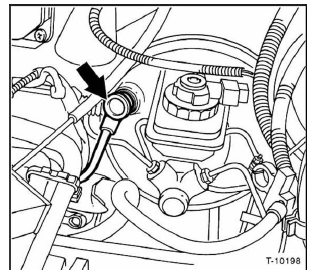
Pull the vacuum line for the brake booster off the connector -arrow-.
Pull off the vacuum hoses for fuel vapour and the pressure sensor from the intake manifold or throttle body as marked. Before disconnecting, mark hoses and connections with masking tape to avoid mix-ups.
Drain the power steering fluid and unscrew the fluid lines at the power steering pump, see page 164.
Warning: do not reuse drained oil. Dispose of it in an environmentally responsible manner.
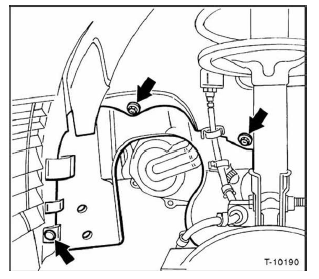
Unscrew the cover in the left wheel arch and unclip it -arrows-. To remove the cover, the connector of the brake pad wear sensor must also be disconnected.

On both sides, unscrew the nuts and press out the tie rod ends with a commercially available puller, e.g. Hazet 779.

Unscrew the strut on both sides from the steering knuckle.
Remove the brake hose and the ABS wheel speed sensor cable from the strut brackets.
Pull the drive shafts out of the wheel hubs. Hold the drive shaft and push the steering knuckle outward with the other hand. If the drive shaft is tight in its splines, use a commercially available puller.
Remove the front exhaust pipe, see page 120.
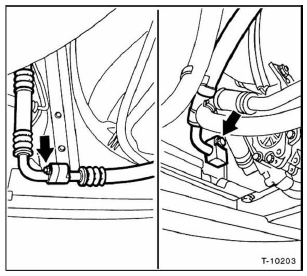
Vehicles with air conditioning: unscrew the cover for the AC compressor. Unscrew the connecting lines from the compressor to the evaporator and condenser -arrows-. Warning: the air conditioning must first be drained by a qualified workshop, otherwise there is a risk of accident from escaping refrigerant.
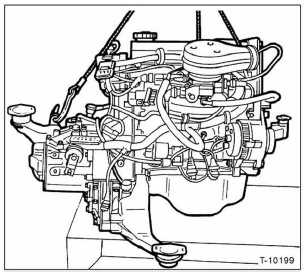
Attach a hoist to the engine. Hook a suitable rope or chain into the engine lifting eyes. One eye is on the generator bracket, others are near the oil filler neck and at the transmission mount. Lift the engine slightly with a workshop crane to relieve the engine mounts.

The Fiat workshop uses a hydraulic ram lifter with a support tool, see illustration. Attach the support tool using the 2 lower flange bolts of the engine/transmission. Lift the engine slightly to relieve the engine mounts.

Unscrew the center engine mount from the underbody, arrows.

Unscrew the left and right engine mounts, arrows.
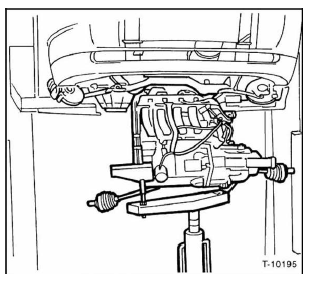
Check that all hoses and lines running from the engine to the body have been disconnected. Then lower the engine.
Unscrew the starter motor.
Remove the intermediate shaft, see page 152.
Unscrew the engine-to-transmission connecting bolts.
Use the fitting lever to press the transmission off the engine.
Test yourself
A quick Fiat Bravo quiz: every answer comes with an explanation and a link to the manual page.