Replace/check brushes for alternator/voltage regulator
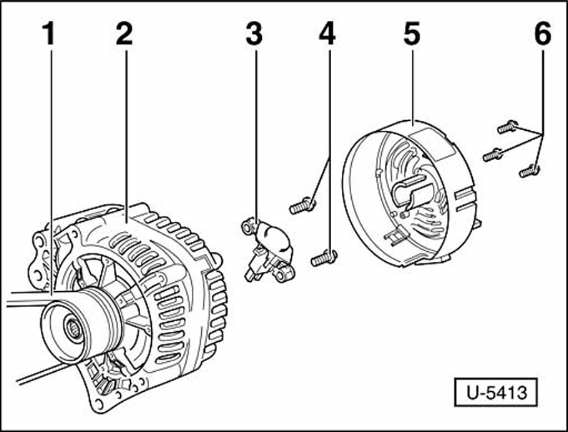
Remove the serpentine belt - 1 - and the alternator - 2 -.
Unscrew the alternator protective cap - 5 - with 3 bolts - 6 -.
Unscrew the voltage regulator - 3 - from the rear of the alternator (2 screws - 4 -) and carefully pull it out.

Replace the brushes - 2 - if the length is 5 mm or less. To do so, unsolder the connecting lead.
Check the slip rings for wear; if necessary, lightly turn them down and polish.
Clean the contact surface and check the preload of the contact spring; replace if necessary.
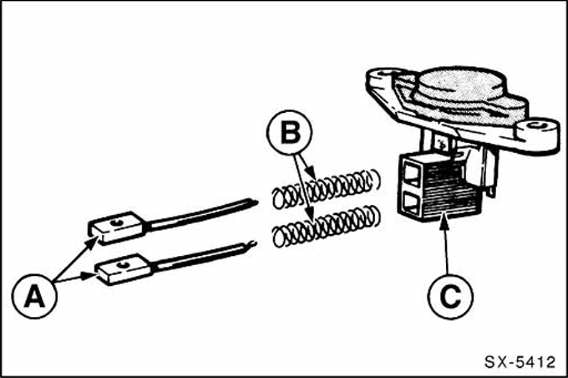
Insert the carbon brushes - a - and springs - b - into the brush holder - c - and solder the connections.
To prevent solder from wicking up into the lead when soldering the new brushes, grip the brush lead with flat-nose pliers. Caution: Solder wicking up the lead would make it stiff and render the carbon brush unusable.
The insulating sleeve over the lead must be clamped next to the solder joint using the existing eyelet.
After installation, check that the new carbon brushes move freely in the brush holders.
First fasten the voltage regulator loosely by hand with one screw, then carefully press it into its final installed position and tighten the screw.
Screw the protective cap onto the rear of the alternator.
Install the alternator.
Pry the plastic cover off the rear of the alternator with a screwdriver and remove it.
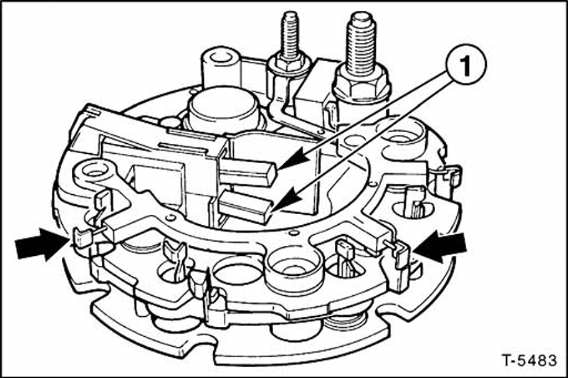
The illustration shows the brushes - 1 - with the diode plate removed.
Test yourself
A quick Fiat Bravo quiz: every answer comes with an explanation and a link to the manual page.