Removing and installing front fender
Remove the headlight and front turn signal lights, see page 270.
Mark the position of the front wheels relative to the wheel hub with paint.
This allows the balanced wheel to be refitted in the same position. Loosen the wheel bolts. The vehicle must be standing on the ground.
Raise the vehicle at the front and remove the front wheels.
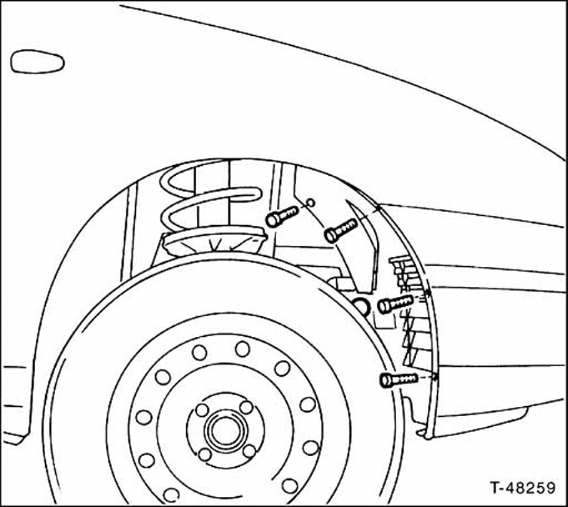
Unscrew the front inner fender with 4 screws. Pry out 1 clip with a screwdriver.

Unscrew the rear inner fender with 3 screws.
Remove the side turn signal light, see page 264.
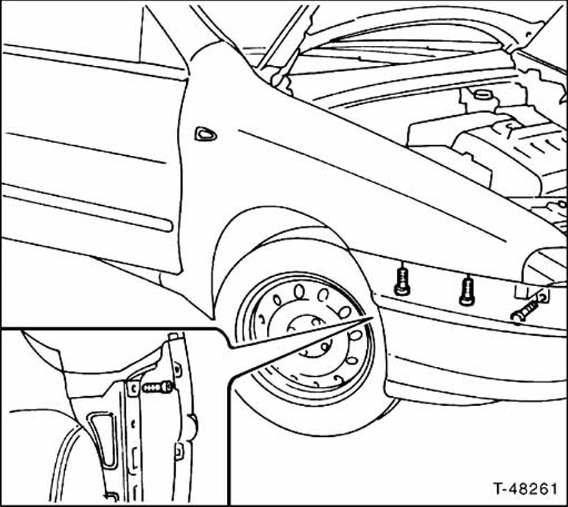
Unscrew the front fender from the bumper and the front side panel.
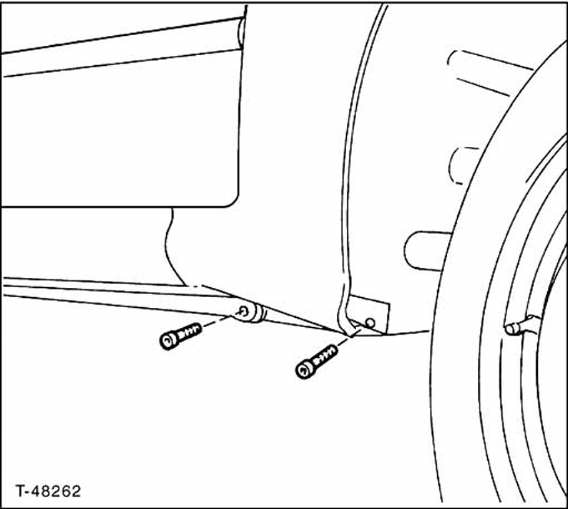
Unscrew the front fender from the sill trim.
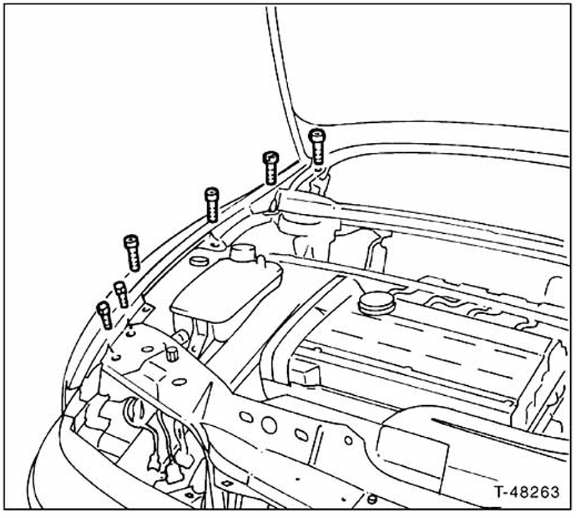
Unscrew the upper front fender.
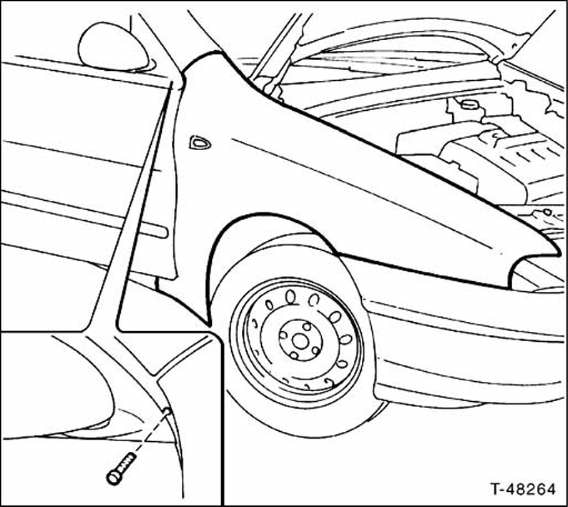
Open the door and unscrew the front fender from the A-pillar.
The front fender is held very firmly by the sealant. Cut the fender seal with a sharp knife.
To loosen the front fender, a hot-air gun that reaches a temperature of at least 600 °C can be used.
Fit the hot-air gun with a flat nozzle, soften the sealant all around one section at a time, and carefully pull the fender off piece by piece.

Scrape the sealant off the body. Take care not to damage the paint.
Before installing the new front fender, paint the areas that will be inaccessible later.
Clean the mating surfaces of the front fender and align them if necessary.
Fit the front fender briefly, align it, and remove it again.
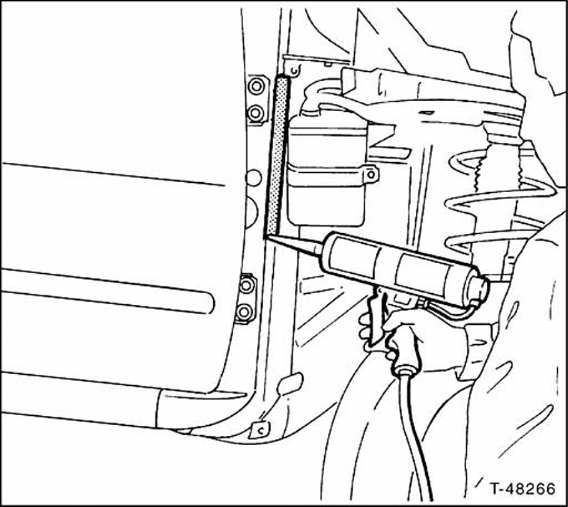
Apply commercially available fender sealing tape to the mating surfaces, or apply room-temperature curing sealant such as Sikaflex 221 (Sika).
Position the front fender, align it, and screw it on with 10 N·m.
Smooth or remove excess sealant with a knife.
Apply underbody protection to the inside of the front fender.
Install the side turn signal light, see page 264.
Insert the front inner fender, screw it on, and press the clip in.
Screw the trim for the front sill on.
Install the headlight and front turn signal lights, see page 270.
Position the front wheels so that the marks made during removal line up. Before fitting, lightly grease the centering seat of the rim on the wheel hub and the conical surface of the wheel bolts with wheel bearing grease. Do not grease or oil the threads of the wheel bolts. Fit the wheels.
Lower the vehicle and tighten the wheel bolts crosswise to 90 N·m.
Test yourself
A quick Fiat Bravo quiz: every answer comes with an explanation and a link to the manual page.