Removing and installing/replacing and aligning hood
Open the hood and support it.
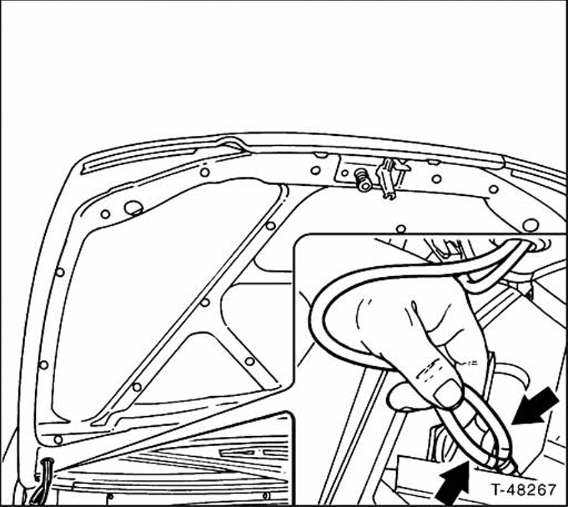
Disconnect the hoses for the washer nozzles, close them with suitable plugs, and clip them off the hood.
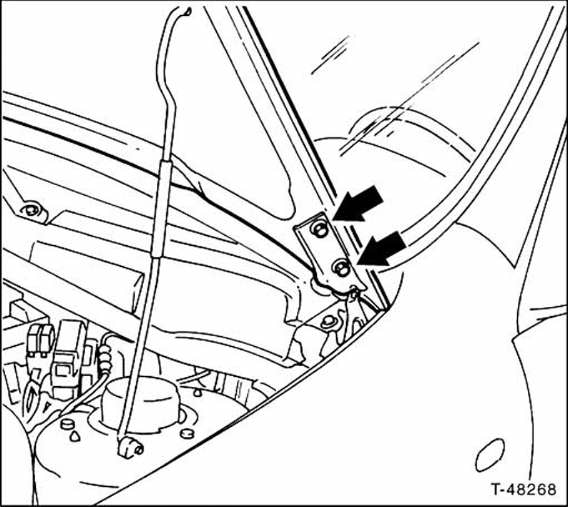
Mark the installation position of the hinges with a felt-tip pen. To do this, outline the hinges on the hood with a felt-tip pen.
On each side, unscrew the 2 fastening screws and remove the hood with an assistant.
Position the hood on the hinges with an assistant and screw it on loosely.
Align the hood according to the marks and tighten with 10 N·m.
Insert the washer jet hoses into the clips.
Push the hoses onto the jets.
Close the hood and check that the gap to the surrounding body panels is even all around. If necessary, realign the hood.
Transfer the hood support bracket, washer jets, lock pin and insulation mat.
Install the hood without the lock plate and loosely tighten the bolts.

Loosen the mounting bolts and align the closed hood so the gap to the left and right front fenders is equal and parallel. The arrows show the possible adjustment directions.
Carefully open the hood and tighten the bolts.
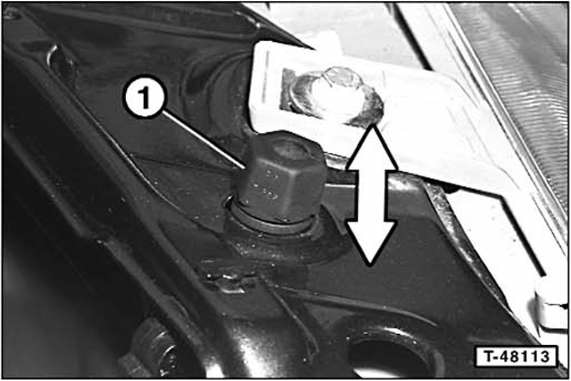
Screw the 2 rubber bumpers -1- for the hood, left and right, fully into the closing panel.
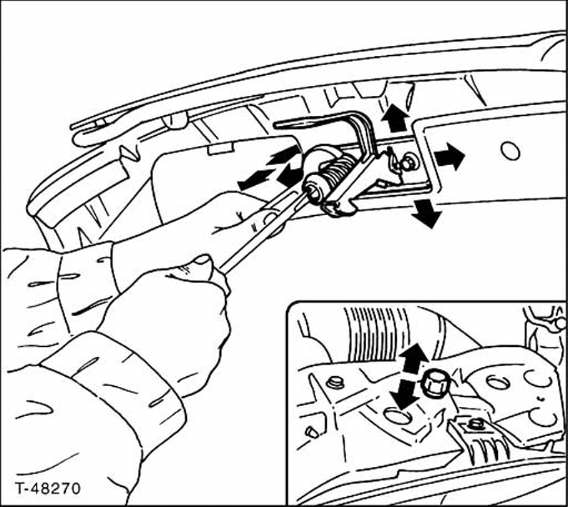
Loosen the lock nut on the lock pin and adjust the lock pin with a screwdriver until the hood is parallel to the upper edges of the front fenders when closed. The arrows show the possible adjustment directions.
Now turn out the stop buffers far enough that the hood is slightly preloaded when closed and parallel to the upper edges of the front fenders.

If necessary, adjust the lock plate. To do so, loosen the 3 bolts and move the striker plate. Then tighten the bolts.
Connect the washer jets.
Test yourself
A quick Fiat Bravo quiz: every answer comes with an explanation and a link to the manual page.